
5 Board and Batten Tips – my adventures with power tools and a giveaway
You guys, 2 things…
#1 – I am now the proud owner of power tools!!!
#2 – I’m still the proud owner of all my fingers!

TADA! Yep, I’m pretty giddy about it still (the power tools, not all my fingers, although I’m very thankful to have all body parts still intact).
You know I typically do all my projects with a hand saw, miter box, and a good ole fashioned hammer and nails. I like to get in touch with my amish side that way…but never again!
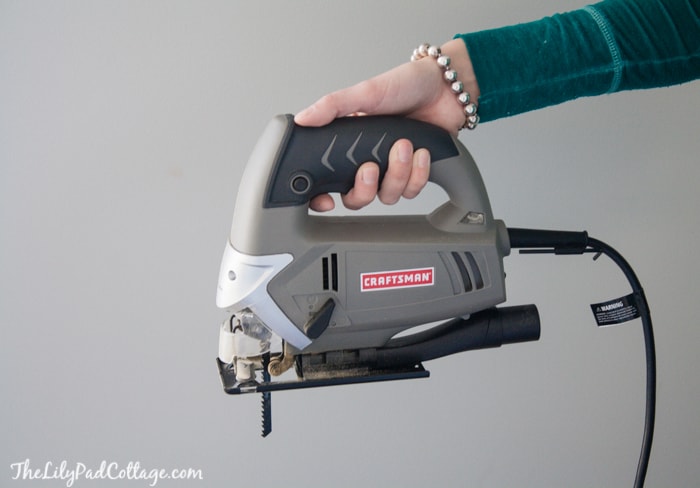
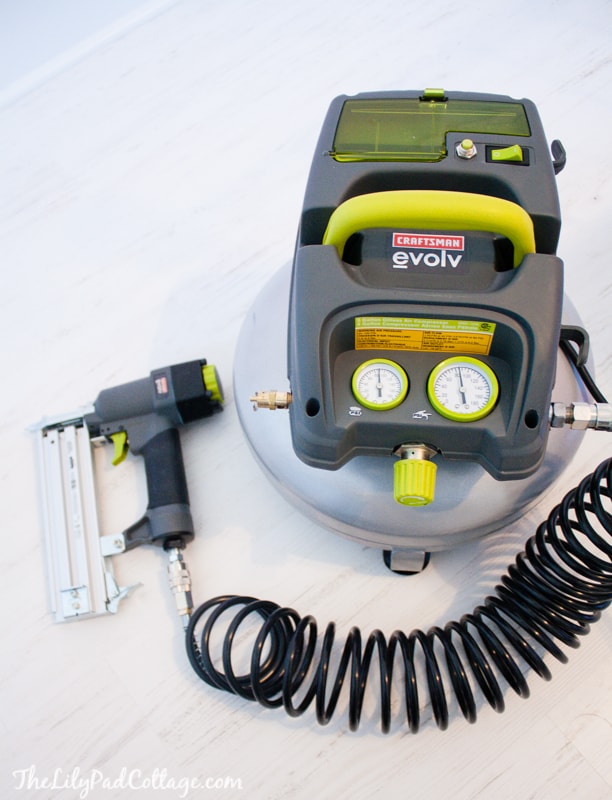
Installing this board and batten in my daughter’s room literally took about an hour as opposed to the whole weekend. Why did I go so long with out power tools in my life?? I’ll tell you why, for one I thought they were going to be super expensive – which was not the case! I got this handy dandy little Craftsman Jigsaw for $60 and the whole Craftsman EvolvAir Compressor with 2 in. Brad Nailer and Accessory Kit for $99.
Bonus, the Evolv kit came with all sorts of attachments included so I will no longer turn blue in the face trying to blow up all my kids inner tubes and rafts this summer.
I kind of feel like I can take over the world with this thing, or build a whole house! Ok, so maybe a bird house to start…but this baby saved me so much time and was so easy to use!
I picked these both up at Ace Hardware which brings me to my 2nd reason why I never had power tools – the intimidation factor. I can’t tell you how many times I walked through the tool section at other stores and felt like I had no idea what I needed or how to use them. But one stop in my local Ace and they had me hooked up in no time. One of their friendly staff had me explain my project to him and then he showed me all my different options of saws and nail guns, his recommendations of what I needed and a few pointers on how to use them. I left feeling totally confident that I got this… and guys – I so did!
If you follow me on instagram you know I’m getting ready to revamp my favorite girlie’s room. I originally had put up some bead board wallpaper in her room, but I was never crazy about how it turned out. I had always wanted to put a nice chunky board and batten in there instead, but didn’t dare do it myself. This month Ace Hardware challenged us bloggers to try a project we would normally hire out and it was just the push I needed to try it myself.
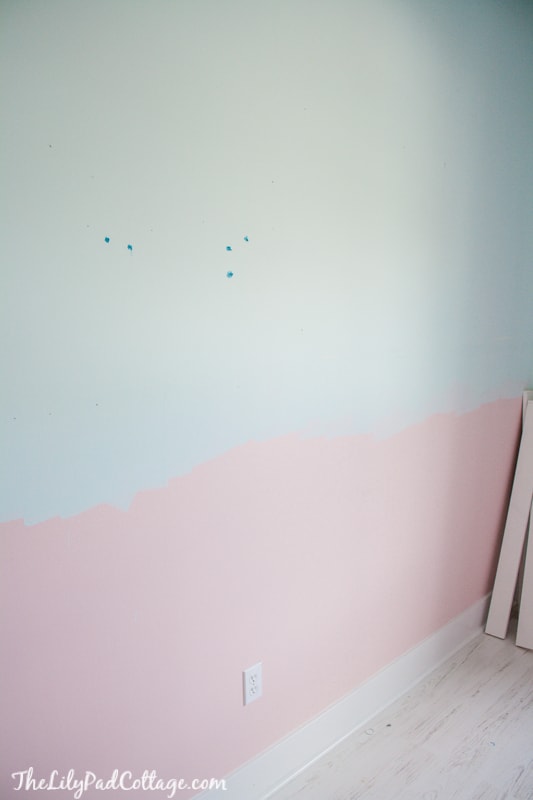
Here’s the wall after we ripped down the previous wallpaper – (hello old pepto-bismal paint, so we meet again…)
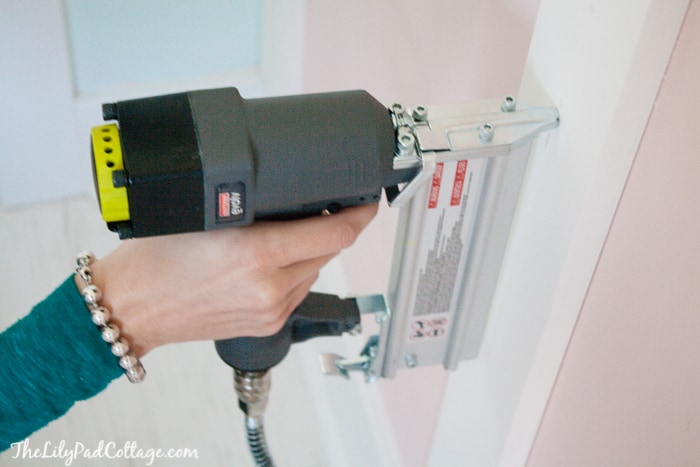
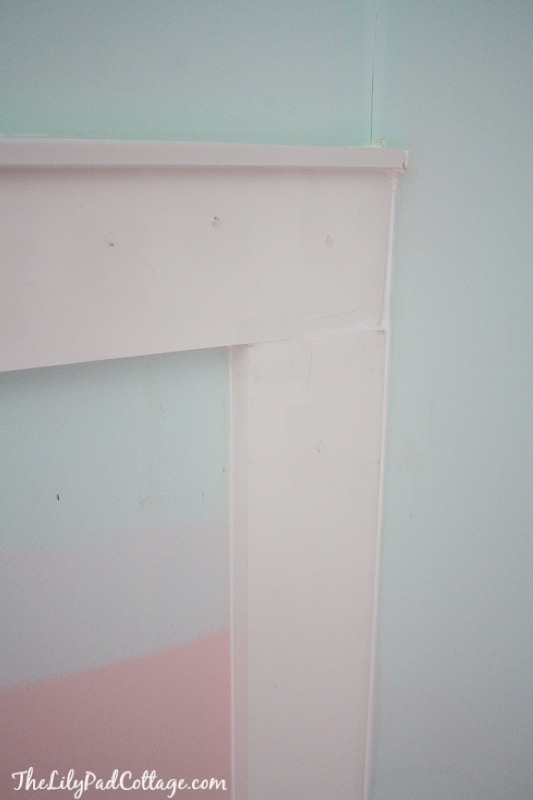
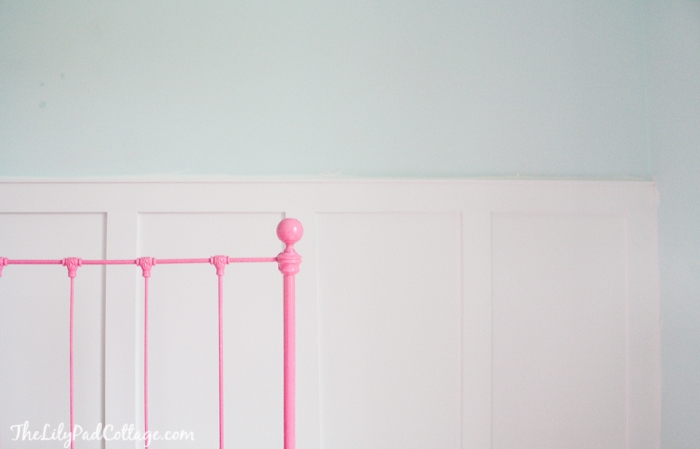
and here it is after nailing up all my trim, in about 20 minutes (!) still can’t get over how easy the brad nailer made my life!

The jigsaw was perfection too, no more blisters from using the hand saw for 20 minutes to cut just one board.
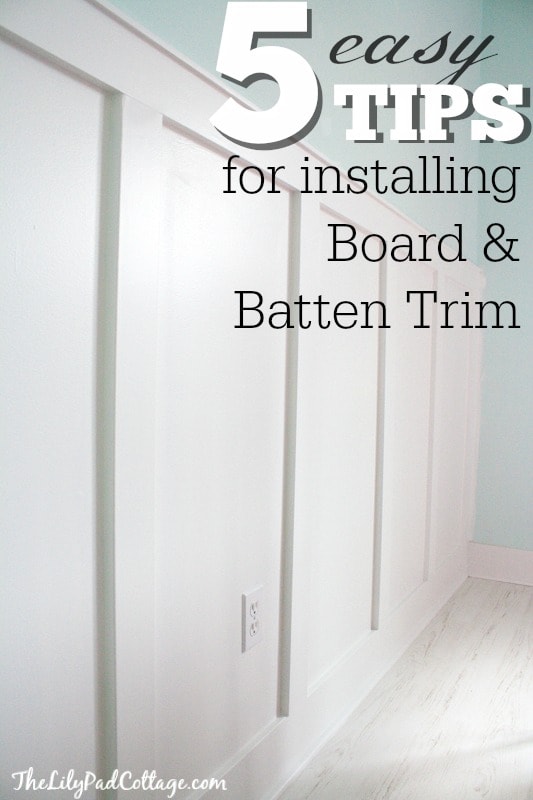
There are a zillion and 1 tutorials out there on how to put up board and batten so I won’t give you a full tutorial, but I will tell you my top 5 board and batten tips!
1. Obviously power tools are your friend! Enough said.
2. Make all your cuts first. I found it helpful to cut all my board first before nailing anything to the walls. I then laid them all out side by side so I could make sure I had cut them all exactly the same length, this will save you a headache when you go to attach the top piece of trim. This also helped me visualize the spacing I wanted between all the boards.
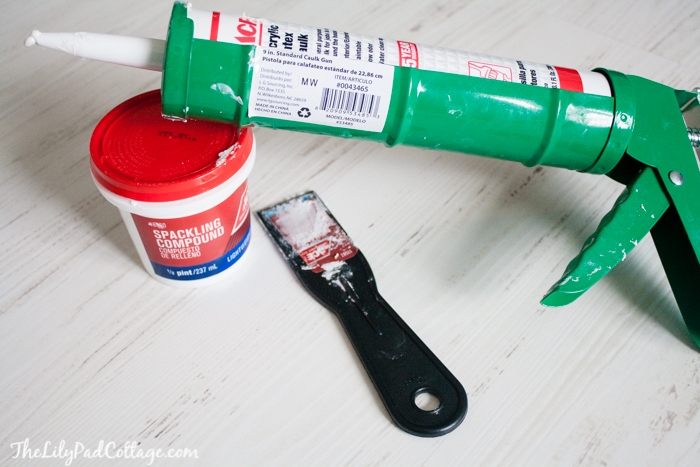
3. Spackle, or wood filler is a must. Even with the perfect cuts the jigsaw made, none of my joints were perfectly tight. Fill all those gaps with spackle, let it dry and give it a good sanding with a sanding block.

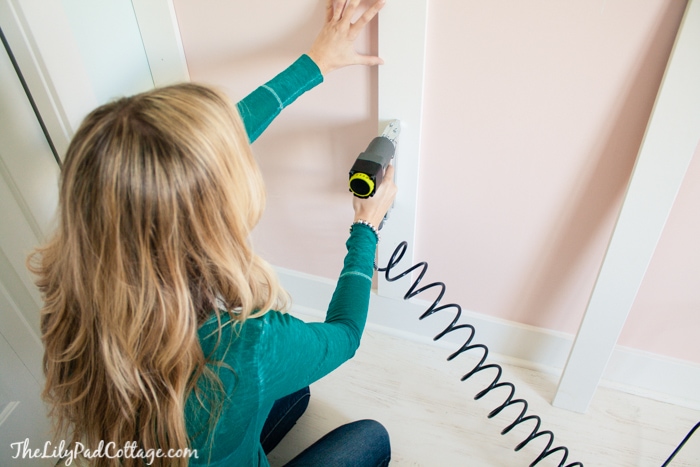
4. For a really professional look, use caulk. I caulked everywhere the trim met the drywall for a really airtight seal. This really makes your trim look great when you paint. You can see in the photo below how handy this is too for when your walls aren’t perfectly level.
5. Paint! Use a high quality paint, roller cover and brush. I used Clark+Kensington Satin paint (Silent White is the color) and primer in one and did 3 coats, sanding lightly in between each coat. I also cracked a window when I painted, because the helpful guy in the paint department told me that paint dries with less noticeable brush strokes in cooler temps.
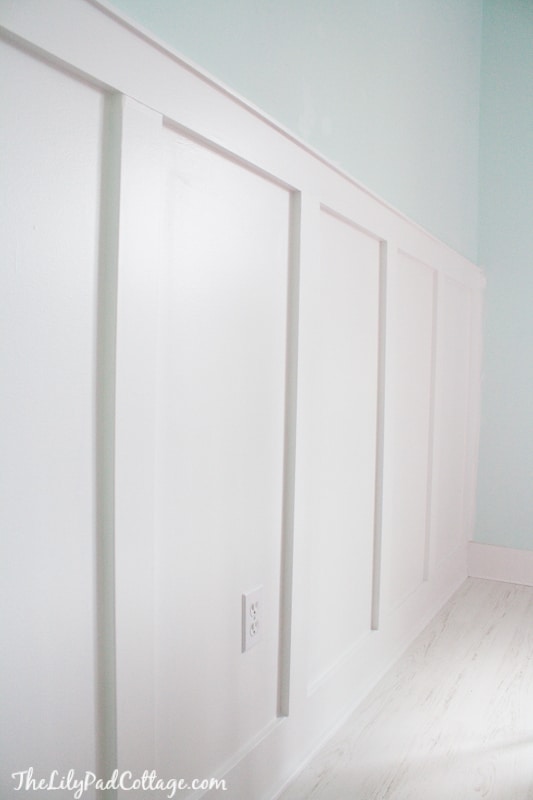
So there you have it, my board and batten all finished up, but I’m just getting started in my daughter’s room! Stop back later in the week to see the GORGEOUS wallpaper I added above the board and batten and learn all about my almost nervous breakdown during the process. Let’s just say I’ll use my power tools any day over wallpapering ever again…
Now here is another giveaway for $100 gift card to Ace Hardware so you can get some power tools of your own! Just follow the rafflecopter instructions below for you chance to win, good luck!
Disclosure: I’m a member of the Ace Hardware Blogger Panel. Ace Hardware provided me with products and compensation for this post, but all opinions are 100 percent mine. All opinions and positions here do not necessarily reflect those of Ace Hardware.
a Rafflecopter giveaway
I know this is an older post but figured it be worth asking! Did you replace your base boards before installing the board and batten? Or use the room’s orginial base boards? And what are the measurements of the base board? Thanks!
HI Sara, we actually had thicker baseboards to begin with because our home was only 5 years old so we didn’t need to replace them. We don’t live in this house anymore so I don’t have measurements for you, sorry!
what a great diy! I, too, am constantly doing home projects but
Routinely hire out projects requiring power tools. We just had a
Beautiful Ace Hardware open nearby. Need to try! Thanks!
Thanks Dana!
I would buy grass seed and other lawn essentials since thats on my to do list this spring!!
Looks amazing! I love caulking!!!! How did you finish the baseboards? I am debating using a baseboard from the store or just a wood board. what would you suggest? I’m putting it up against carpet:) GREAT JOB!
I would purchase paint :-).
Thank you for the opportunity and God Bless You :-)
I,would buy paint and painting supplies
We just bought a new house and we’re fixing it up. This post is super helpful!
Great, thanks for posting this. It looks just fantastic. Closing on a new house May 1st and I WILL be doing this.
I’ll buy a nail gun and paint to renew color walls in my home.
I would buy some paint to paint my entryway!
I’d buy a new lawn mower, ours broke :+)
I would buy paint to redo my kids bedrooms for the summer while they at summer camp as a surprise.
I would buy gardening supplies
Paint and a sander!
I think I would go for some garden supplies and a few tools.
I’ve been planning on doing this in our dining room, but I’ve totally be procrastinating because I’ve been overwhelmed. You’ve inspired me to get started! Thanks. Looks like I’m buying power tools this weekend :)
Those price tags just made me super excited! You see, I’m the one in our household that will run fast and dive into a project before actually thinking it through. My husband thinks it through until he has convinced both of us to not do it. This would make it so I can do it and he can see how easy it is!! Thanks! I would be the brad nailer for sure!
Right? I don’t know why I thought tools were crazy expensive, I so wish I had gotten them sooner! You can go do it! :)
I would SO buy a tool I could call my OWN! Something to help me with little projects around the new house. :)
Amazing job! You’re totally giving me more confidence about tackling this project myself!
You can do it!!
Kelly, looks awesome. I would buy a power sander.
I would buy paint to tackle a board and batten project in our lower level.
Great job with the power tools!
I am coveting your jigsaw!! Great work- I’m doing my kids bathroom this weekend with board and batten.
I want a Dremel saw!
I would probably buy a staple gun! :)
I have been eyeing some DIY upholstered headboards lately, but I am too scared to purchase the big tools!
Winning this might be the kick in my pants I need to get started :)
i have been wanting to tackle this project for quite some time! you did a great job! would love to win a gift card to one of my fave “go to” stores!
Love your board and batten walls. We had someone do ours and they used a thin sheet of wood to put the board and batten on. It makes it a little more beefy. Out local Ace has some nice outdoor plants, so that’s what I’d use the gift card on. :)
Very nice job you did! I’d get some tools to start our Spring projects.
I’d get the Dewalt 1/2in 18V Heavy Duty Cordless Compact Drill/Driver Kit (DC970K-2). Very much needed in our house.
I have this very project on my list for the weekend! Your blog about it makes me think I can do this easily! Thank you!
I would buy either power tools or plants for my garden :}
I want to paint our laundry room something vibrant!
It looks great!
I have wanting board and batten in my entryway and down the hallway. Loooove the way it looks!! Thanks for sharing. Now I just need to get the Hubs on “board…” <—pun intended. ;)
Kelly you da bomb, keeping all your fingers! This looks amazing, what a wonderful job you did. And I’m so proud of you for working with the power tools as well.
Now aren’t you tempted to run all over the house finding more walls to do? We finished our Great Board and Batten Project earlier this year and I can already tell it’s going to be the first of many :-)
you can see her in all her glory:
http://herlovelynest.blogspot.com/2014/01/the-great-board-batten-wall-part-2.html
We are currently re-doing the master bath and are in need of a new drill!
So nice!! You are so inspiring, I’ve been so wanting board and batten in my staircase. Don’t know if I could be as talented as you though
Looking good!
I was just thinking abut trying to tackle the same project in my daughter’s room and was contemplating buying power tools as well! Our closest hardware store is an Ace. Love them!
This looks amazing!! I love board and batten so much! Also, your hair is gorgeous :-)
I have a list of projects longer than my arm so I could list about a thousand ways I would spend it!
I’m not sure I’m even eligible, since I won from you already… but in the spirit of participation and ‘you never know, lightning may strike twice…’ a comment seems in order.
I want to seal or driveway and do an entryway project, paint until my arms fall off, caulk all kinds of stuff, and do some crowne moulding, chair rail, and beefy non-cardboard trim in our house. :)
I would probably buy paint. I’m feeling the itch to repaint my bookshelves.
I have a jigsaw, so I would buy the brad nailer! Oh how I have been wanting one of these! Thanks for the tips and confidence!
Absolutely love the board and batten look. We have board and batten on a portion of the outside of our home and like how
it adds interest to the exterior. When we moved into this older homes years ago we covered a lot of walls with bead board….but now wishing that we would have used the board and batten, at least in some rooms. Love the look!
oooh!! i’d love a palm sander. and even though i own quite a few tools, i don’t actually own a hammer! the shame!
I could use some paint!
I would but a hanging plant for my patio. They always have beautiful ones at great prices. And then gardening things!
Some new power tools.
Thank You or the chance to win!
You have so inspired me, Kelly!! I’m sitting here looking around trying to see where I can put up some board and batten!!
Thanks for the chance to win!
I would definitely use the gift card from Ace Hardware to get some tools. I would first get the Brad Nailer, and place the rest of the the money on the saw. I would love, love, love to win that gift card and be so appreciative. Thank you for the opportunity to enter.
I would buy paint and a sander.
We’d buy lawn/garden equipment for the first summer in our new home.
I would definitely add power tools to my collections of old fashioned tools!!
Your board and batten looks great! Love your blog! Power tools make all the difference….
I’m so buying that jigsaw
I’d love to replace my wimpy baseboards.
Our basement still needs repaired from the flood we had one year ago and I would use it for that! Thanks for the chance!
Love it! I would buy tools and paint!
We are in need of an air compressor and a nail gun would be great!
Kelly! You were cutting wood with a HAND SAW?! How did I not know this?? I am very happy for you and proud of you for taking the leap! The board and batten look fabulous! And power tools are my favorite :) I would probably buy more paint at Ace for the new house if I won. As long as I didn’t get too distracted in the power tools section :)
Wow, Kelly! Awesome job! I feel a new project coming on…..thanks for the inspiration!
Great job. Love the look! I would love a nail gun as well! We just borrow one every time we need one!
Kelly,
The top piece, is it one piece of molding with a lip on it, or a piece laid on top of another piece to create the lip? Looks great! Thanks for sharing!
Hi Shelby, it’s 2 separate pieces. I used 3 1/2 inch MDF boards for the vertical pieces and the top piece. Then a 1 inch trim piece on top.
I would buy paint, grass seed, and potting soil.
Wow! Looks awesome! Thanks for the chance to win.
Looks great! I would buy the nail compressor kit. I have a lot of things to use it on. Thanks for the chance to win this.
God Bless
I would definitely buy some paint. I’m finally starting to rip all of our wallpaper off. I have so much painting to do. Thanks for the chance to win.
Awesome job, it looks really professional. P.S. I think your silver bead bracelet totally coordinates with the nail gun!!
I would buy paint
Hello – I would get the: Craftsman EvolvAir Compressor!!! Looks amazing and I’ve always wanted the air nail gun – I know I will be a rockstar with it!! Great post and give-away!! Thanks much!!
I could do this! Love those tools!
Wow… I didn’t know those tools were so affordable. I want to do some board and batten too, so I am definitely going to look into those.
Yours looks great. Can’t wait to see the wallpaper.
I would love and try to do this in our back entry way. You make it look so easy!
I would love to try my hand at this. Our compressor is huge and manly. I like the one you posted about. I am definitely going to check these tools out. Thanks for a chance to win.
What a beautiful makeover. I’d love to have those type of power tools.
Hi,
I would buy paint! It’s been a long winter here in Wisconsin. I am ready to freshen things up! Maybe something spring!
You are so talented! I would buy all the stuff to make the tiered herb garden shown in the Ace HomePlace “magazine” online or the DeWalt 5in Random Orbit Palm Grip Sander, which I’ve been wanting for a long time to refinish furniture!
So many things I could buy. I want a new sander that would be a start. Thanks for the chance.
I would give it to my husband to go “shopping” with thanksf or the giveaway :)
I would get some paint to paint our house!
Paint, brushes and some other DIY goodies! After a heavy rain, my bathroom ceiling fell in…way past time to fix it! (I have RA and it’s been flaring for a bit).
I love to get a new jigsaw!
Great post – I might actually need this! We just found out we are having a girl and this is something I might want to do with the nursery. Looks great! I’d buy paint!! Love Benjamin Moore paints at Ace!
This looks great! I’d buy LOTS of supplies for the mole-infested yard.
I’ve looked some at Home Depot at power tools but have also felt intimidated and not sure what to look for. Thanks for this post – I’m heading over to Ace to look around!!! You did a fantastic job but then again I always love your work you post!!
I’m desperate for an air compressor! I just reupholstered a chair using a heavy duty hand stapler this weekend, and my hand may just fall off. I’d love to get an upholstery stapler and a nail gun.
Big girl tools now! That’s awesome! Way to step up your game ; ) completely jealous by the way … I’m slowing adding to my little tool collection (and I totally have a miter box with hand saw LOL) and would LOVE/NEED to add a nailer!!!
So proud of how you just take on these projects like taking a bull by the horns … Very impressive and I’m sure you feel so proud and accomplished by the end. Keep these wonderful and creative DIY projects coming because you’re inspiring.
Have a great Monday! : )
I would buy a power tool for sure!
I would buy some power tools, there are a few diy projects I’d love to tackle this spring!
Oops! Forgot to tell you what I would buy at Ace! I probably would have to browse the store. Don’t need any power tools. I’ve always wanted a paint sprayer. That might just be it! Thanks for the great giveaway!
I too have been scared of power tools – you are inspiring me.
I love the look of board and batten. Nicely done!
Looks awesome, Kelly! I’m not intimidated by power tools. My parents were crafters. My Dad could build anything. He taught all us girls how to use power tools, and to be confident with them. He always said to us “you can do anything if you put your mind to it”. Good thing I learned from him, my wonderful husband is dangerous with tools. NOT just with power tools, ANY tools. Wish I could paper that wall for you. I have a side job papering for people. Of course, for you I would do it for free. You have been quite an inspiration to me! Can’t wait to see the bedroom reveal!
It looks gorgeous! You did a great job!
Looks great, can’t wait to see the room with this addition!
Also, did you nail the boards into the studs or just the drywall? Thanks?
It looks so good! Great job! I would definitely have to go with a paint sprayer! We will be painting our kitchen cabinets soon and a sprayer would be so much better than brushing.
The wall looks awesome!! And I’m so glad you still have all of your fingers :)
The wall looks great… Time for me to stop being intimidated and give power tools a try!
I would buy a nail gun with an air compressor!! crossing my fingers!! I have been bugging my husband to install bead and batten, but with these tools, I could do it myself!!
Adds so much character! I am looking forward to seeing the room!
Love, love power tools and your girlie’s new room!
I would also buy a nail gun! Or a keg jig. Those two things are at the top of my list.
That looks great! I definitely struggle with the power tool purchase and now I see how easy it is I would definitely buy a compressor and nail gun as well. Can’t wait to try this out on one of my walls!
Great job…good tutorial!
Front door, front porch makeover.
I still get intimidated by saws and some power tools but I want to DIY. Thanks for showing some of the tools you use for instruction! I need to buy that saw!
I feel inspired! Thank you.
Thanks for the tips! I need that brad nailer asap!
It looks amazing Kelli! Can’t wait to see it with wallpaper:) I’m still a little skid dish around power tools:/ good for you though !!!!
Thanks for the vote of confidence! Power tools have always intimidated me too.. so nothing gets done while I wait on “someone”.
i love your blog and I love YOUR HAIR!
Amazing job you done. Always nice to have the right tools for the right kind of jobs.
As what I would buy if I should happen to win would be either wood stain or paint as I have projects that I would like to do but money wise I have been holding off .
Thank you for this wonderful giveaway opportunity
This really looks great! I’m wanting to try this in a few rooms also! Thanks for sharing!
I just found your blog and I love it!! I love my local Ace store and would probably buy garden supplies!
This is great, and looks really clean! I’m hoping to do the same treatment in our hallway upstairs to brighten it up and add some character! Thanks for the opportunity! :)
ID BUY A NEW PAINT SPRAYER!! :)
Looks great I have a small house that I am always looking for cute ideas to make it a little bit more unique and special! This board & batten trim has inspired me to jazz up my office this weekend! Thanks for all of the wonderful ideas!
I need garden supplies & new paint :) Thanks for this! Love the new room!
I would definitely buy some power tools!! I have just started building and have to drive to my parent’s house to use my dad’s tools……so sad at 31! LOL! So far I’ve built a tv stand, a headboard and a desk for my husband. Love your blog! :)
Looks great. I’m looking to do this in our basement and hope it looks as good :)
I would buy a jigsaw, it would come in so handy. You did a great job!
I love it! It looks great. What size boards did you use? I like how it looks chunkier. I have have been wanting to do my hallway that way but have been too chicken! You have inspired me.
You can do it! It was so much easier than I thought, they are 3 1/2 in wide MDF boards. Good luck!
I would buy a new power tool with my giftcard!
I can’t wait to see the wallpaper and fireplace!
That looks great, Kelly. Can’t wait for the reveal.
It looks great. I’m always afraid to try power tools, but maybe this is the push I would need.
I still leave the power tools to hubby, i just don’t see him with a paint brush in his hand and the drill in mine….yet.
Contest is already closed?
WOW!! I am impressed! Not only of your tool knowledge but that you kept all of your fingers. Do you have a tool belt? I didn’t see a pencil behind your ear :-) I love the compressor — I’d like to have a pneumatic stapler and nail gun. The compressor should work — I’ve always wanted one especially when I’m making cornices. Can’t wait to see the finished room. Have you taught Buddy to fetch your tools for you yet?
That looks amazing! It looks totally pro. Is there no end to your talents?