
Easy Light Swap
Ever since we redid my parent’s master bathroom, I’ve been obsessed with the Pottery Barn wall sconces we chose. Unfortunately our bathroom is wired for above the mirror light fixtures not wall sconces. As much as I love DIY, rewiring things felt a little over my head (especially with the time crunch I was working with on our master bath redo – read about it here.). I didn’t love our current lights with the new planked walls, they felt a little too formal. I have been looking for a while for new light fixtures in here, but I just haven’t fallen in love with any. In the meantime I wanted a quick update. Enter my favorite tool in my toolbox – spray paint!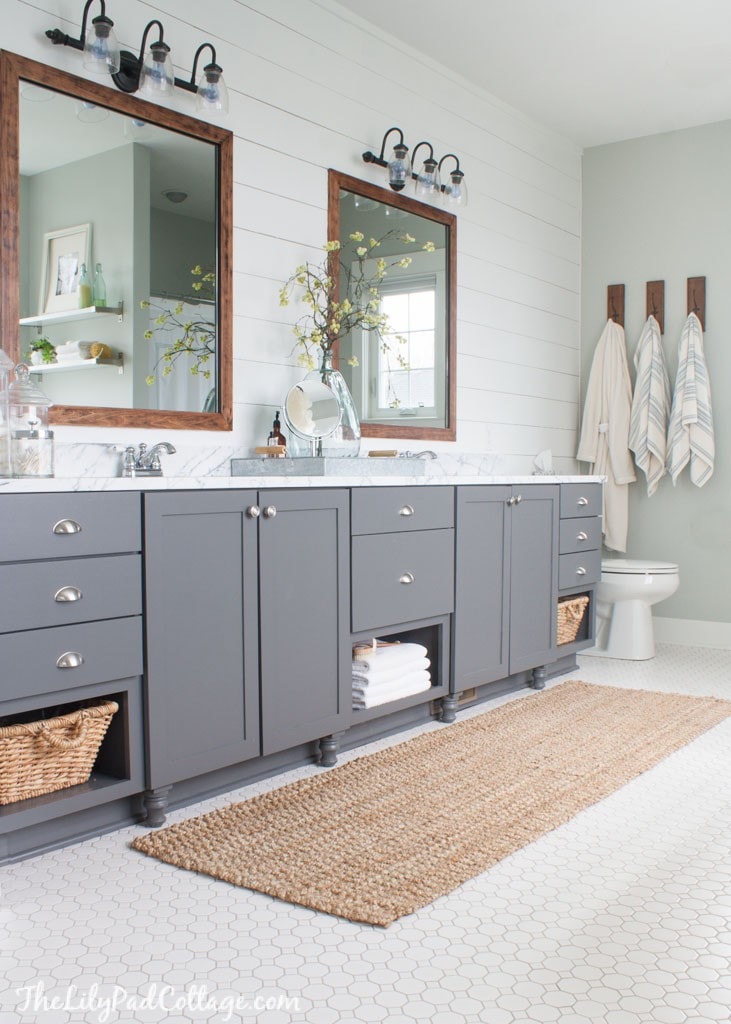 All I did was unhook the light fixtures (being sure to turn the power off first!) don’t let this scare you if you’ve never done it, it’s easier than you think. Then I removed the shade/globe/glass whatever they are called things. I stuck some paper towel in the light sockets to protect the electrical stuff. I then used oil rubbed bronze spray paint, 2 coats and let it dry overnight.
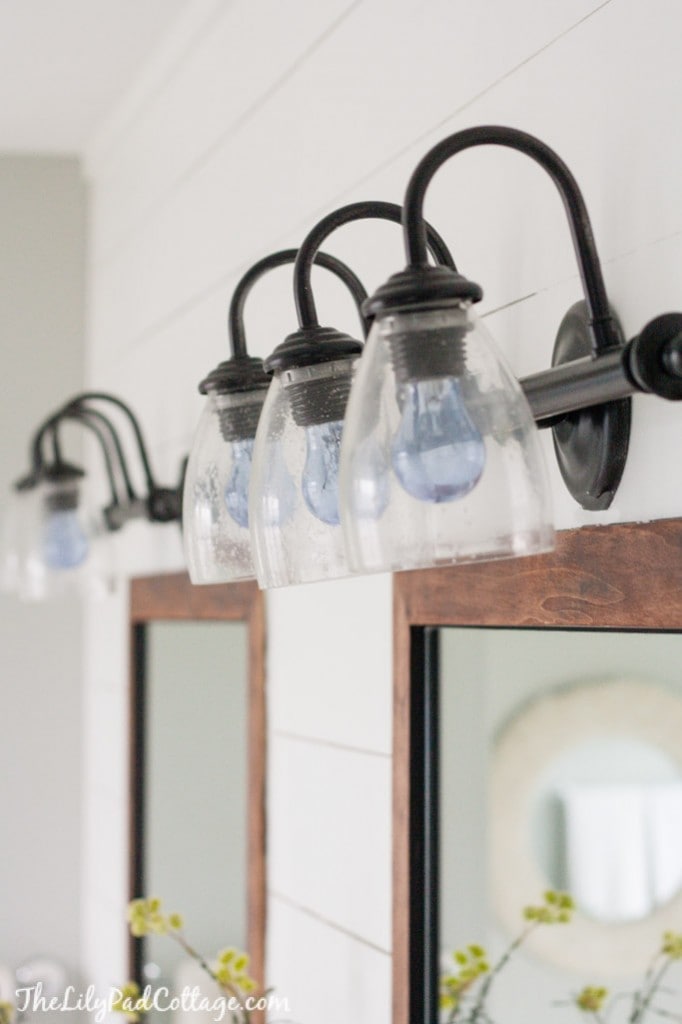
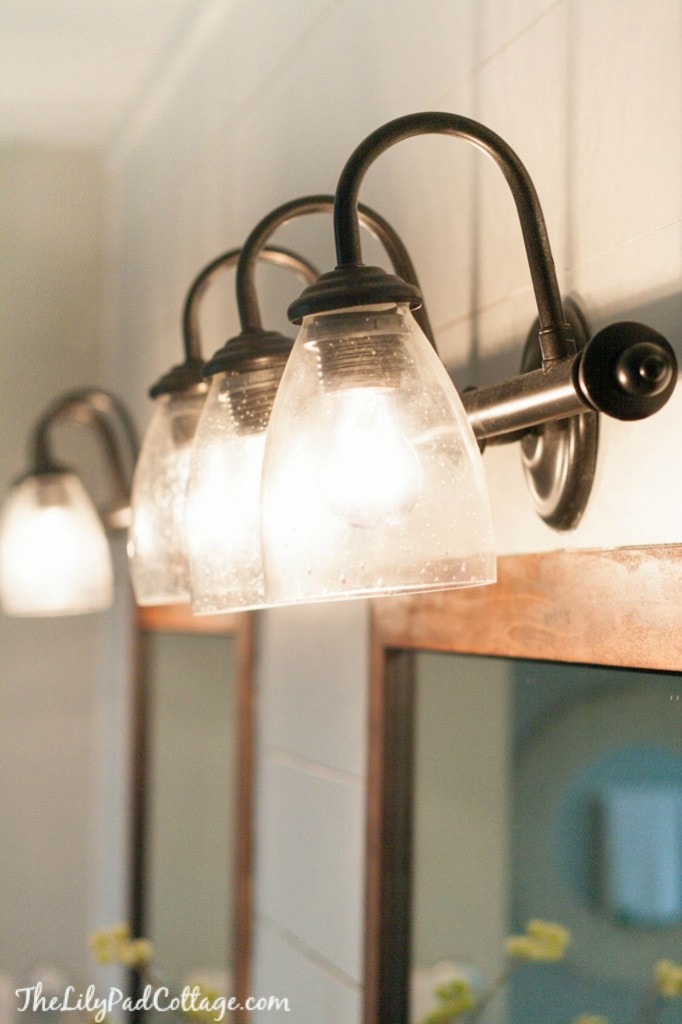
I found these great bubbled glass shades at Lowes, I think they were on sale for around $4? I hoped they would give me the same feel as the Pottery Barn wall sconces at my parents house I love. I screwed them on and tada! Brand new light fixtures for around $12 each.
Even the Mr. couldn’t complain about that one, and BONUS he didn’t even recognize them. He thought they were brand new. All of our other light fixtures in the bathroom and hallway are oil rubbed bronze (notice the capiz chandelier in the background that is for some reason hanging crooked) so I feel like it flows better. 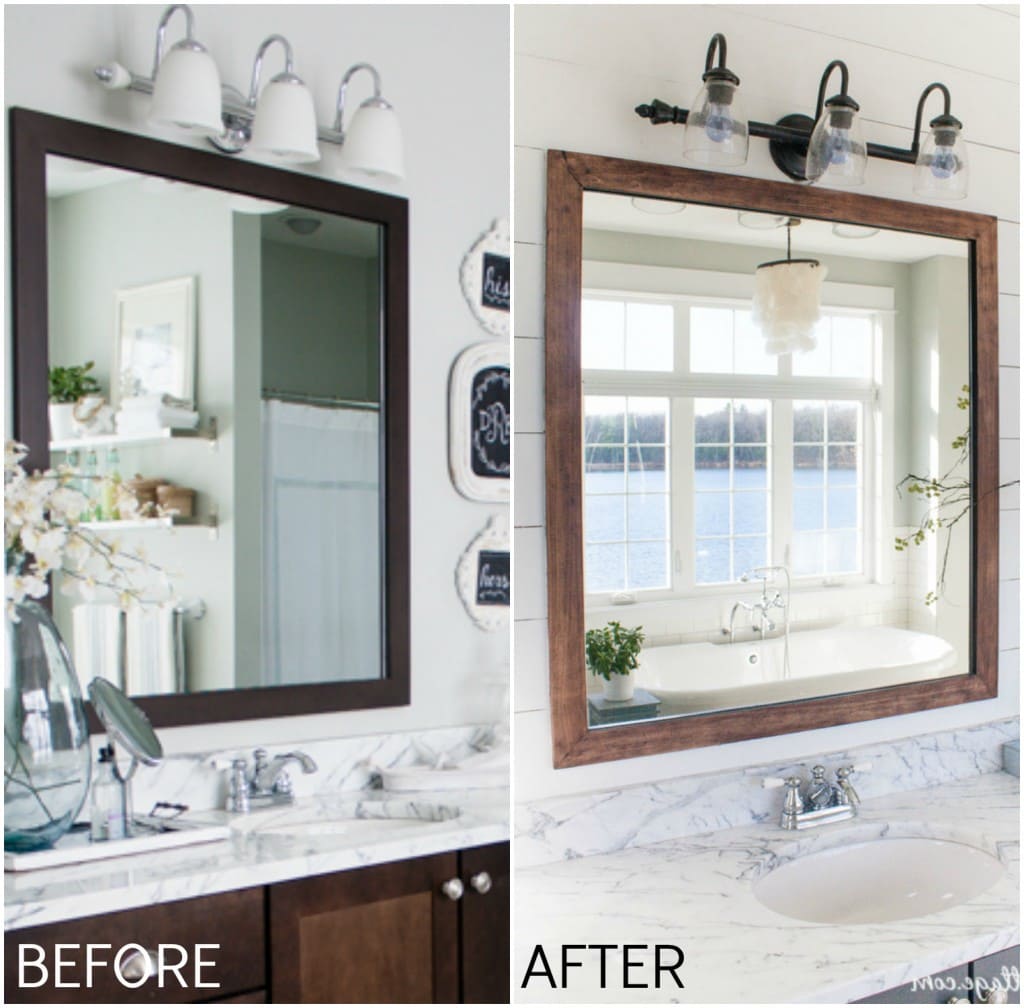 These probably won’t be our forever lights in here, but I think they are perfect for now!
PS Ignore the blueish light bulbs in there, they are all I had in the house, but I plan on getting edison bulbs for them soon!


Can you tell me what style/brand floor tile you used in this bathroom? Thanks!
What paint color is the wall?
I want to purchase this Pottery Barn bathroom light fixture but cannot find it. If you want to sell it, I’ll buy it!!
I love this! We are in the planning stage our own bathroom renos and have one of those horrible 80s multi bulb things over the bathroom, this was just the inspiration I need.
Also your blog is lovely :) I’ve been having fun looking around.
Thanks so much Jangle, good luck with the reno!
I’m visiting because of Layla’s boast today. I’ve enjoyed all your updates. Now I have to get to Lowes to see if bubble lights are still there! I read through this post. The replies. Nice followers. Uhhh…I actually thought the part not spray painted looked like it’s more real(?). Rustic. Along with shiplap, oil rubbed bronze we have the rustic galvanized look. Smile. But seriously, it looks better than if that strip were brown!! And I’d not have noticed!!! Also, even blue bulbs are hard to come by as LED Bulbs are pushed and very expensive. I had trouble with the inside of the filaments…what I saw were round and Edison. But there may be the smaller by now. I gave up. I needed 60w clear–lumens output high.
I thought your blue lights looked like they match. They are light bulbs. That can’t be found. Three generations from now they shall have faux blue bulbs!!!
Your blog is very well done. I’ve never traveled to that part of the USA so it’s pretty to gaze upon our country via your photos. Thank you!
Thanks so much for stopping over from Layla’s, seriously still pinching myself that she wrote about my blog :) she is my fave!
Great job using what you have! The lights look so pretty. I love that oil-rubbed bronze finish — my favorite.
Wonderful! Also, would love to know how you created the planked walls!
Hey Katy I’m awful at writing tutorials so I just looked up a few different ones on pinterest, I did use 4×8 sheets of underlayment.
What a great idea, I love the lights and have similar lighting in my bathroom and think I will do the same thing. I found some bulbs at Home Depot that are a round Edison type bulb and they are a bright white light. I used them in my fixture above my kitchen table and they are perfect.
Oh I’m going to have to snag those for myself! It’s so hard to find edison bulbs that have decent light for a bathroom!
What a beautiful transformation!
Thanks Jeanie!
When I first saw your remodel — which is gorgeous — I thought, “must be nice to be able to buy brand new light fixtures” as they looked like they cost a small fortune. So I smiled when I read your post this morning. Off to see which fixtures of mine need updating. Hubby (mine, not yours) can’t complain about the cost of a can of spray paint! You have beautiful taste in everything you do. Thanks for sharing it with us.
Thanks Lynette, sometimes just a little tweak can make a big difference :)
Beautiful!
I love watching your transformations.
Your home is lovely.
PS.
You forgot to spray the rings around the inside of the lights…at least it looks like that in your photo
Best of Holiday Blessings
Pam Massa
Hey Pamela I didn’t spray the rings bc I was afraid it would mess up the threading and not hold the lights up properly. I didn’t think it was too noticeable, guess not ha :)
What a great “disguise” job! I didn’t notice they were the same at first lol. The remodel changed the whole look of your bathroom. Sympathizing with you as just coming through sinus infection/bronchitis myself. Hasn’t been fun, I know. I don’t get to comment often (because I usually squeeze in at work), but read each post. Love your home and the changes you’ve made.
Thanks for reading Guerrina! I so appreciate it, hope you stay healthy the rest of the winter, being sick is no fun!
Wow, I had no idea. Now I have hope for my dated bathroom light fixtures! :)
Ha, good luck!
I love the visual look of Edison bulbs but hate the yellow glow. I’m a bright light gal. If you find Edison’s that are bright white light, please pass along where you found them. I love the new look, especially the shiplap walls. You are such an inspiration! I’m amazed at how much you accomplish since you have such a young family! You’ve put a fire under this ‘old’ gal!
Thanks Jil! Someone else who commented mentioned they found some great ones at Home Depot so I’ll have to check there myself!
I love the ‘new’ look. Thanks for sharing and making it appear do-able!
Thanks Karen, this one is totally do-able!
We have the same bluish lights in our kitchen island fixture because the Edison lights put off a horrible glare through the clear seeded glass. We are very bummed because these bulbs are not in keeping with the style of the fixture at all. Would love your perspective after you place the Edison bulbs in your fixture – do you find the same issue? Desperately wanting a good solution here! Thanks!
I haven’t figured this one out yet myself but someone above commented that they found good ones at Home Depot so I will have to check that out and keep you posted!
Did you do many prep to the lamp plating beforehand…light sanding or something? This look s fabulous.
Do you happen to remember what color grout you used on the bathroom floor. We are using the same tile in our remodel and I don’t want to use white. I like how the contrasting color sets the tile off in your bathroom . Thanks!
Hey Kathy I don’t remember the exact color but there were 3 greys at Lowe’s at it was the middle one :) not too dark, not too light.
I cleaned it really well but that’s it!
Looks great!! It’s amazing what we can do when we are determined. I think you could move mountains — well, even a huge bed up the stairs by yourself. :-)
Ha glad you remember that one Marisa, thanks for being such a faithful reader and always leaving me encouraging comments!
How about a tutorial on the shiplap walls or a source you used for advice? thanks -LOVE your home and style……..
It’s on the previous post ;)
Hey Sunny I read about a dozen tutorials on Pinterest just search “shiplap walls” but I used 4×8 underlayment cut into 6 inch strips and then I just nailed them to the wall leaving a little gap in between. Then I filled in the holes and painted.