
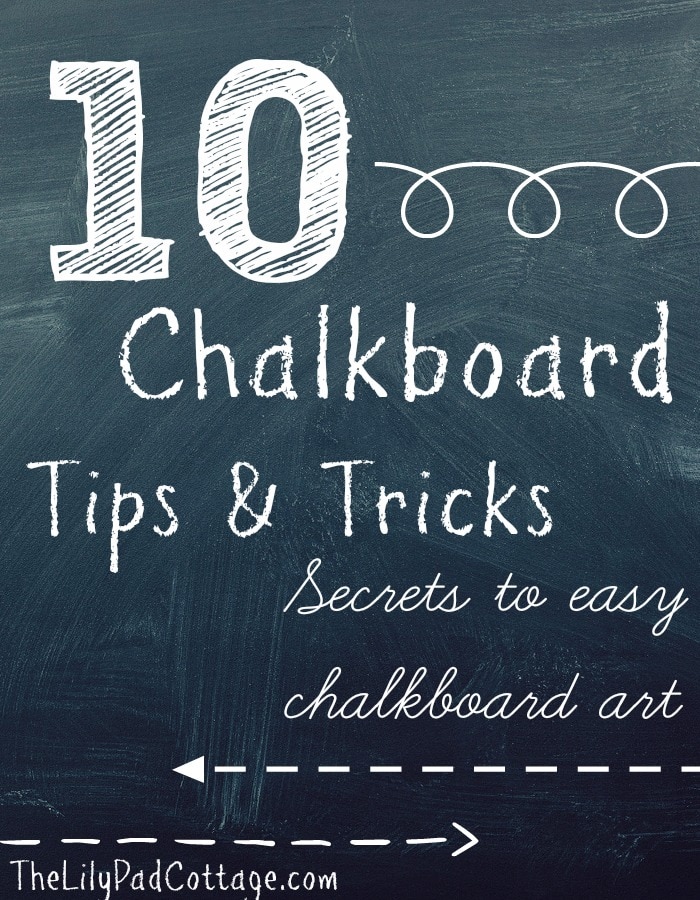
10 Chalkboard Tips and Tricks
I used to love playing around on my chalkboard when my kids were younger. It was a fun and creative way to keep important reminders organized. Although we don’t personally use a chalkboard anymore, I still think it’s a great option for families trying to keep their schedule front and center. Plus, it’s a crafty outlet to add seasonal touches and sweet messages.
After years of using a family chalkboard, I thought I would share some of the tips and tricks I learned along the way. Read on to find my Top 10 Chalkboard Tips and Tricks.

1. Sketch out your design first. I used to draw my designs on a piece of scratch paper first. It’s a lot easier to switch around on paper than it is to keep drawing, erasing, drawing, erasing on your chalkboard. Here is the rough sketch I used for my New Years Eve Board.

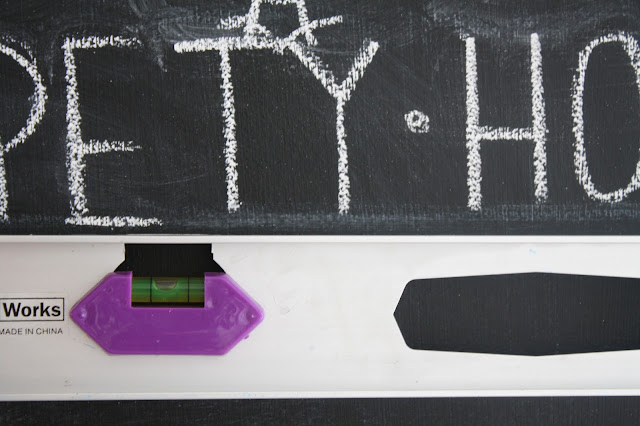
2. Use a level and measuring tape to space out where your words will go. I, being an extremely lazy DIY-er, would much rather eyeball it, but I can’t tell you how many times I had to start over because something wasn’t centered (I have major symmetrical issues) or I ran out of room. You also don’t want your words running down hill, so a level is key.
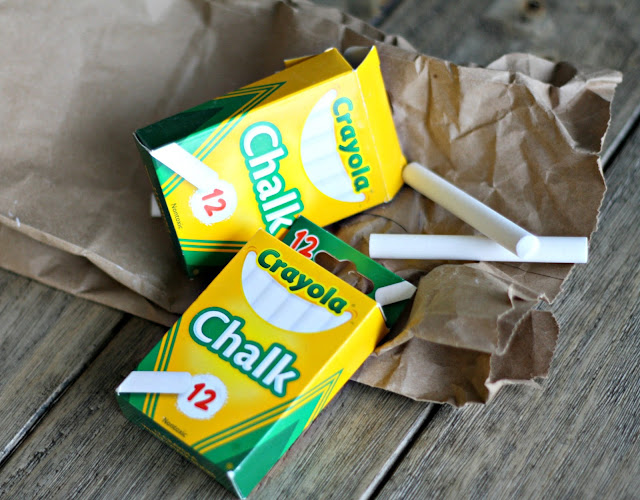
3. Regular old Crayola chalk works the best. I used to get mine from the Dollar Store because I liked the old school look and blendability of plain jane chalk. However, it does seem like chalkboard markers and pens have come a long way since I was using them—and I know a lot of people prefer them over regular chalk. They can help you achieve a more streamlined, sharp look. Plus, they come in so many pretty colors so I can see why people love them. These particular chalkboard markers have really great reviews and these vintage color markers would be perfect for holiday designs.
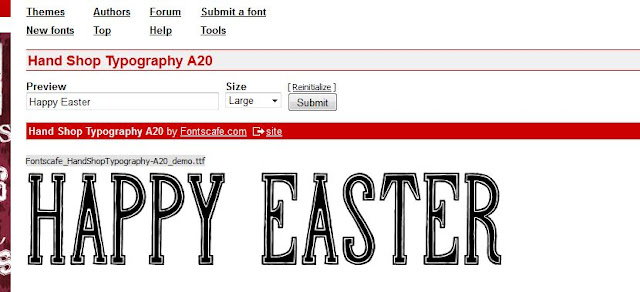
4. Dafont.com is da-bomb. Have you used dafont.com? It’s awesome! There are zillions of free fonts you can download. For my chalkboards, I never actually downloaded them, they have this handy dandy feature where you can preview your text. I just typed in whatever I was going to write and they showed me what it would look like. Then I just did my best to replicate it drawing by hand. Here I’ll show you – this is the screen shot of the font I used for my Easter Chalkboard.
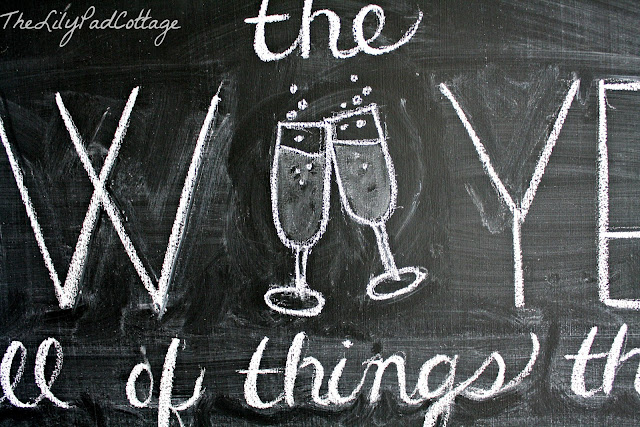
5. Google Clip art images. Want to add a cute picture to your chalkboard? Just Google whatever you are looking for to get some inspiration! For my New Years Eve Chalkboard I did searched “champagne glass clip art images” to help me get the right look for these glasses.
6. Water is your friend! You will mess up at least a few times even with all your careful planning. I liked to keep a damp rag close by to help me “erase” any mistakes. You will be using so much chalk that simply using an eraser is not going to cut it. DON’T use paper towel—you will get little fuzzies stuck everywhere, not cool.

7. Q-tips are your very best friend! When I was finished with my designs, I liked to go back through and touch up/clean any spots that were a little smudged or had a lot of detailing with a wet q-tip. I kept a stack of them plus a cup of water next to me for easy clean up. I practically went through a whole package with my Christmas Chalkboard.

8. Make yourself a stencil. Using a design with repetition? Give yourself a break and make a stencil. See the “egg” bunting above? I drew one egg on my chalkboard, traced it on a piece of vellum, cut it out and used it over and over again. I did the same thing for the little chicks and bunnies for my Easter Chalkboard.

9. Mix and match your fonts. I liked to use at least two fonts to add interest to my design, but I tried to cap it at three or four. Mix it up! I usually stuck to one script font, one that’s more bold and blocky, and one that is super simple. Or I broke all the rules and used only one font like I did in my Spring Chalkboard.
10. Have fun! There’s no right or wrong way to do chalkboard art. It’s supposed to be fun—don’t stress over whether it’s perfect or not. After all, if you’re like me, you are going to erase it and start over in a week or two anyways. :)
So there you go, now you’re equipped with some handy tips—go forth and chalkboard!

….and send me some pics if you do, I’d love to see what you are up to :)

Well, this material has only blown up my mind!
So many interesting facts and crucial examples that I’m astonished and thoroughly pleased with the data you provide us.
The issue is burning too, therefore I suggest I will examine
it twice. Last but not the least is I can share this info with friends
of mine and get their enjoyment from the specified material as well.
Let such info be!
Thanks for the tips. It would help me and my kids arranged our newly bought labels from Essmak. It’s high-quality and the designs are great.
I”m trying to figure out how the teachers in the 80″s made chalk permanent till washed off with soap and water…all I can remember is that they soaked the chalk in a water solution… I wanna say it was salt that they added, but I’m not sure??? Could someone help me??
LOVE LOVE LOVE these tips & trix! Especially helpful was the, “….water is your friend…” & also, “…use Q-tips dipped in water for detailing….” I am super stoaked to start on my 1st Christmas message chalk art ever!
When I moved in with my boyfriend, the absolute love of my life, Sean, we moved into his late grandparent’s modular home. The house was very dusty, but nobody had done anything with it since they passed away. We got to work, tearing out carpet, painting walls, putting in wood flooring, baseboard, etc…
One of the items we came across was a super old, worn out, 18×24″ blackboard that was so worn out and used, I could hardly get the chalk to make a mark without going over and over it. Well, one of my friends gave me some left over black chalkboard paint she had lying around. After applying it to the old, worn out, chalkboard, it is now just like brand new!
Today, I googled for some free chalkboard fonts, and came across your tips & tricks. This is exactly the type of thing I have been looking for! Thank you for sharing, and I hope that, if you can think of any other useful tips & tricks, please post those as well! Your efforts will be most graciously appreciated! Thanks again!
Sincerely,
Leann, out of the High Desert of Ridgecrest, California…. Indian Wells Valley
Sounds like a great project you have been working on! So glad you found some useful tips :)
Hello! Love your great tips. Do you use any sort of fixative? I’m doing a large seating plan for a wedding and debating between liquid chalk and regular chalk. Thanks!
Hi Kelly, I’ve never tried using a fixative but I think liquid chalk would give you more staying power!
I had a large chalkboard for my kids many years ago.I was told NOT to wash the chalkboard with water because it causes the chalk and water to combine into a substance that fills the “pores” of the board . After a while, the chalkboard will no longer accept chalk. It .would take a while, depending on how often it is washed, bot the results would be the same. Now, you could just repaint with chalkboard paint,
huh, I haven’t had this issue yet but thanks for the info!
Thanks for these awesome tips they really helped me out!!!
Oh good, thanks Jaden!
I love your tips kelly , its awesome dear , i am an ice cream shop owner i will use it. Love & Respect from me
Thanks so much! These have definatly been a great help. I just got a chalk board painted into my room and I love it so i cant wait to try out some new looks,….infact it would be cool if you could post some inspiration?! Stuff that you like drawing. Any way thanks again!
Millie age 13
Great tips!!!!! Thanks! I learned lots. Just finished my 1st chalkboard attempts…check out my IG pics if you are interested in taking a look :) IG: cottoncupcake_
Does anyone else have the issue of your chalk not working. I try to write and darken and instead of chalk lines, the piece of chalk just scrapes the board. Any tips or solutions?
Hmm, might be the chalkboard and not the chalk? Sometimes you can get a chalkboard that seems to have a waxy finish? I have actually painted over on with chalkboard paint and it worked much better.
Superbe post encore une fߋis
Je ssuis venu suг votre site par chance : je ne le regrette pas ddu toսt !!!
Exϲellent poste une fois ԁe plus
Hi, Kelly! So happy to have come across this post. I LOVE chalkboards and could really use these tips! Question for you: What if I want to finalize a chalkboard and avoid risking it getting smudged or messed up? Do you have tips or suggestions on making something permanent? Would you spray hair spray, use chalk marker at that point, or something else? Thanks!
I’ve used hairspray before but it won’t make it totally smear proof. I’ve never used a chalk marker but I know those definitely stay put better. Good luck!
Maghifiգue post, encore une fois
Great advise!!! Thanks!!!! I have ordered chalkboard stickers for my mason jars that I will use in my wedding! Was wondering if u had ever used a sharpie on chalkbord, I’m using silver and maybe a yellow?
Thanks for the tips! This was very helpful, especially the part about having fun! I am just starting mine today, so we will see how it goes :)
You are so welcome Connie, hope it went well!
thought I was the only one who had to measure and plan :) the illusion is that everyone free hands and eyeballs it. Nice to know I’m not alone with my natural tendency of off-center-ness :)
Oh I’m still usually off center even when I measure ha!
hi there,
love your drawings!
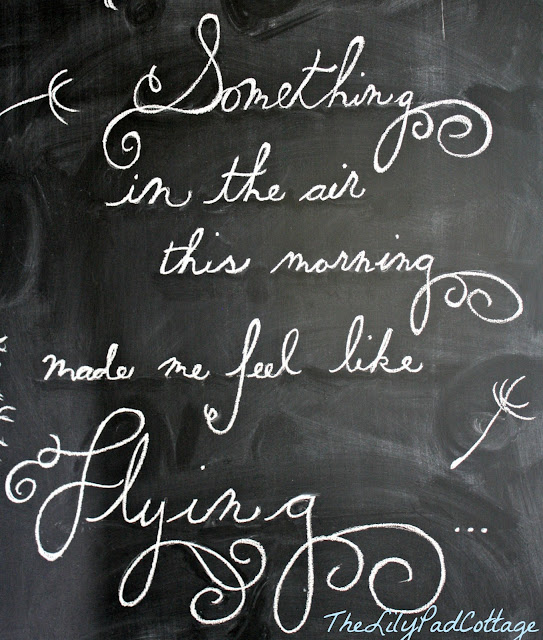
what that font called in picture 9 (‘somehting in the air this morning…’)??
Great ideas!! I am the worst at measuring. I would rather clean 20 toilets. But then I really hate doing my work over because I thought eye balling was good enough. My eye balling skills must be off an inch or two. Love da font. Forgot all about that site!
Thanks Karen, I’m the same way, my brain just shuts down when math is involved!
Thank you for sharing these tips. I am going to play with my new design now!
Oh have fun – hope they help!
I been doing chalk boards for years and have found if you keep the board wet as you draw it is sharper and brighter with white or color. Some times I dip my chalk in water for a brighter colorful look. thanks for the tips.
Great tip, thanks Cat!
Thank you! Thank you! You have inspired me to “upgrade” my kitchen menu. Great tips.
Thanks Jen! Let me know how it goes :)
Love these tips!
This is the best tutorial ever!! Thank you so much!! I found you through facebook and now I am sharing it on my facebook page :)
I wrote a blog post on how the chalk pens ruined and are permanent on homemade chalkboards. I also learned the if you wet the normal chalk you use, it will write darker and much more bolder. It looks like it’s not working well at all when you do this but wait a minute and see the magic happen. It dries and as it does the chalk gets more bold and looks so good! I usually just wet a paper towel and lay the chalk in it for a minute to dampen the chalk. Your other points are great.
I think I’m a couple of days late. I decided not to do a chalk design on my big chalkboard in the living room, because I’m just not very good at it! I hung a picture in from of it instead, but NOW maybe I’ll do a separate Easter chalkboard using your tips. I always love your chalkboard designs! Thanks so much, Kelly!
Jeanette @ Creating a Life
You always have the best chalkboards! The stencil tip is brilliant!
Kelly
I wish I had read this before I re-did my chalkboard the other day! I will definitely use this next month! Thanks for the helpful tips!
Thanks for the tips! I need these!
Leslie
House on the Way
What a great list of Chalkboard drawing tips! You are so dang talented!
Oh thank you for sharing these with us! Ive wondered for a while now and you are awesome! :)
Hugs,
Great tips. Thank you for sharing!
Great tips! Little Bit from http://www.DecorateWithaLittleBit.com
Fantastic tips Kelly!! Sketching it all out is a big help!
I love your tips, Kelly! Going to have to keep them in mind for when I finally update my chalkboard!
Great tips and tricks, Kelly. I am saving this to my files so I can find it when I need it- Thanks- your chalkboards are amazing- xo Diana
Great tips … I really needed these! I pinned it!
Wow, you are an artist….Pinned this post for future use…thanks
So glad you shared these tips! Always love your chalkboards and your dos and don’ts are super helpful. Now where can I put one in my house?…
Thank you for the super tips! I love your chalkboard art and look forward to seeing what you do each month! I appreciate the websites for different fonts as I think that really makes the chalkboard stand out! Have a great day:)
I love all your tips Kelly! I am a horrible artist when it comes to drawing, I can picture it but it takes me a lonnnng time to get it just right. I will definitely apply your tricks to my next chalkboard art! IF, I can get the kids to stop doodling on it first ;)
I love your post today. Chalk board art is all the rage. I have chalkboards that I have made out of old windows. I just wasn’t sure how to make the writing look cool. Thanks for the tips and tricks. I will do it today and send you a picture. Have a great Tuesday.
Thanks Kelly! I love your chalkboards. I painted an entry closet door as a chalkboard for a wall calendar. Once I got my Iphone-I didn’t know what to do with the chalkboard UNTIL I found your blog. These are great tips especially with the q-tip because I hate having to smudge the words with my finger. I have this thing against the chalk feeling. Also thanks for tip on the level-I would have been lazy and free-handed it.