
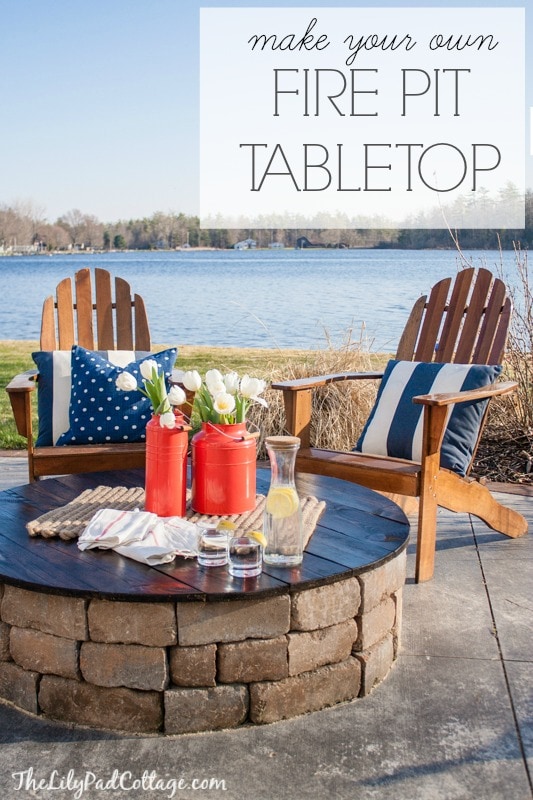
DIY Fire Pit Table Top
This is my firepit.
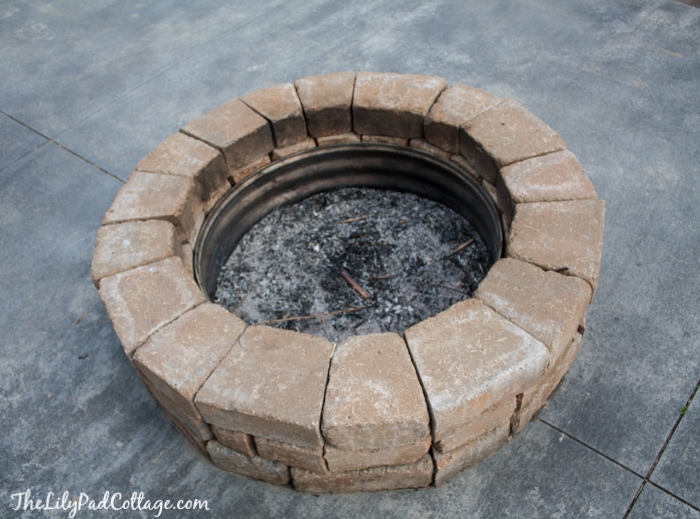
Which my kids seem to think should double as a sand box (even though we built them a perfectly nice sandbox down by the water). It drives me nuts, because as you can imagine sooty ashes, kids and my white couches just don’t mix.
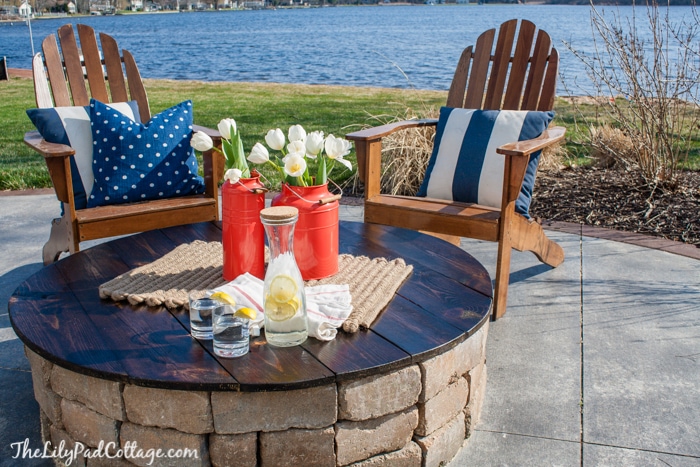
So, meet my brand new table! It totally makes my fire pit a multi-tasking super hero – perfect snack table by day (banishing naughty children who like to be covered in soot) awesome fire pit by night (covering previously mentioned children in marshmallow goo instead).
Need your very own DIY Fire Pit Table Top? You can totally make this too! So here’s the scoop, this month Ace Hardware is celebrating their 90th Anniversary, fun right? To celebrate they challenged us Ace Bloggers to complete a project using only $90. My table came in right at $87.98, boom!
I saw a fire pit table top at a home and garden show and have been wanting one ever since. As usual the friendly people at Ace Hardware were amazing in helping me figure things out, because being the professional blogger person (insert sarcasm here) I am, I walked in there with a really fancy crayon drawing of what I wanted to make, but I wasn’t really too sure how to make it.
They were up to the task, quickly walking me around the store showing me the various brackets and wood that might work for me. We were all brainstorming and finally came up with a plan. Then I have to tell you awesome they are, because once I decided on the wood I needed I was really worried about it all fitting in my car, and they said no worries they would follow me home in one of their trucks with the wood if it didn’t fit, how nice is that?
Luckily one of the guys got it all loaded in my car for me and I was ready to go.
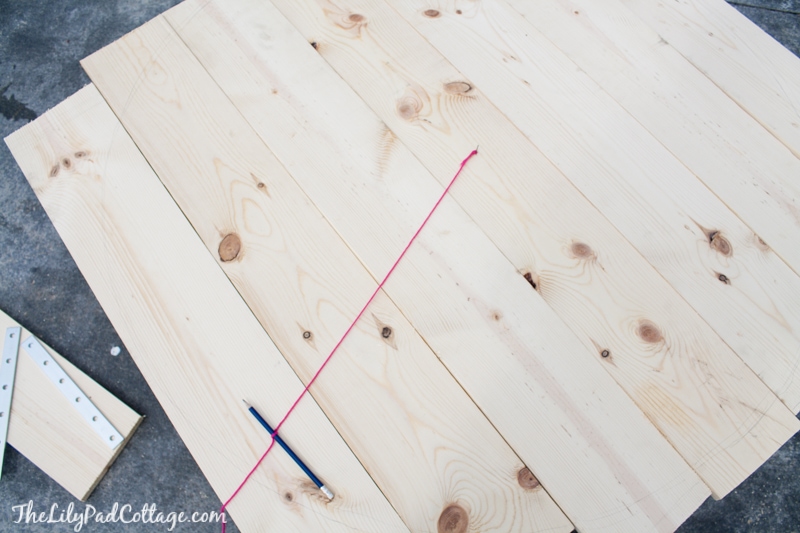
First step was cutting my boards down to a more manageable size. My fire pit is 48 inches in diameter, so I cut them down closer to that size. I used 4 – 1 in x 8 in x 8 ft boards.
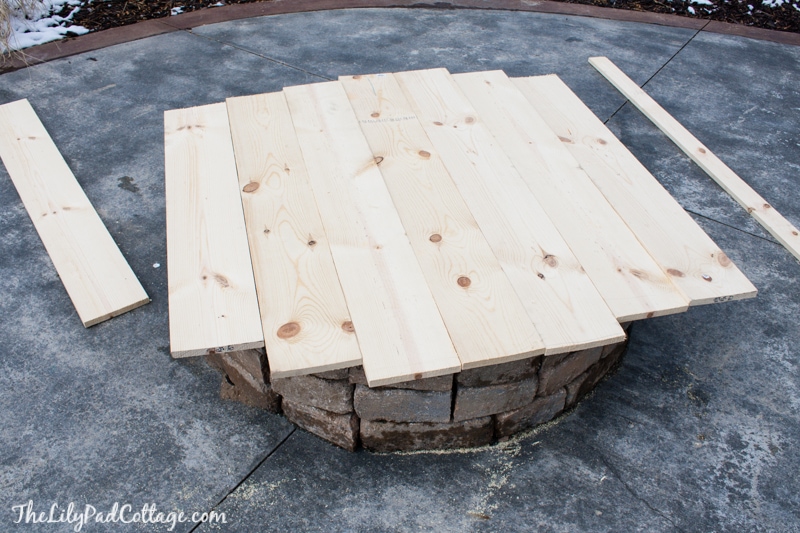
The next step was drawing a circle on them, I nailed down a piece of string in the very center of my fire pit. Then I tied a pencil to the end and drew a big circle.
Next I screwed all the pieces together with a 1 x 4 that I cut in 3 pieces and some metal brackets. I wanted the table to sit flush down inside my fire pit, so I couldn’t just put the 1 x 4’s all the way across, I had to use the metal brackets for the end pieces. I cut the 1 x 4’s to the right length, so they would fit snug inside the opening of my fire pit. I didn’t want the kids to be able to wiggle the top back and forth.
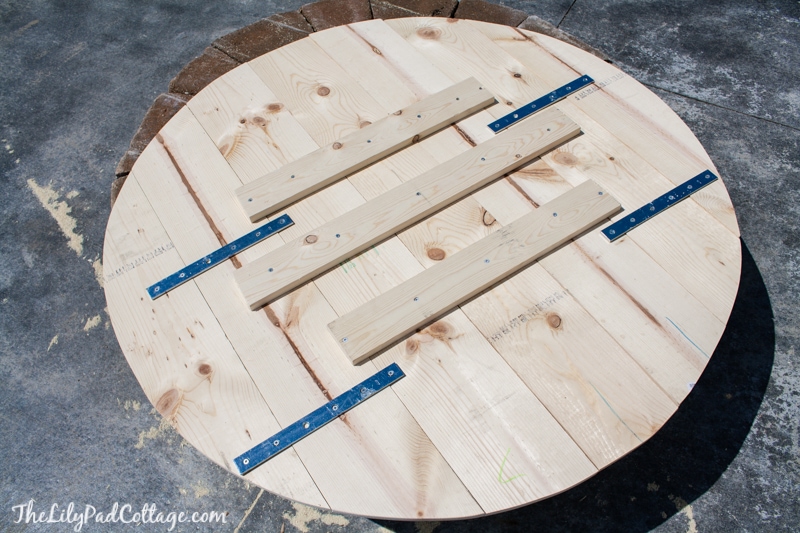
I used 2 different lengths of screws, longer (1 ¼) for the wood brackets, and shorter ones (¾) for the metal brackets. I screwed them all down with an electric drill making sure they didn’t poke thru the wood on the other side.
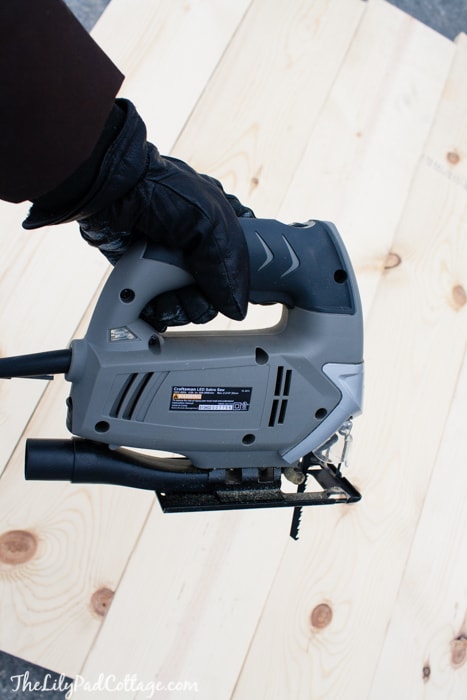
After it was all secured together, I was ready to haul out my favorite new toy – the jigsaw (read all about it here). I was surprised at how easy this circle was to cut out, my saw zipped right thru the wood. Ignore my ridiculous winter gloves, it was 30 degrees the day I built the table…last week…in April – sigh!
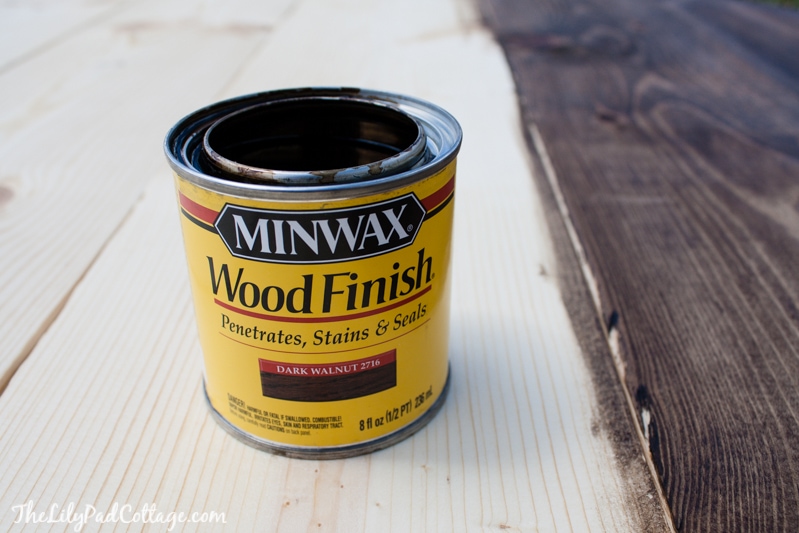
Next I sanded the whole thing down with a palm sander and applied a coat of wood conditioner to help the stain take evenly.

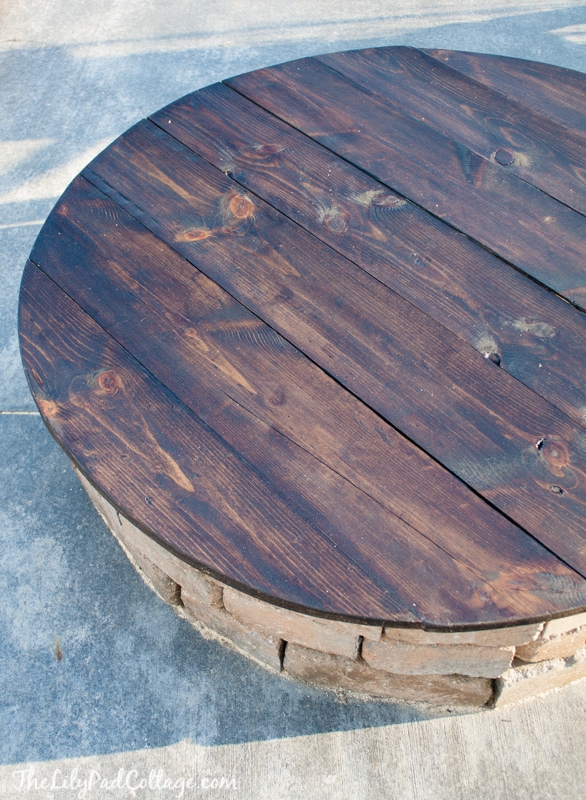
Then I applied 2 coats of walnut stain, followed by 2 coats of outdoor quality polyurethane. Make sure to polyurethane both sides to help waterproof your table.
Tada! Isn’t it so pretty? We have been LOVING this table! It’s the perfect height for the kids to sit and have an afternoon snack and it also a great spot for family game night too.
The table is nice and light too, and I have no problem taking it off myself and rolling it away when we are ready to get our s’mores on!

UPDATE: I know this probably goes with out saying, but make sure your fire pit is absolutely extinguished and cold before putting your table top on. We always throw water on our fire and wait until the next day to replace the cover. We don’t want your handwork going up in flames!
Also you may want to try pressure treated lumber to create this project, we have had a very rainy summer here in Michigan and I had one of the boards warp a bit. I added a couple more metal brackets to the back and that pretty much took care of the problem, but you may avoid the problem all together if you use treated wood.
Disclosure: I’m a member of the Ace Hardware Blogger Panel. Ace Hardware provided me with products and compensation for this post, but all opinions are 100 percent mine. All opinions and positions here do not necessarily reflect those of Ace Hardware.

Did you do any finishing before you put the brackets and 1x4s on or just after?
thabks for posting! We just finished ours based on your plans and it looks great!
Oh good, glad to hear it, thanks Jen!
My neighbor made this and used an old pallet for the wood and sanded it then stained. Turned out beautiful she then stenciled a big checker board on in the center, so cute. I would rather have backgammon, she is so crafty. They use big painted heavy metal washers for game pieces.
I have been thinking about making a table top to cover the firepit I created for quite some time now – and this is almost exactly what I had in mind! I may use an opaque colored stain instead (I’m crazy for BLUE in my garden for a pop of color!!)…I built my firepit atop a round brick patio that I laid myself, using old bricks (most of them were free : ) It was a back breaking job several years ago, and I’ve wanted to make a top to act as an “ottoman” / “coffee table” for quite some time now! Love what you did!!! Great job : )
Oh sounds beautiful, love your ideas!
Our fire bowl finally burned through, so looking to build a pit similar to yours. The best clear spot for it, unfortunately, in on top of our concrete pool deck. Just wondering if yours is on top of the pavers, or are the pavers cut to go around the pit? Also, what do you have at the bottom of the pit, if not the pavers? Gotta build the pit before we can make the table top!
Our’s is on top of our concrete but we cut a hole in the concrete the size of the pit, for drainage etc… not sure what would happen if you put it directly on the concrete like that? We just have sand in the bottom. I’m doing an updated fire pit post later this week so watch out for that :)
I decided to make your table top and used recycled pallet boards ,I then added a a drawer handle to the underside for easier lifting …..thanks….great idea…..total cost……6.00$
Smart, love that idea Donna!
I have been looking at doing this for my fire pit Thanks for the directions on how to do it I have one question though. Should I allow space between the boards for expansion and contraction of the wood? If so how much? Thanks for posting this I will start the construction this week.
Hey Gary sorry I missed this comment somehow! You could leave a little space, I did get some expansion now that it has been a few months but the table it still in pretty great shape despite that. I think using treated wood would probably solve any of those problems.
I LOVE Ace Hardware. They truly know what customer service is. Unfortunately they are quite a distance from me so I usually end up going to home depot or lowes. But when it comes time for me to get things that I am unsure of, I make the trek to ACE.
It’s worth the trek to talk to someone who is so willing to help and actually knows what they are talking about :)
That is AMAZING! What a great idea! I wonder how a wood top would stand up to the rain here in the Pac NW?
Hey Jodi, it has been raining what seems like non stop this spring and so far so good but it’s only been a few weeks. I think if you seal it really well, the top and the underside you would be good to go!
Great idea, Kelly! A quick and easy weekend project with a very professional looking finish. Good luck in future projects. -Bruce
Thanks so much Bruce!
okay, i am totally doing this to cover up our pit when we are not using it. Love it. Happy Mothers day.
Thanks Laura, hope you had a great day today with your cuties!
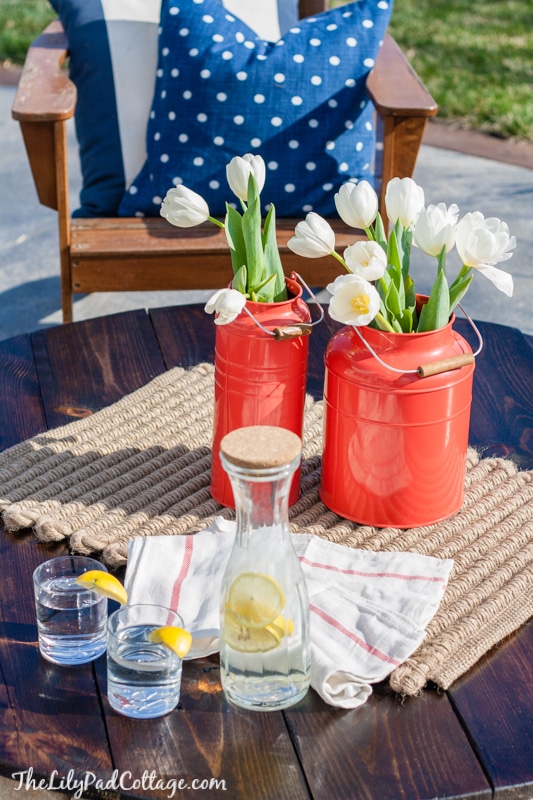
Oh sorry and are your striped pillows the classic stripe ones or the sun brella stripedones fromPB?
Hi again Natalie :) The striped pillows are the classic stripe ones, although we have had them 3 years and I will say they have faded just a bit but we are totally south facing and they are in the sun all day. They are still in pretty great shape though.
Could you share where you got your adirondack chairs from?
Hey Natalie, they are from World Market, got them a few years ago.
I think I may just have to make this! I’m thinking I might try adding a piano hinge in the middle in order to fold it in half so it takes up less space & make it a more manageable size for me to move around. Thanks for your post :)
That’s a great idea Amanda, love it!
I would put it towards a fire pit! The bottom has burned out of our old metal one.
Love your project. I finished my L’shaped sectional this past winter so now I need to make a table…I love the stain you used. I would use the $90 towards supplies for my new coffee table….some casters, stain, brushes etc.
I am totally in love with your blog !!!! It has inspired me to decorate bedrooms for all my great grandchildren. What fun!!!
Install new flooring in kitchen thanks for giveaway
I’d use it to put up headboard in the bathroom!
Great idea – I’m going to copy!
good ole’ Ace! Love that store! gorgeous Kelly! one of my fave color combos – red, navy, white! i would use the card to spruce up my back patio area! : ) p.s. we are STILL awaiting spring’s arrival in rochester ny! : (
Awesome! Added to my to-do list right after build fire pit :-)
I would use the $90 for our basement entryway, hooks, shoe racks etc.
The heat -resistant paint is what you use to paint bbq cooking units. I would use the gift certificate to finish my office. It needs TLC. Thank you Linda
I think something important you left out of your post is: if you are planning on using wood as a top to a fire pit, you either need to paint the bottom with a heat-resistant paint or make sure you never put the top on unless you know for certain the pit is stone cold.
We always pour water on our fire and leave the top off until the next day, but yes you should definitely make sure the fire is completely out!
I would be a copy cat and make a wood fire pit cover…been wanting one since last summer!!
Love this idea! I think I need to make one for my fire pit!
What a great Idea! You could even paint it to match your existing furniture.
definitely, I have plans to stain our furniture darker like the table :)
I would paint all of the lighter wood furniture in my house to match the cherry wood majority.
I would use it to buy paint for my shutters and stain for deck.
I would use the $90 to build a new table top for the glass outdoor table the old house owners left us. I used to live at the beach and collected boxes and boxes of broken up abalone shells perfect for a mosaic tabletop. The $90 would go towards a plywood base, nice side boards, grout and antique bronze spray paint for the now white metal table legs. Love the fire pit tabletop, great idea.
I would use the $90 to add some lighting to the back porch with hanging lanterns. I love your table top! Thank you for the chance to win!
Great giveaway! If I win I will use the gift card to buy an outdoor ceiling fan for our patio! Texas is hot!!
Hmmmm, there are so many amazing things I could do!!! I would probably make a headboard bench for my backyard. I have the old headboard, but just need the wood to build the seat part and of course a fun pretty paint color! I LOVE love love your firepit table, and your blog! You are a genius and have ridiculously good taste! Plus your writing skills are pretty amazing too. :) I just found your blog about a week ago and have been reading it for hours at a time! Thank you so much for this opportunity! xo Amber
Your firepit/table is such a great project. Love your blog.
Oh, where do I start ? So many things I’d like to do . Being a hardware store, I’m sure there’s many things my husband could think of also . Thank you for giving us that chance !
We have a ton of renovation projects started in our 1939 Craftsman style home so the $90 would come in handy for any number of supplies :)
i would replace our nasty old bathroom faucet with $90! thanks for the chance to do so
With 90.00 I could start building the back porch. We just got a house and it had this ramp and we tore it down. I need some patio furniture, that nice fire pit table top and a few chairs and is all good to go. :)
I would use it towards a diy fire pit! We have been wanting one for years!
I would love to do the exact same thing for our firepit. What a great idea – my kids are always wanting to get in ours also. ;)
Office Cubby needs completed for some storage!
What a great idea! I’m all for multi-use/purpose! We’re hoping to build our own fire-pit. I’ll certainly have to add this! Thanks for the inspiration!
I’d use the money to finish the gazebo we are building in our back yard & yes we are adding a fire pit.
Your firepit is beautiful! I’m knee deep in so many home projects. . . painting, chicken coop, and adding a front porch. Love visiting Ace Hardware to help get things done!
Building a firepit is my next project … this would be great!
I would use to make a fire pit .
I would repar my upstairs deck. It needs some tender lovin care.
Love it! Have been looking for this exact thing. Now to get my husband to build it. :-)
This is really cute and makes the fire pit look so much cuter when it’s not in use. Great idea!
We would use the gift card to finish a brick paver seating area with a fire pit! It’s our summer DIY project. Great giveaway!
As a matter of fact We are in the process now of building a firepit area…
With a rock wall, some comfy chairs, and a few cool stools…I’m loving
the firepit table top..perfect for when your not using it!
If I were to win the $90 gift card, first I would dance with glee, because winning something is rare for me and that would be totally exciting! THEN, I honestly would LOVE to build a fire pit, AND use the awesome fire pit table DIY found here on this page! I think it’s a brilliant idea! We just bought a cottage on Cape Cod and we are probably going to be lucky to finish all of the necessary renovations, never mind fun stuff like a fire pit. :)
Looks fabulous! Great job:)
Looks great! And a bonfire with that lake view has got to be amazing!
Kelly, what a great job and such beautiful color you chose for the stain. I can totally understand your decision to do this, I don’t think I would want sooty feet in my home wither. I would use the $90 for the new house for sure on a folding table for our new laundry room that John is going to build. Thanks for the chance.
Cynthia
Hi I LOVE your firepit table top and want to make both the firepit and the top for our back yard. LOVE it!!! great IDEA!! As always there’s a lot I could do with $90 too. Thanks for the great ideas, Lisa
There is a lot I can do with $90!! Thank you!
Ahhh! This is so great, Kelly! I’m pretty sure I need to come over and test it out! ;) I’d love to win the gift card, too! My basement needs all the help it can get! ;)
Love it and I have a fire pit that needs a table top!
Debbie
This is such a creative and beautiful idea. Sharing on my FB page!
We would definitely use the Ace Gift card to finish up our outdoor patio we started last year!!! Starting with lights!! love what Ace hardware have done to their stores
I have just discovered an Ace Hardware next to my son’s high school. I would love to purchase cabinet hardware for the baseball team’s concession stand. And then, I would use the left overs to buy some new outdoor furniture! It’s time to freshen up the outside of the old homestead.
Man I want to do this in our backyard! So fun!
With $90 I would totally make this table top!!
So amazing!!! I’m truly impressed with your table making skills!
(And I hear you about that 30 degree day in April ….)
:) Linda
ugh this spring is the worst! Bring on summer :)
You never fail to amaze me! What a great job, I might have to hire you to build one of these for my new fire pit, looks amazing!!
Just took a pic & showed hubby , he built one last Fall ours is square shaped this will be a great addition thanks for the idea
It looks great what a great idea! You are making me more confident to get over my fear of power tools!!!
Kelly, what a great idea! We just built a new patio that includes a fire pit. This is going on my hubby’s must do list!!! Fabulous!
I would finish my deck project.
I plan to make a patio in my yard and “Ace Is The Place” to make it all happen!
Oh girl! This looks like it’s straight out of pottery barn’s catalog! ; ) Looks fantastic! I want to build on outdoor table, so I’d probably use it for that : )
Oh I wish I lived in a pottery barn catalog ha :) thanks!
Ace is the best!
I would get started on my spare bedroom remodel—I need drywall and paint and….! Love the fire pit table top! Do you have instructions for the fire pit as well?
I don’t have instructions on that, it was just a pre made fire pit kit that we bought at a lawn and garden center, but it was so easy to put together!
I love your fire pit! Those blue pillows are absolutely gorgeous as well!
Thanks Rebecca they are from PB
It looks fantastic Kelly.
I will send this to my son…he has a fire pit like this. Where did you find the water container with the cork lid ?
Thanks Bev, it was $2 at Ikea :)
Would love a gift card, would actually start our outdoor fire pit project! Thanks for the awesome tutorial!
Absolutely gorgeous! What a great idea.
I would buy materials to build a wooden outdoor chandelier. (And put what I could toward a battery operated drill! :)
I’ve got lots of projects started, and need to finish before we host our son’s graduation party this July :) Extra funding always helps! Thanks, and great job on the fire pit. What lake do you live on? Looks awesome :)
Oh boy, I would begin my master bathroom makeover! Paint my vanity cabinets, retile my floor (It is pretty small and I already have the tile) and repaint my walls! I might be able to squeeze in a couple of accessories too! Dreaming over here! :)
My daughter is getting a brick patio installed next week with a fire pit off her Lanai. This table top would be perfect for her too! The $90 gift card would pay for all the supplies. Thank you Kelly & Ace Hardware!!
I have many outside projects I want to do at our lakeside home this summer and that gift card would certainly help!
A $90 gift card would come in handy with the workshop that my husband is building. Thanks!
I hope they have those old wood screen doors–I would love to get that for the spring for my house.
I would use the Gift Card to purchase some new paint for the trim of our house. We live in a log home on a lake in MN and the trim needs to be refreshed. It would look so nice to spruce up the outside and make it look pretty again!
I would love to take up our well used carpet in the basement and stain the concrete floors. I have seen them in some restaurants and think they are beautiful. It would be great to have a $90 gift card to purchase the products needed.
Awesome job…as usual.
with a $90 gift card i would begin my project of transforming and updating the kitchen – there are some new and neat products to transform your cabinets/countertops and floor, all at a fraction of the cost of a total renovation…so there is my plan ;)