
Painting a Leather Chair DIY
Last week I debuted my daughter’s new teen girl bedroom, and you were all the best as usual with the sweet comments! I’m so glad you loved the room as much as we do. Today I’m sharing the quick painting a leather chair DIY we used. to spiff up this midcentury modern find.

We found this beauty on a rainy Sunday afternoon when we hit up a local antique store. We were actually there to find a dresser (thankfully we nabbed one of those too, some days you just luck out)! I walked around the corner to find my daughter cozied up in this old chair.

It was the perfect size for her, and her room – love at first sight! The leather was in rough shape though – dirty, dingy, and sporting a few madmen-esque authentic 50’s era cigarette burns. For $30 we thought we would bring it home and see if we could save it.
First, we hit it with every cleaning product known to man and a lot of good old fashioned elbow grease. It definitely removed a few years of grime, but nothing could erase every bit of its previous life. I used Tide and warm water, Dawn and warm water, a magic eraser, Norwex cleaning paste, and actual leather cleaner to name a few. Here it is after we cleaned it, doesn’t look much different, but I promise this was after many buckets of blackened water.

I was pretty convinced this was as squeaky clean as it was going to get, so onto phase 2. – leather paint! I had absolutely no clue you could paint leather, but my daughter had watched a crafting youtube video where a fun design was painted on a leather bag. We thought why not give it a shot? I ordered Angelus leather paint from Amazon in white. I bought 3 bottles because I had no idea how much I would need, but we only ended up using 2. My typical prep for painting any surface is cleaning said surface really well first. Since I had scrubbed this to death already, I felt like we were good to go.
Here it is after the first coat.

I used a regular old paintbrush (the Wooster short-handled paintbrushes are my go-to for every project) and started applying the paint. I quickly realized I was going to need a lot of thin coats. The paint wasn’t covering everything and was a little streaky at first.
After letting it dry for a few hours, I applied the 2nd coat, and a 3rd….and 7 coats later it was complete!
Here it is after 4 coats.
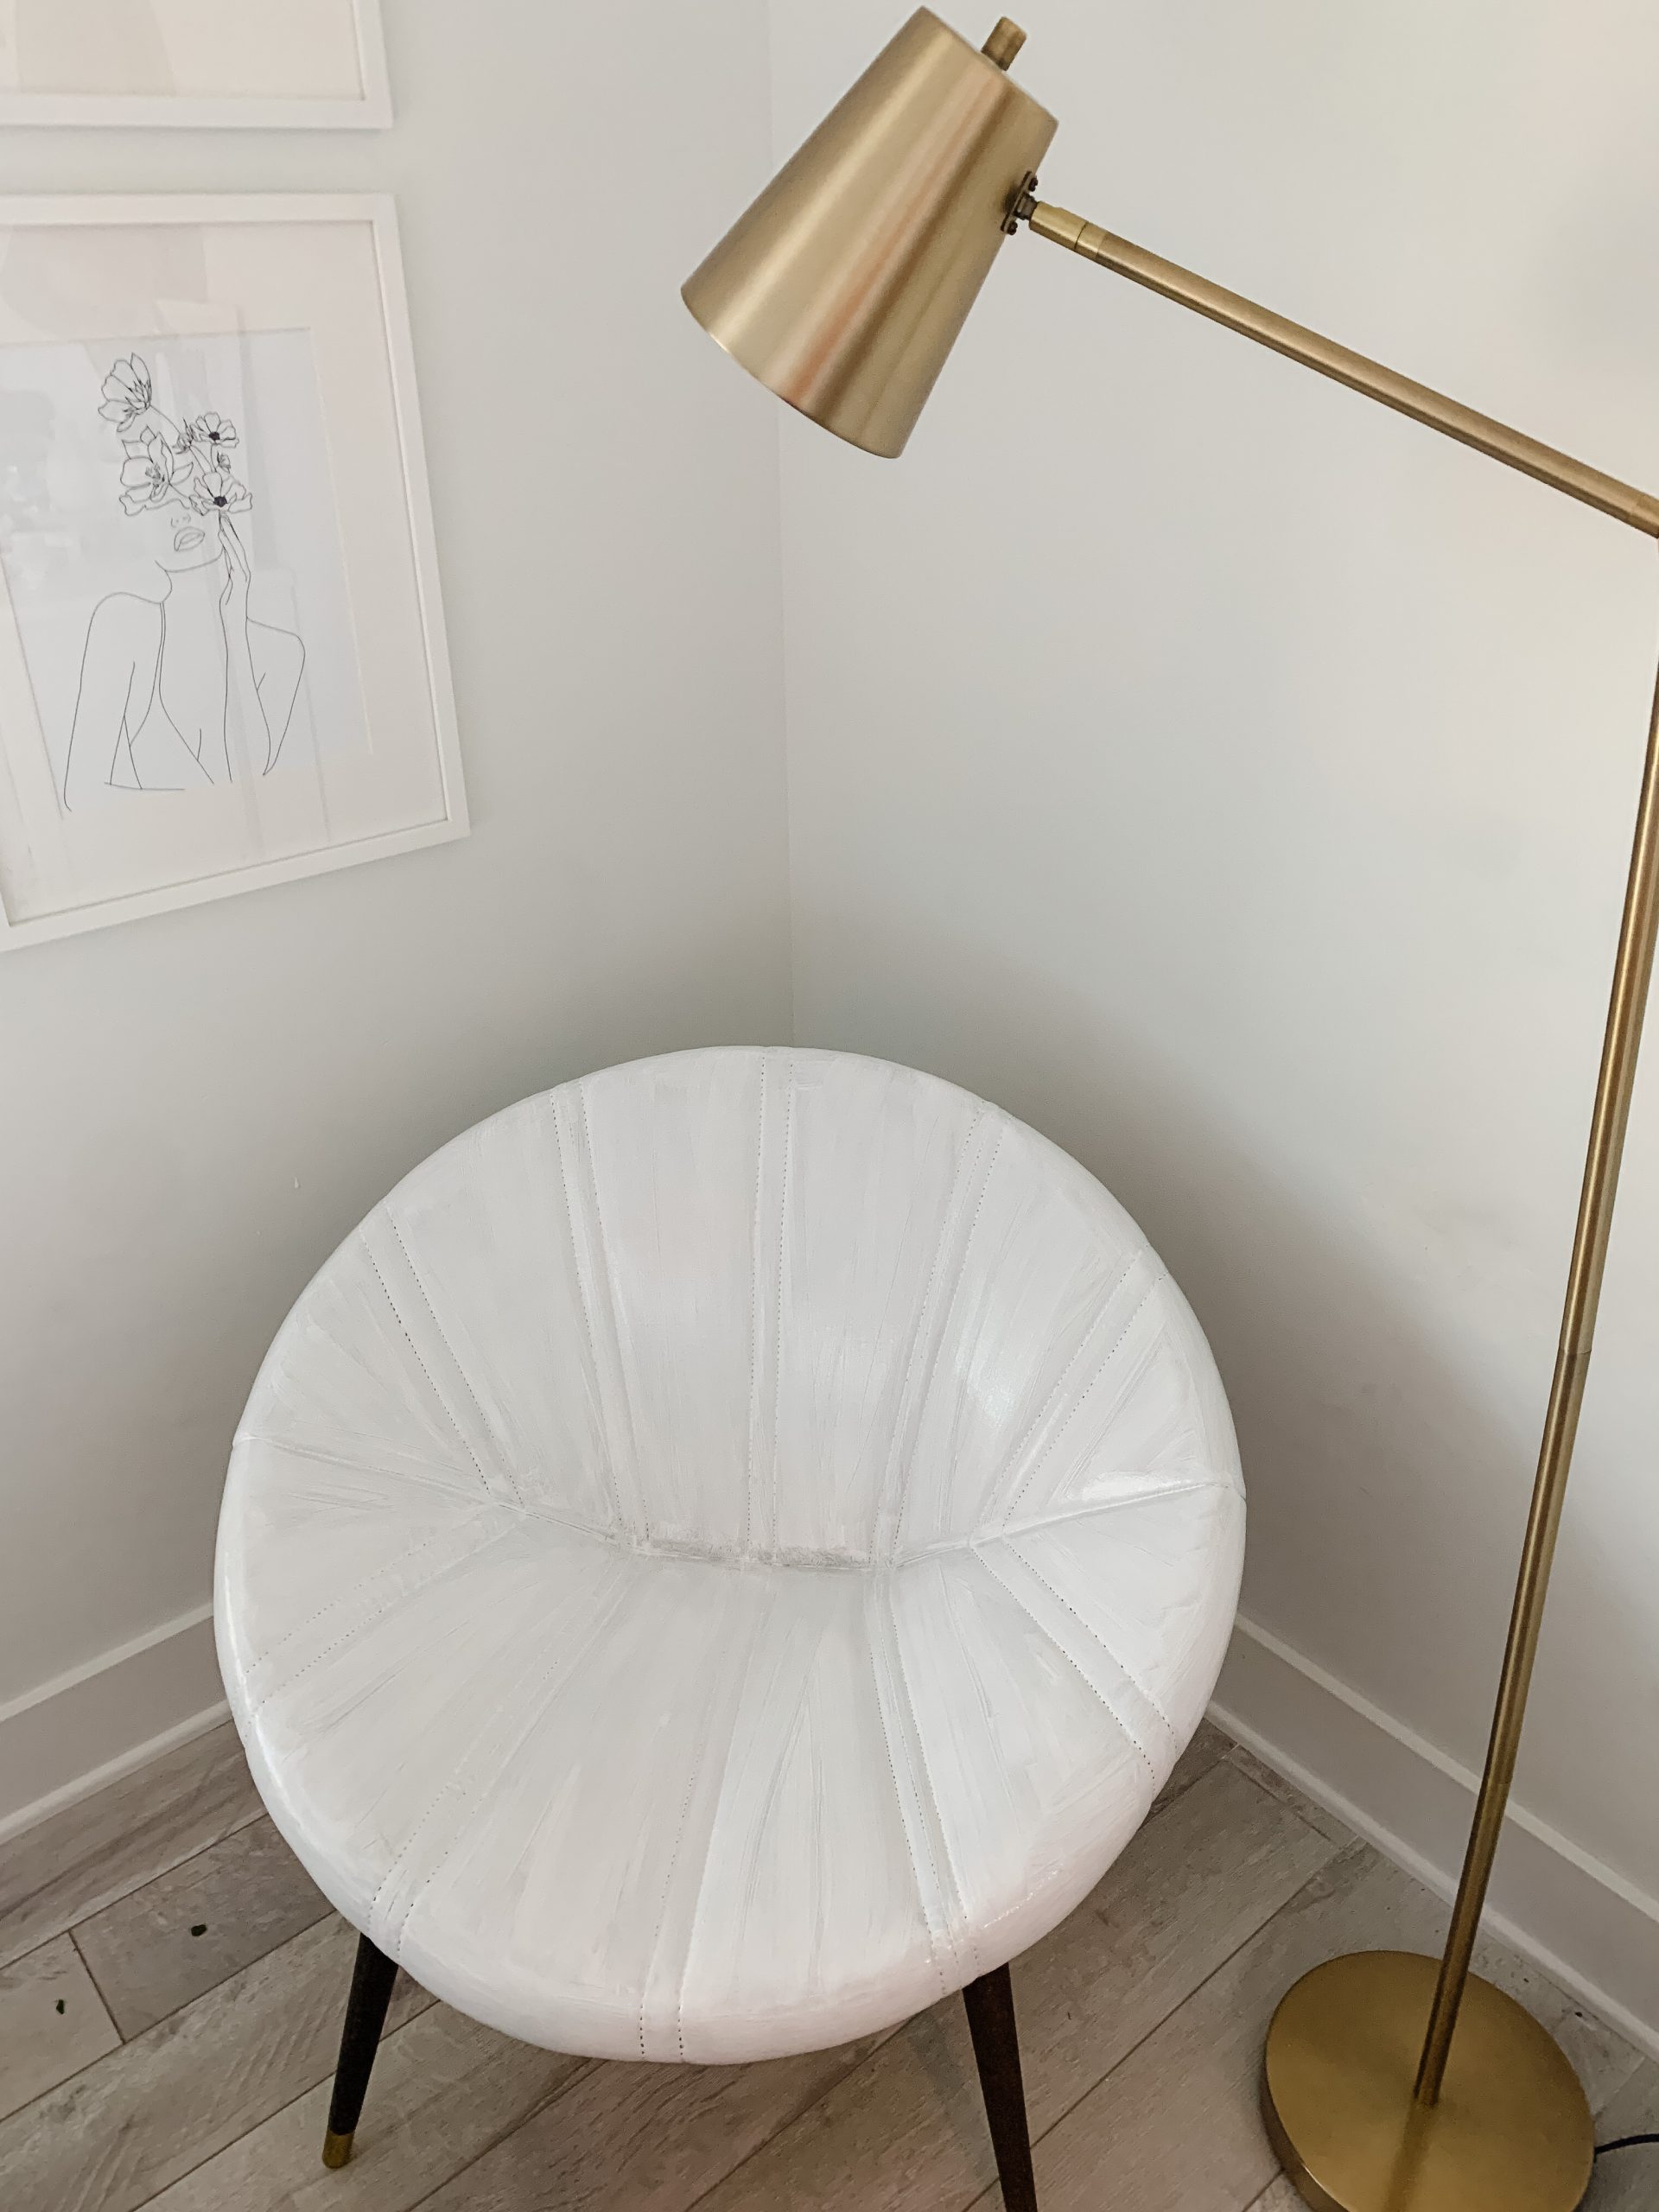
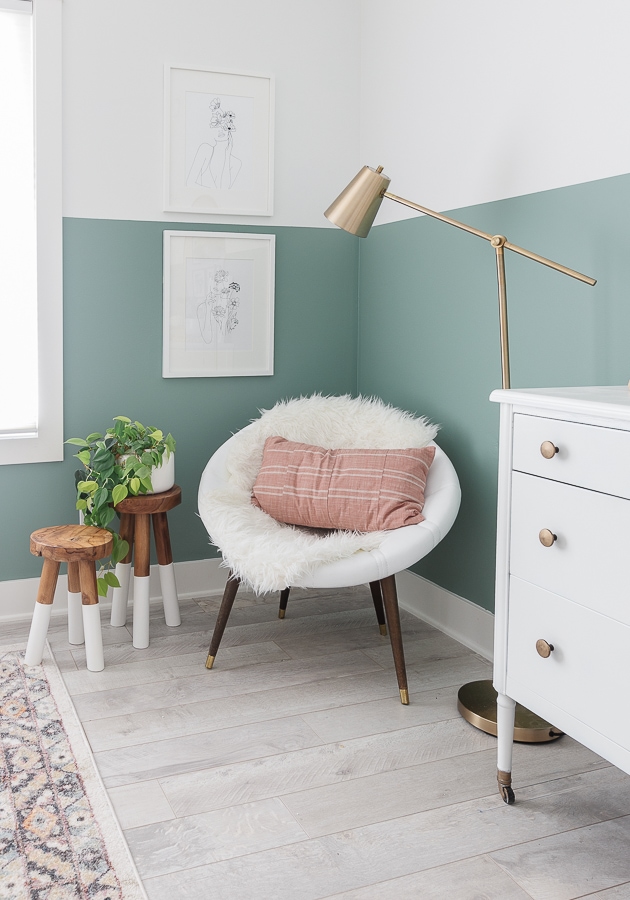
I let it dry for 48 hours just to be sure before anyone sat in it, but it looks brand new! It even filled in those cigarette burns.

I’ve had a few questions on how I think this will wear over time – to be honest, I’m not sure?! I’ll keep you all posted if we have issues. I think the fact that we are keeping this little faux fur throw in here will probably save it from a lot of wear and tear. I’m assuming touching it up won’t be too hard if we do see some issues.

So far so good though! The paint is really flexible and the seat still feels nice and soft. I think this product worked great for a thinly padded chair like this, but I’m not sure it would work on an old leather couch with thicker cushions. I would say the less squishy the better, so you aren’t testing the limits of the stretchiness of the paint. So proceed with caution if you try this at home.

This was such a fun project and it’s always great to be able to give new life to an old piece of furniture with this painting a leather chair DIY!
If you missed my daughter’s bedroom reveal be sure to check it out!


My parents-in-law law used leather paint on a sofa and two club chairs! Amazing results that have lasted for years. Do it!
wow that’s awesome!! Thanks for sharing!
I would like to know about the sketches on the wall. Who drew them and where can I purchase them
They are from urban outfitters you can find all the sources if you click through to see my daughter’s whole room reveal. Everything is linked there – thanks!
Leather paint! Who knew???!! The chair is just beautiful and the perfect addition to that cozy corner! Great job!
Wow!! Looks perfect in her room!! I love that the legs on the chair have the gold caps on the bottom which compliment the stools with their white bottoms!
Also, I’ve seen several tutorials where people have used thin layers of chalk paint over vinyl (I know yours is legit leather) to transform a chair. They carefully sand with fine grit in between coats to take away brush strokes. Then it gets finished with clear wax. The pictures look incredible!!
In any case, your finished piece looks so inviting in the corner as a reading nook. Thank you for the inspiration!!
Oh good tip I haven’t heard of using chalk paint like that!
Thank you for the before & after photos! What a great find!! After all of the work you poured into the chair, you must be thrilled with the transformation ?. Wouldn’t it be interesting to know the “previous life” of the chair??? Or maybe not… ?.
hahaha! I’m not sure I want to know lol!
What a great transformation on that chair! I never would have thought to do that! It looks beautiful! So does her room. Great job momma!
Thanks Lisa! It was such a fun little project.
Wow!!! Hats off to you! 1000% better! Hope your daughter enjoys many hours of good reading in that chair. So love the room…and the print above the bed that tipped it all off! Nice work, as usual.
Thanks so much Jeannie!