
Pool House Flooring Update
Hey! I accidentally took a few weeks off here on the blog. The Mr. and I have been working our fingers to the bone on the pool house and we finished all the flooring! Apparently, I’m older than I used to be. Back in the day, I could DIY in the AM and blog the results at night. Now as we are getting closer to 40, I basically passed out as soon as my kids go to bed, hence the radio silence over here. The Mr. and I also sound like a bowl of Rice Krispies with all the snap crackling and popping our joints are doing – yikes! Thankfully our rusty DIY skills were still alive and well, despite not tackling a big project in a while.
Excuse the dust and dirt in all these quick iPhone photos. Everyone has been in and out with dirty boots and sawdust, so I need to wash everything yet. Also, we used satin paint on everything but in the iPhone photos, the glare makes it look glossy.
Pool House Flooring
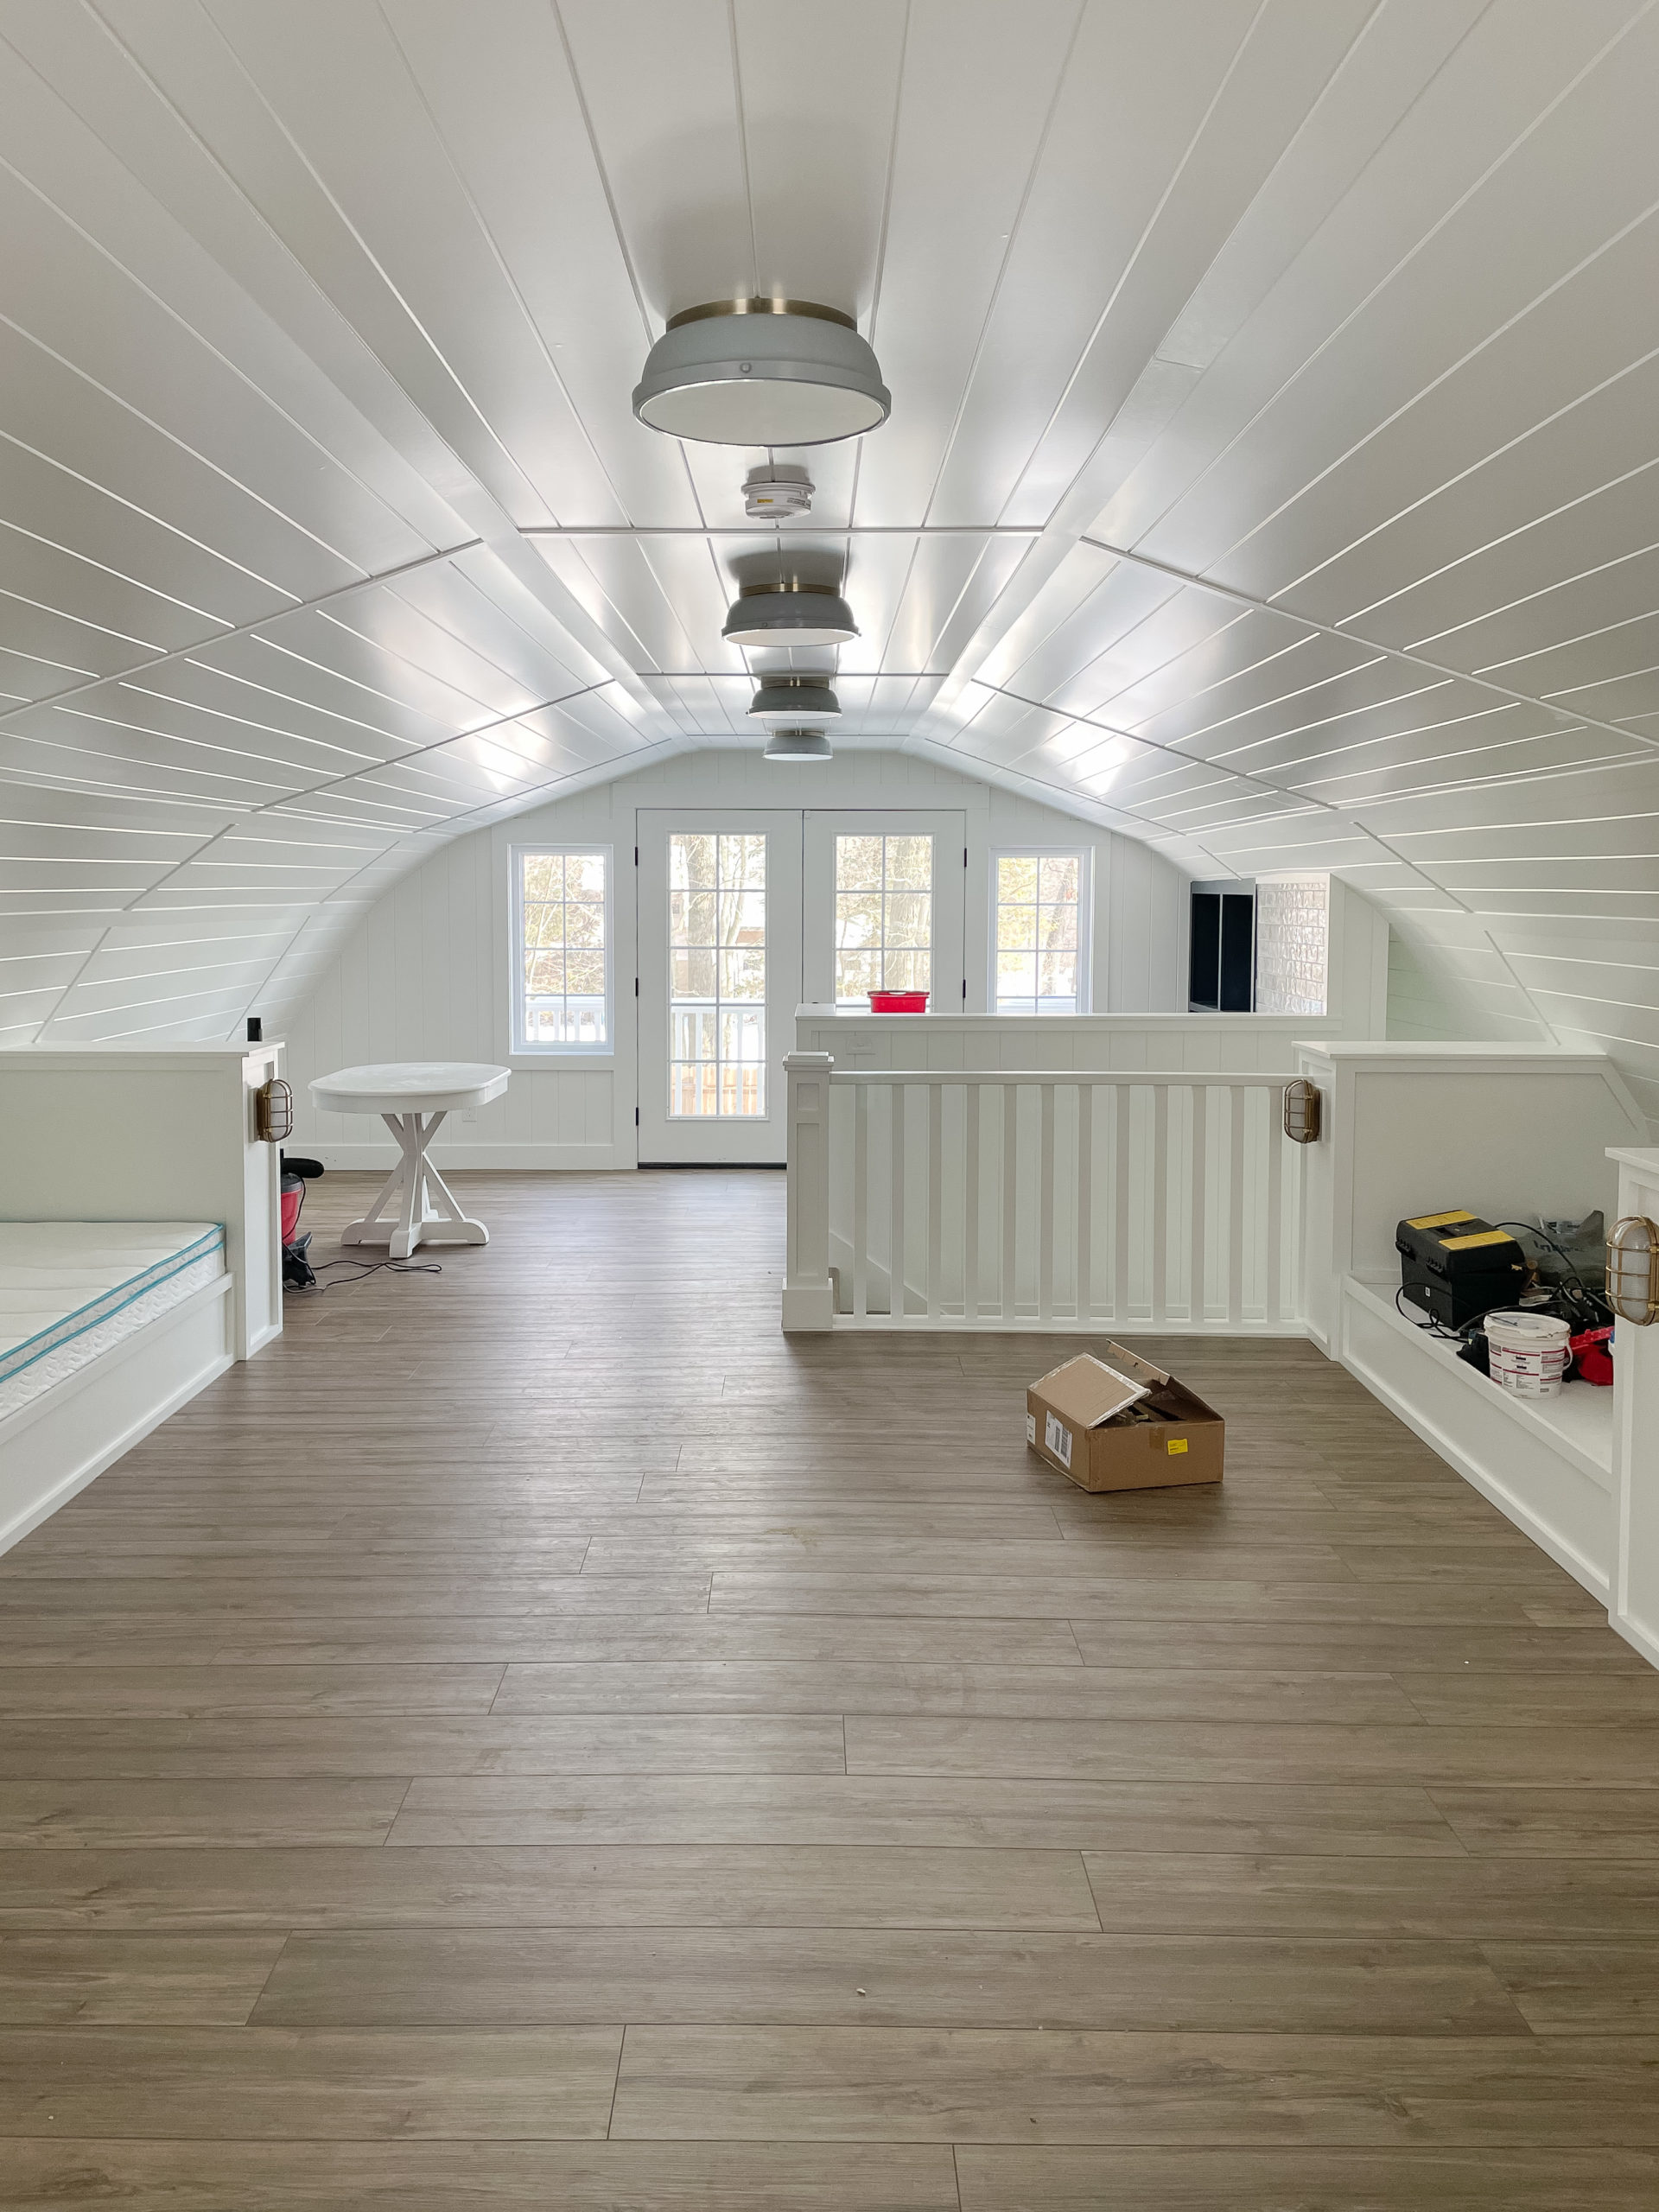
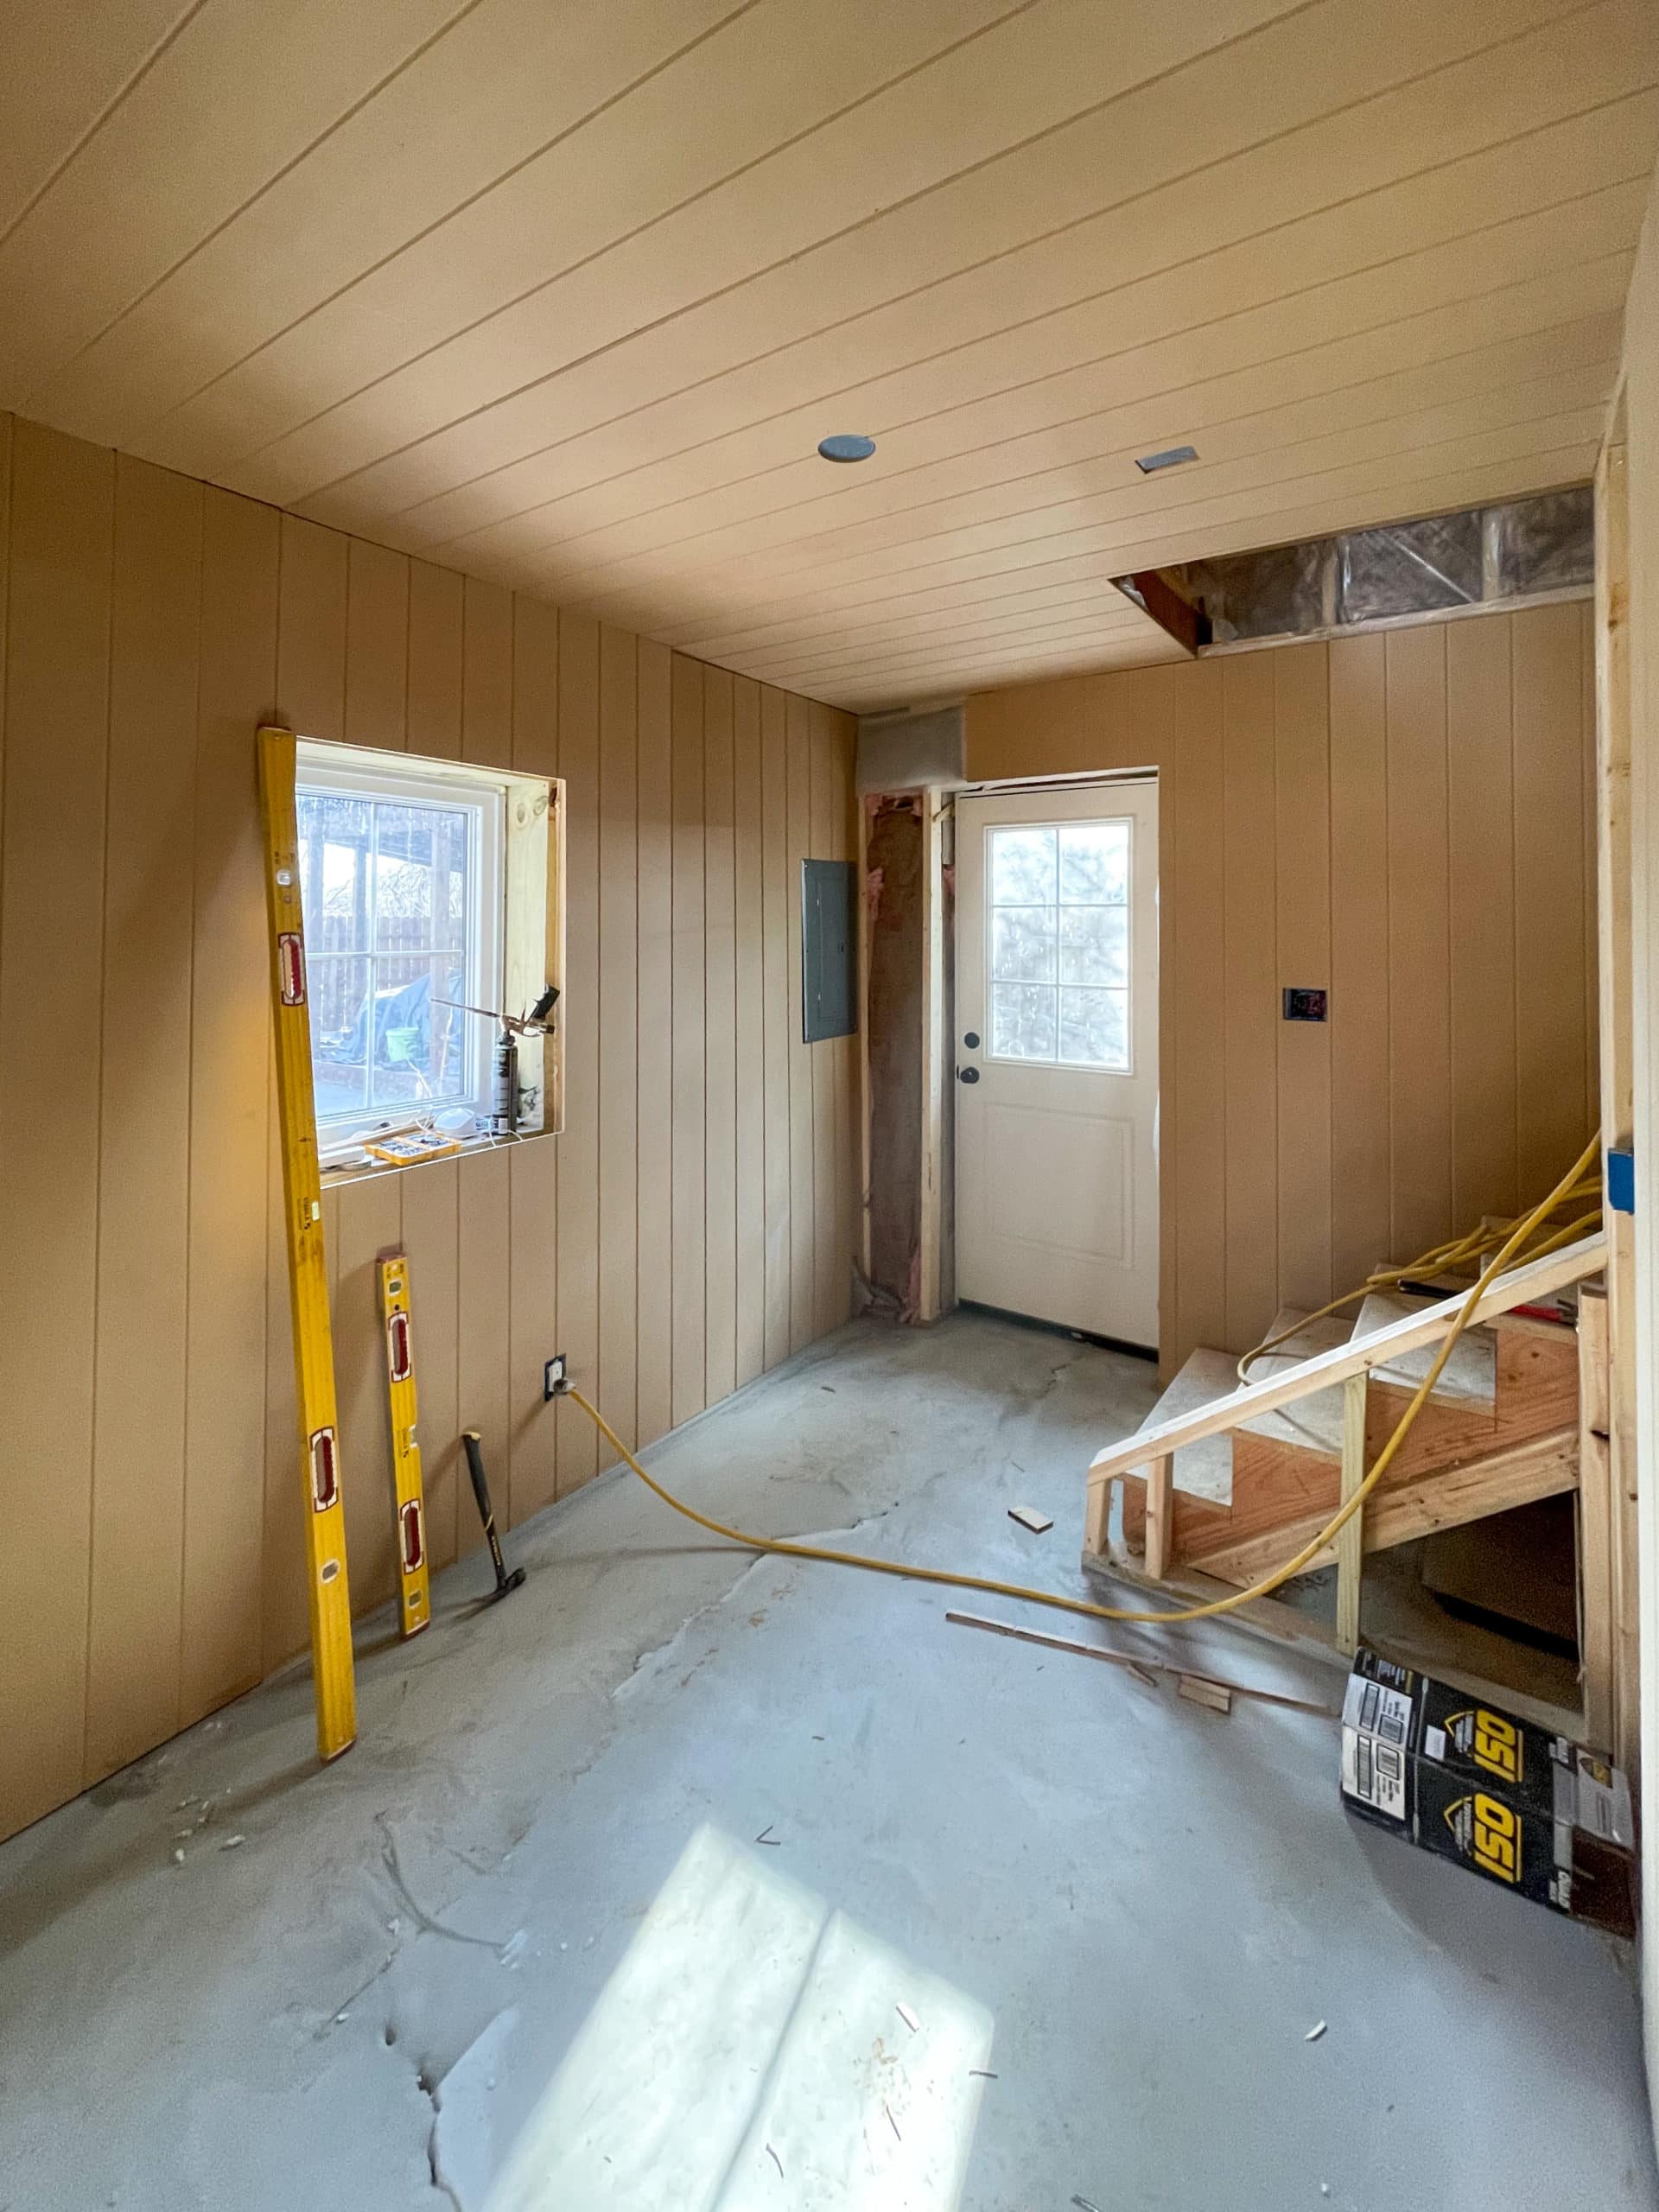
It took us a long weekend and a few weeknights to get all the luxury vinyl plank flooring installed. It was a pretty easy job – just tedious. I had a lot of questions on Instagram about where we learned to do this. There are a bunch of great YouTube videos out there. Basically, if you can use a saw (which anyone can, I promise), you can do this. It is a floating floor, so it all just pops together with a little finagling and a rubber mallet and block. Side note: just be careful where you are swinging the rubber mallet while your partner holds the floor locked in. The Mr. came very close to giving me an accidental nose job a time or two. He spared my nose, but managed to hit his own fingers and has the blood blisters to prove it!
Don’t mind the painter’s tape on the floor – I’m trying to decide on couch size. I bought an 8×10 rug in here and I think I’m shooting for an 80-inch couch, which is what is taped out there.
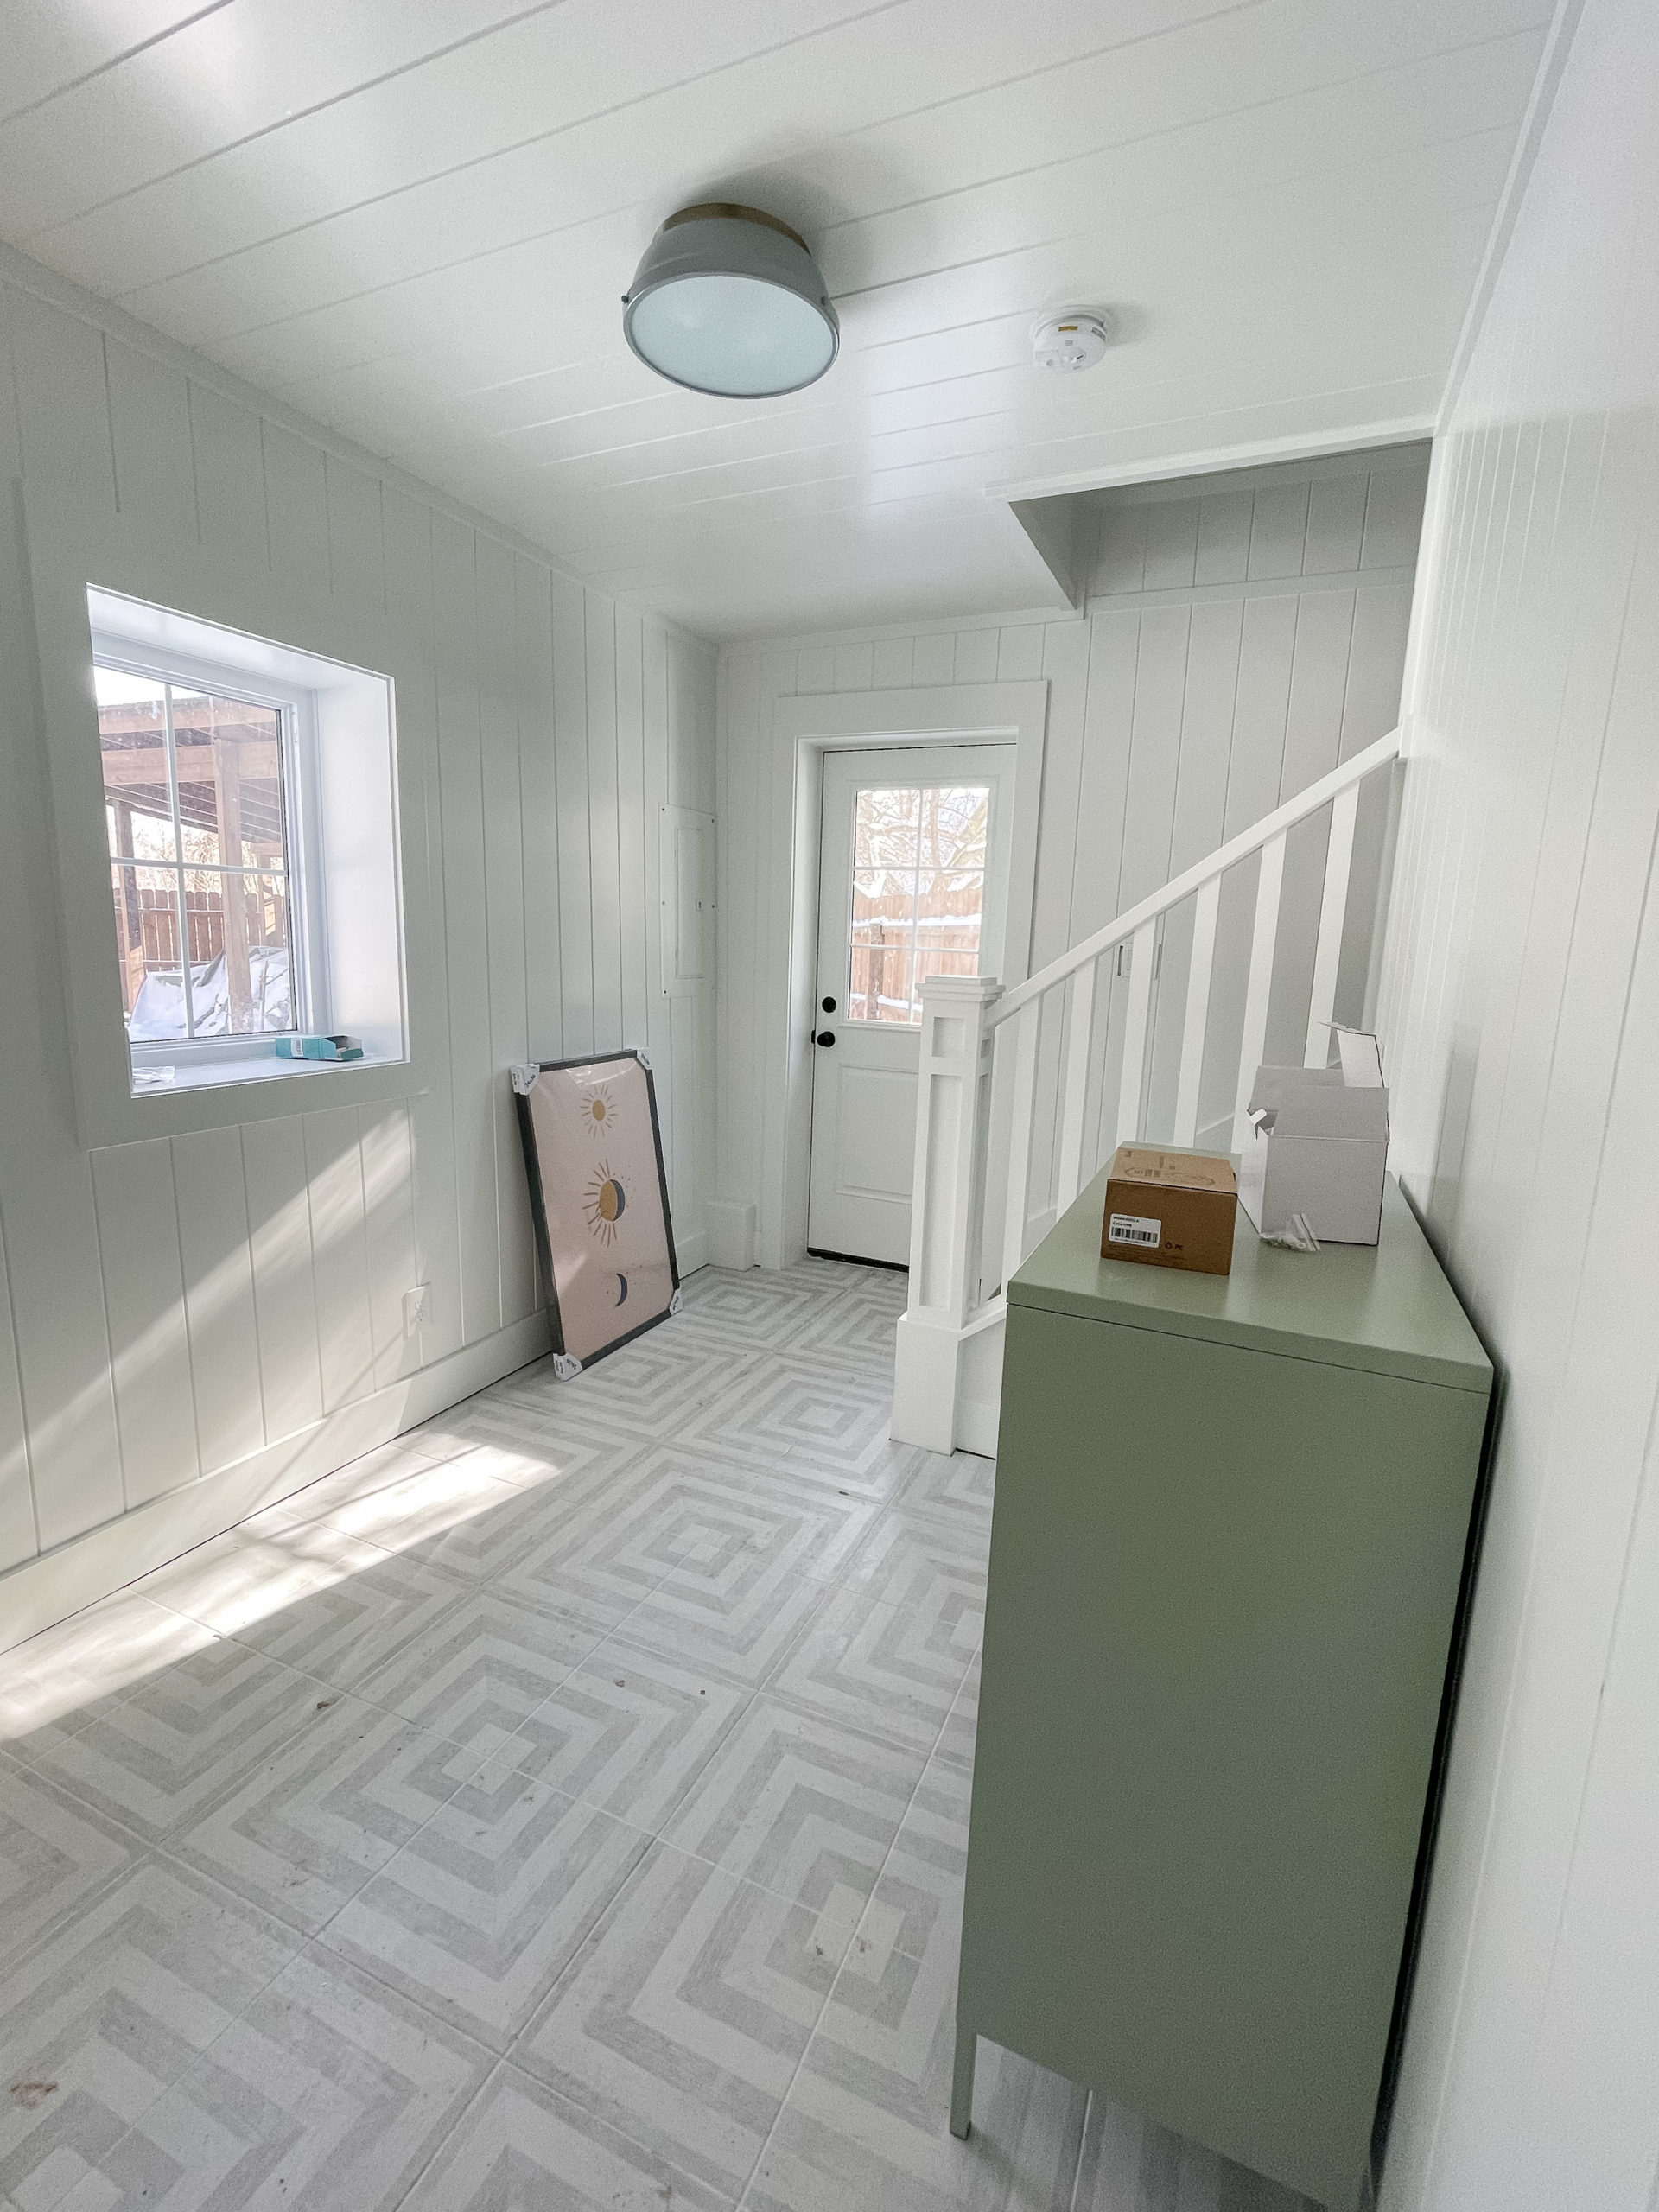
I’m really happy with the flooring. I wanted something a little darker than the floors in our home to hide dirt, but still something light and coastal feeling. I had a lot of questions on how luxury vinyl plank compares to our engineered wood flooring. I think it looks great, even though I can tell it isn’t real wood. It looks beautiful and judging from the number of times we dropped tools on it while installing, it’s definitely indestructible. Plus it’s completely waterproof, which will be great with wet feet/towels from the pool.
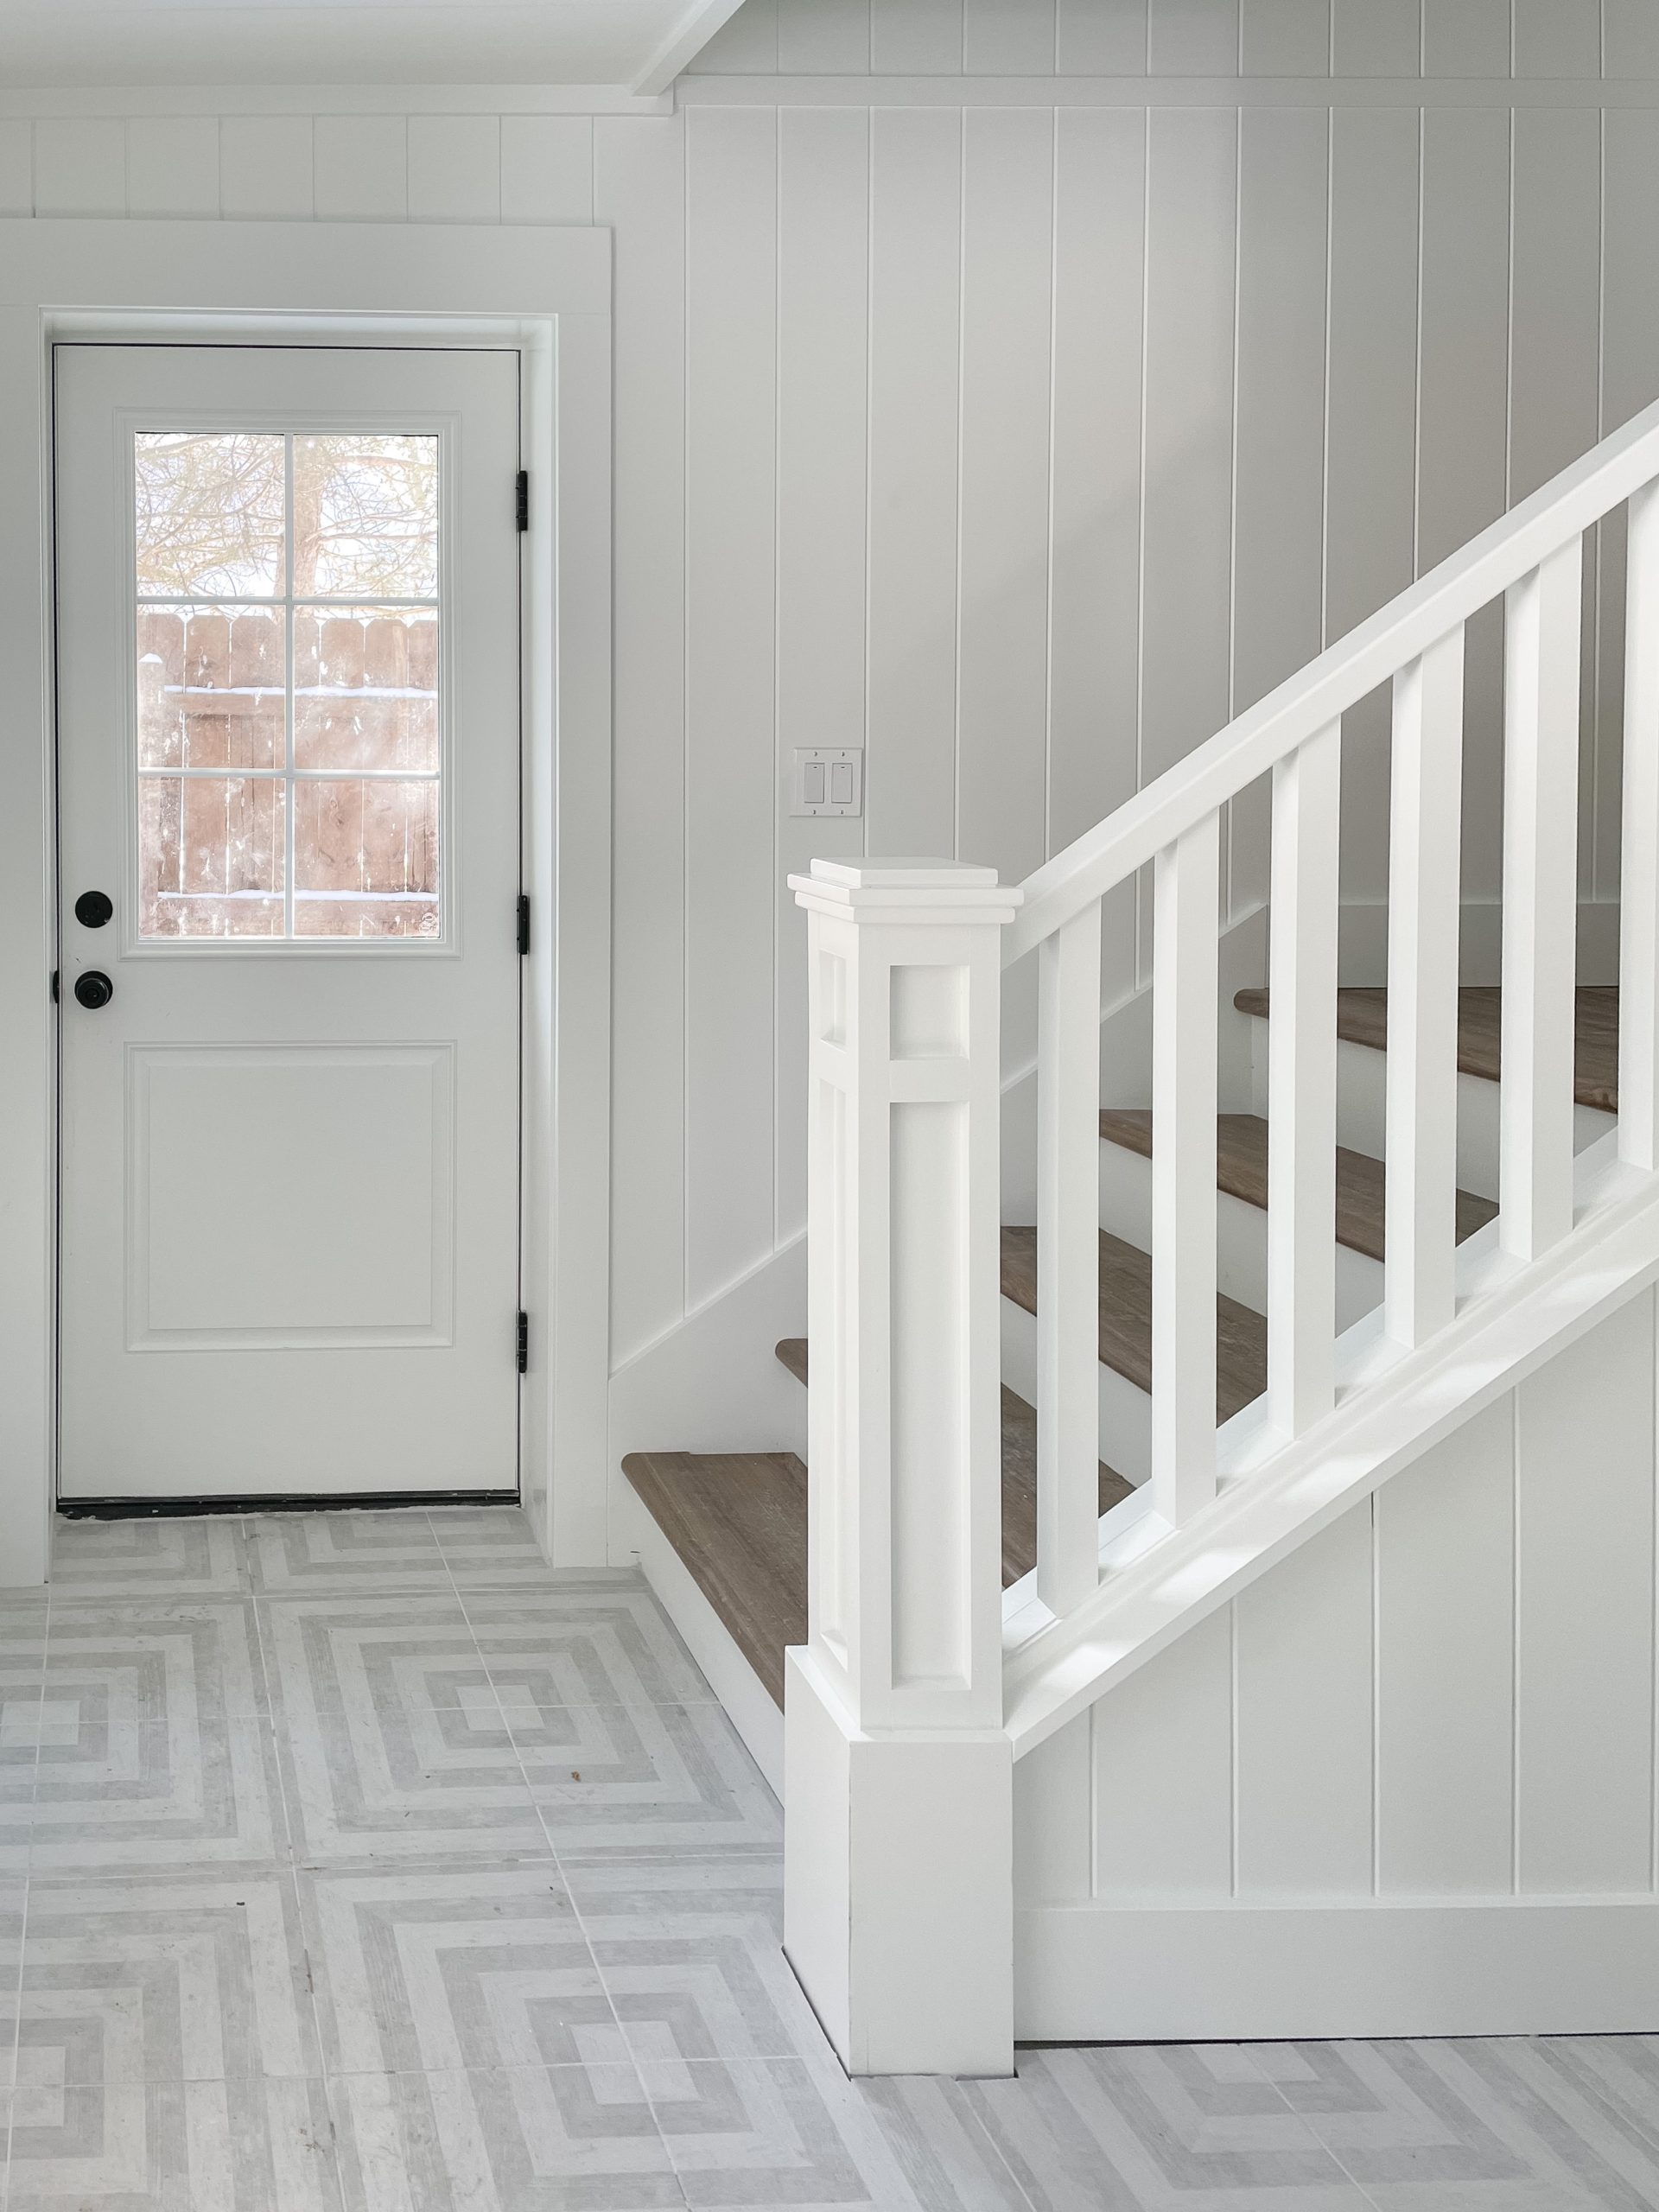
We installed the flooring the short way vs. the long way like the boards used to go. It’s crazy how much wider this made the room look as it had a bit of a bowling alley vibe before.
Next up was tackling all the tiling. I started small with the backsplash while The Mr. finished off the LVP flooring. Again tiling is a totally doable DIY and YouTube videos are your friend. When we have tiled in the past, we have always rented a wet saw, but wow the rental price has jumped. It was actually only $15 more to just buy our own saw. Although after finishing 4 solid days of tiling we both vowed never to tile again. I’m sure once we can feel our knees again we will change our minds about that.
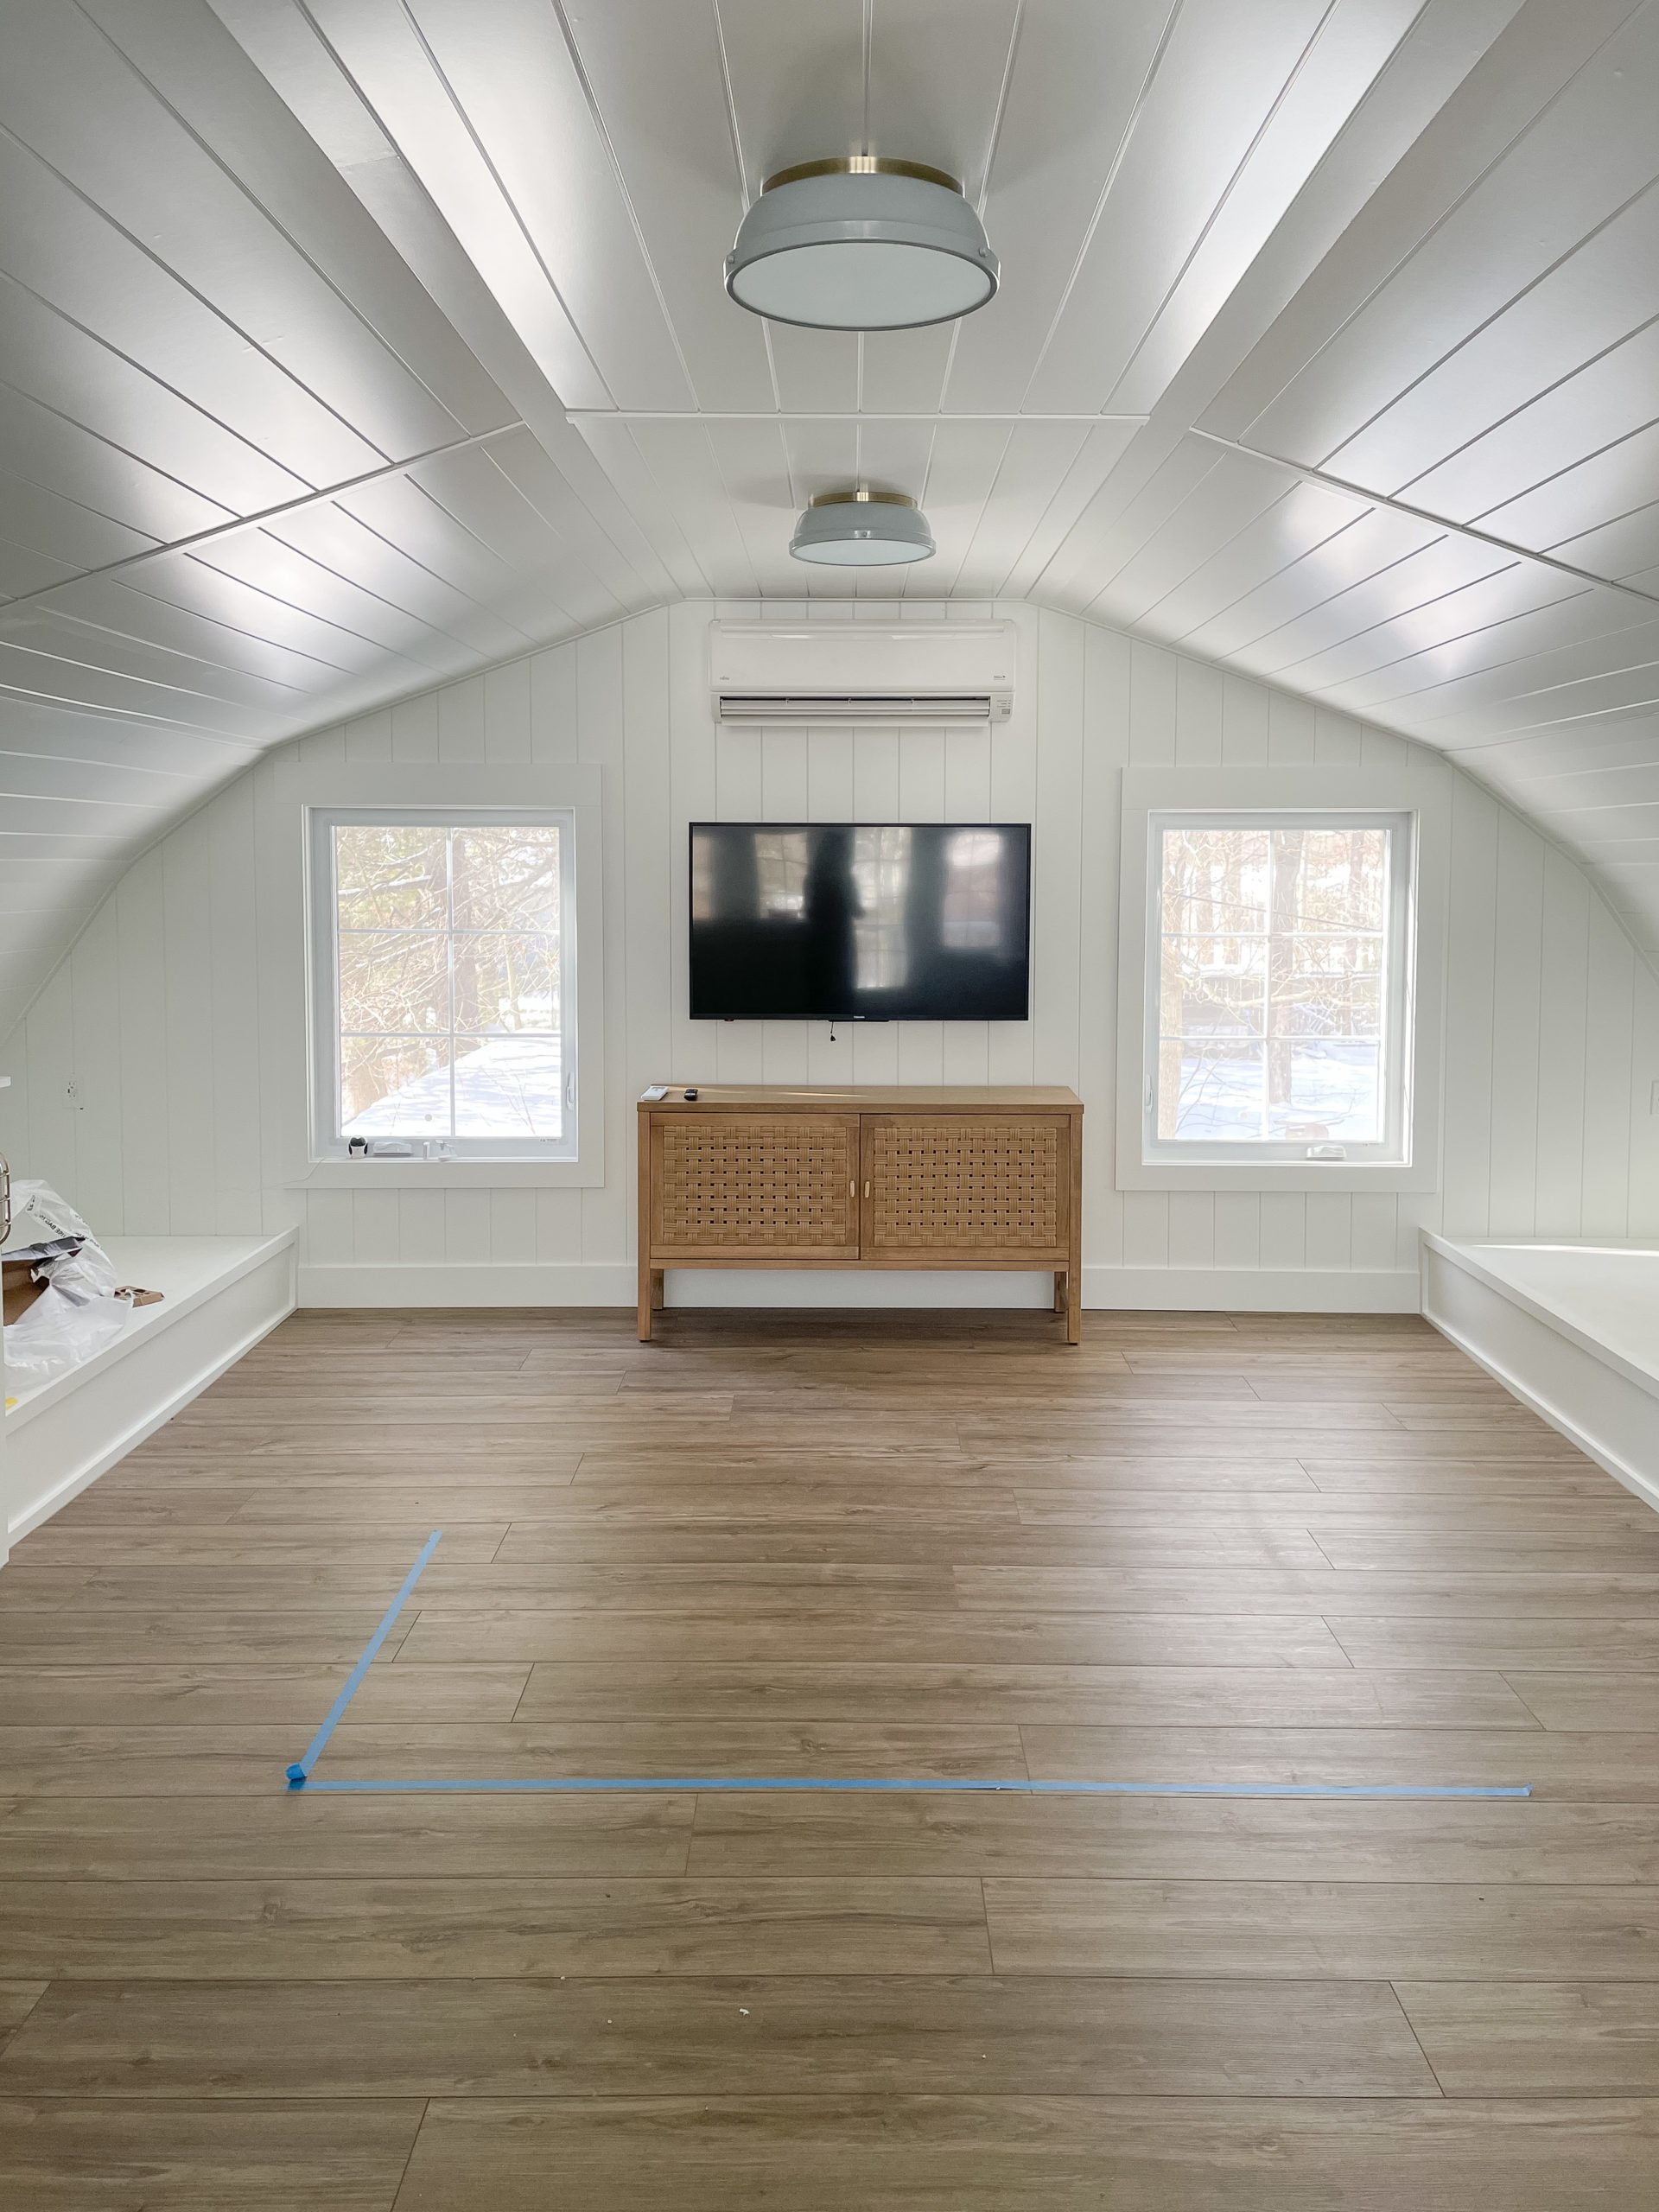
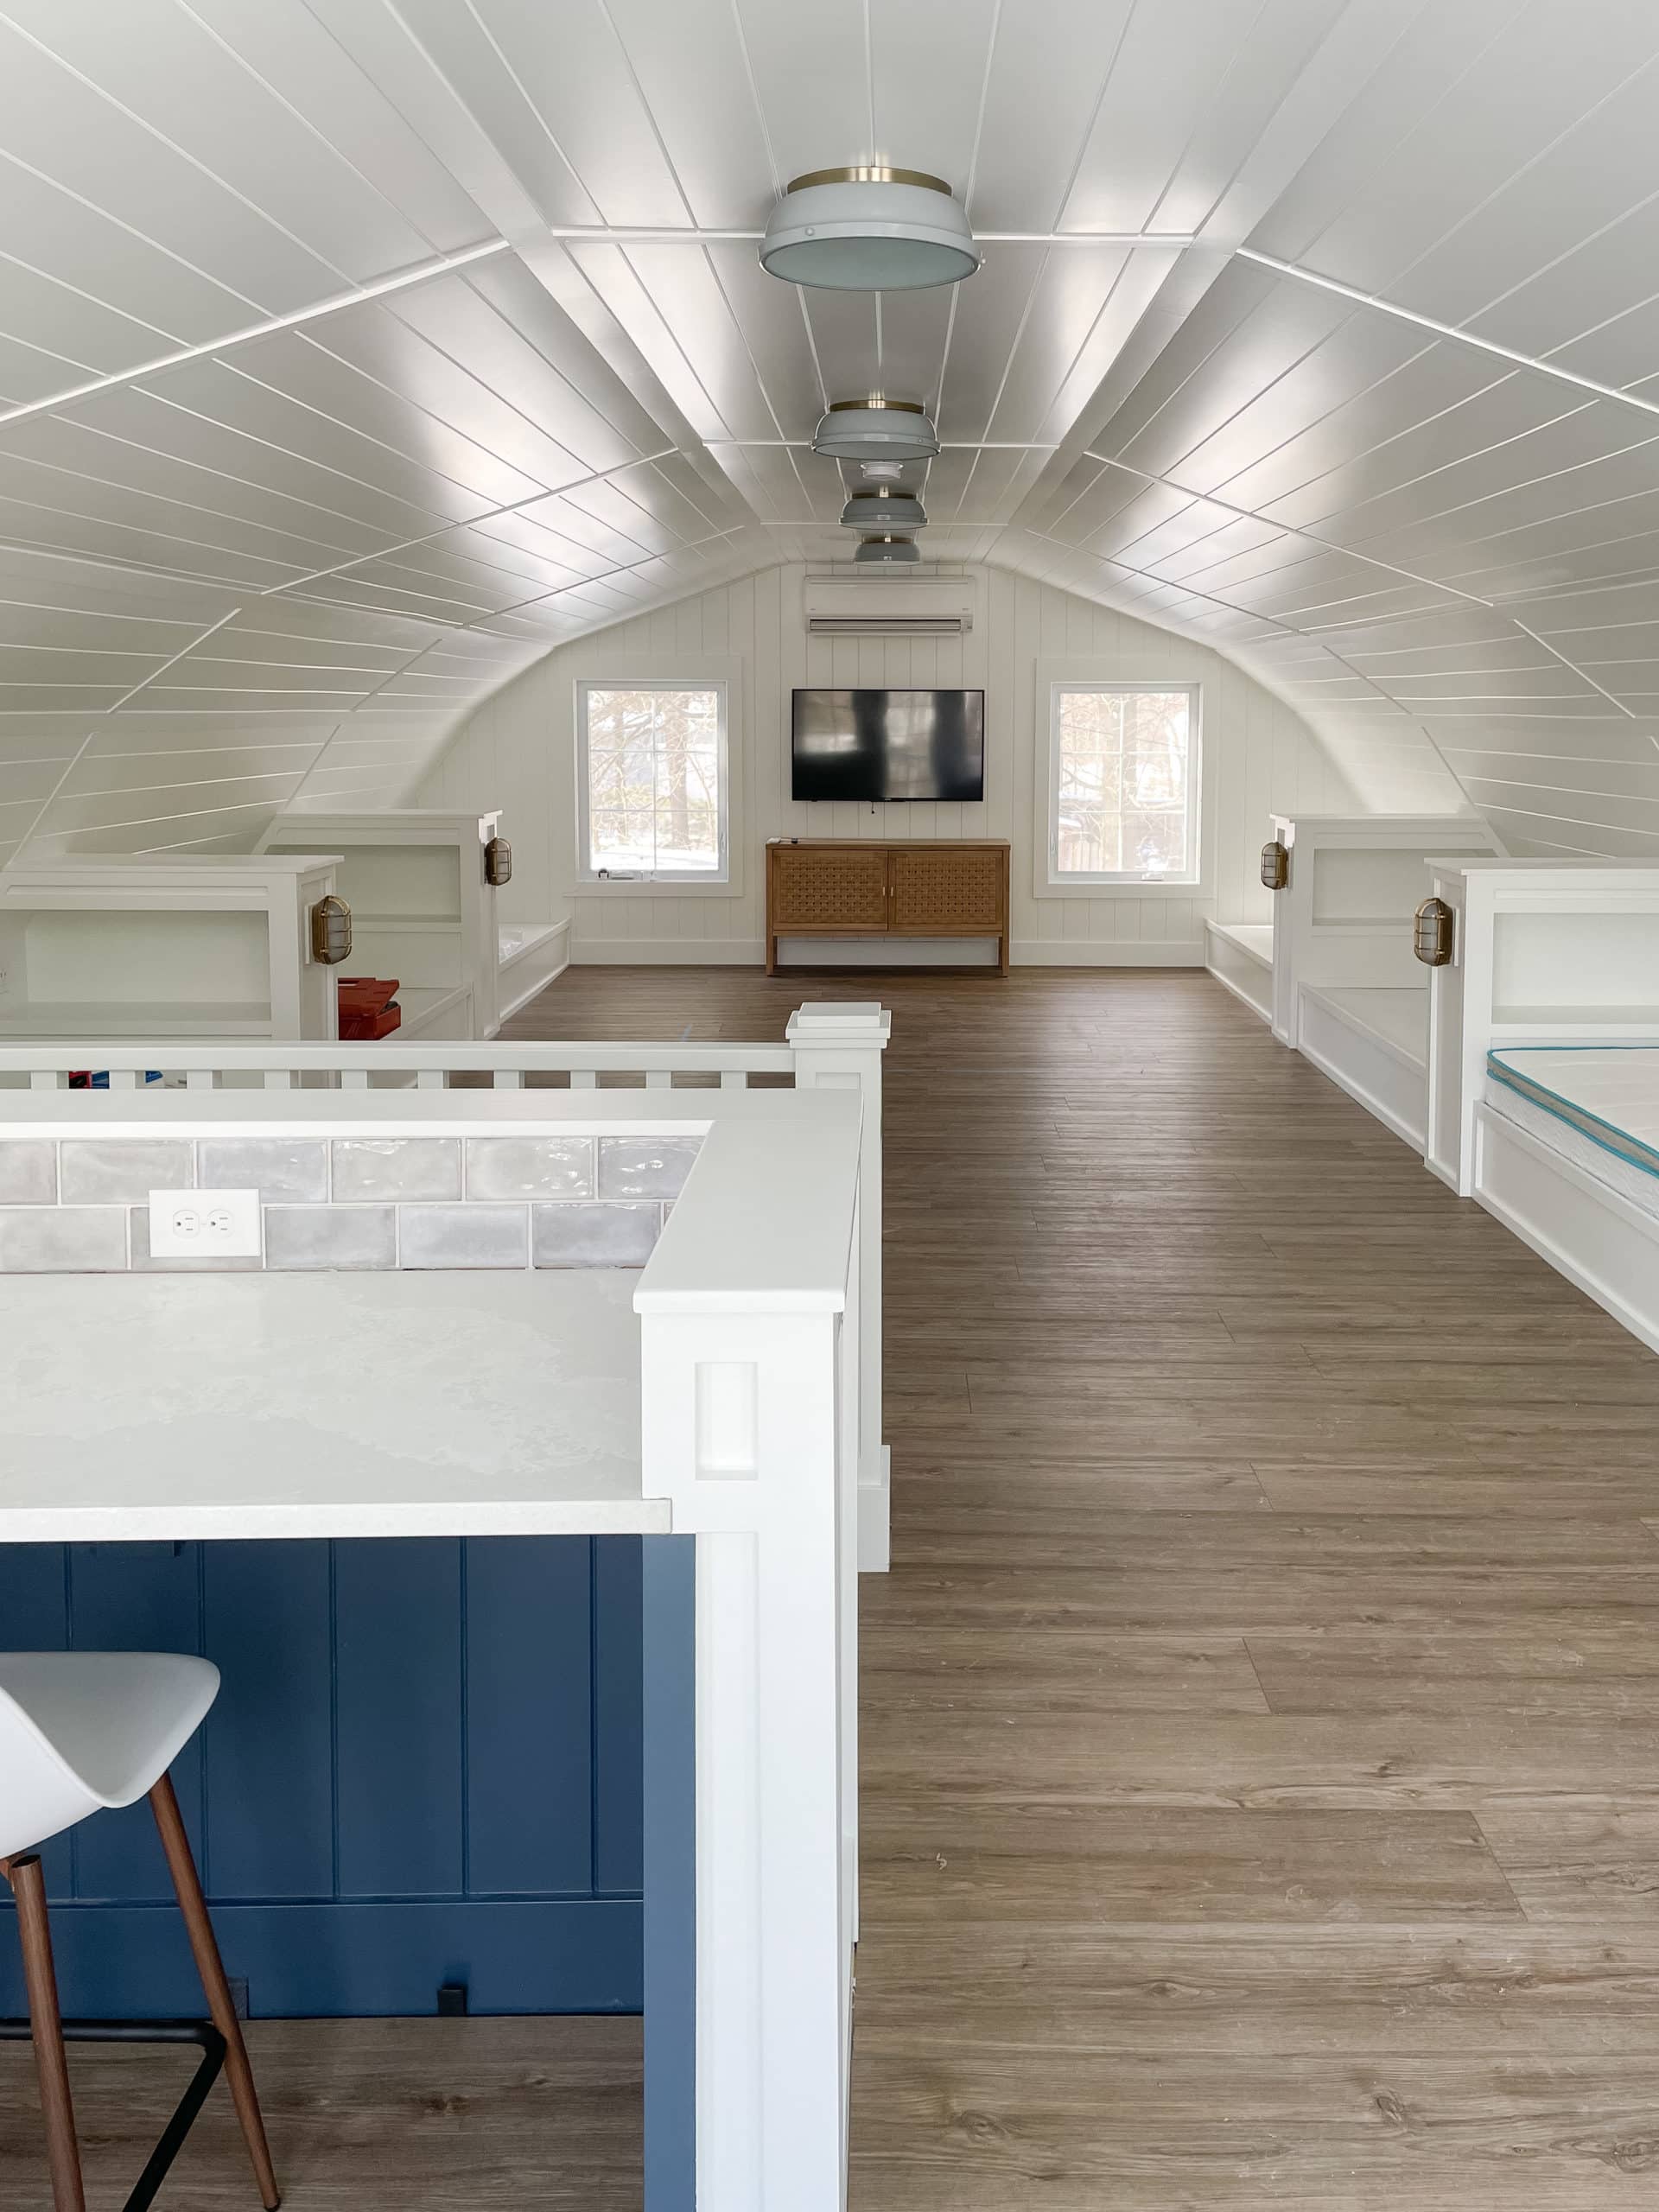
I’m still waiting on one more barstool to arrive for the snack bar.

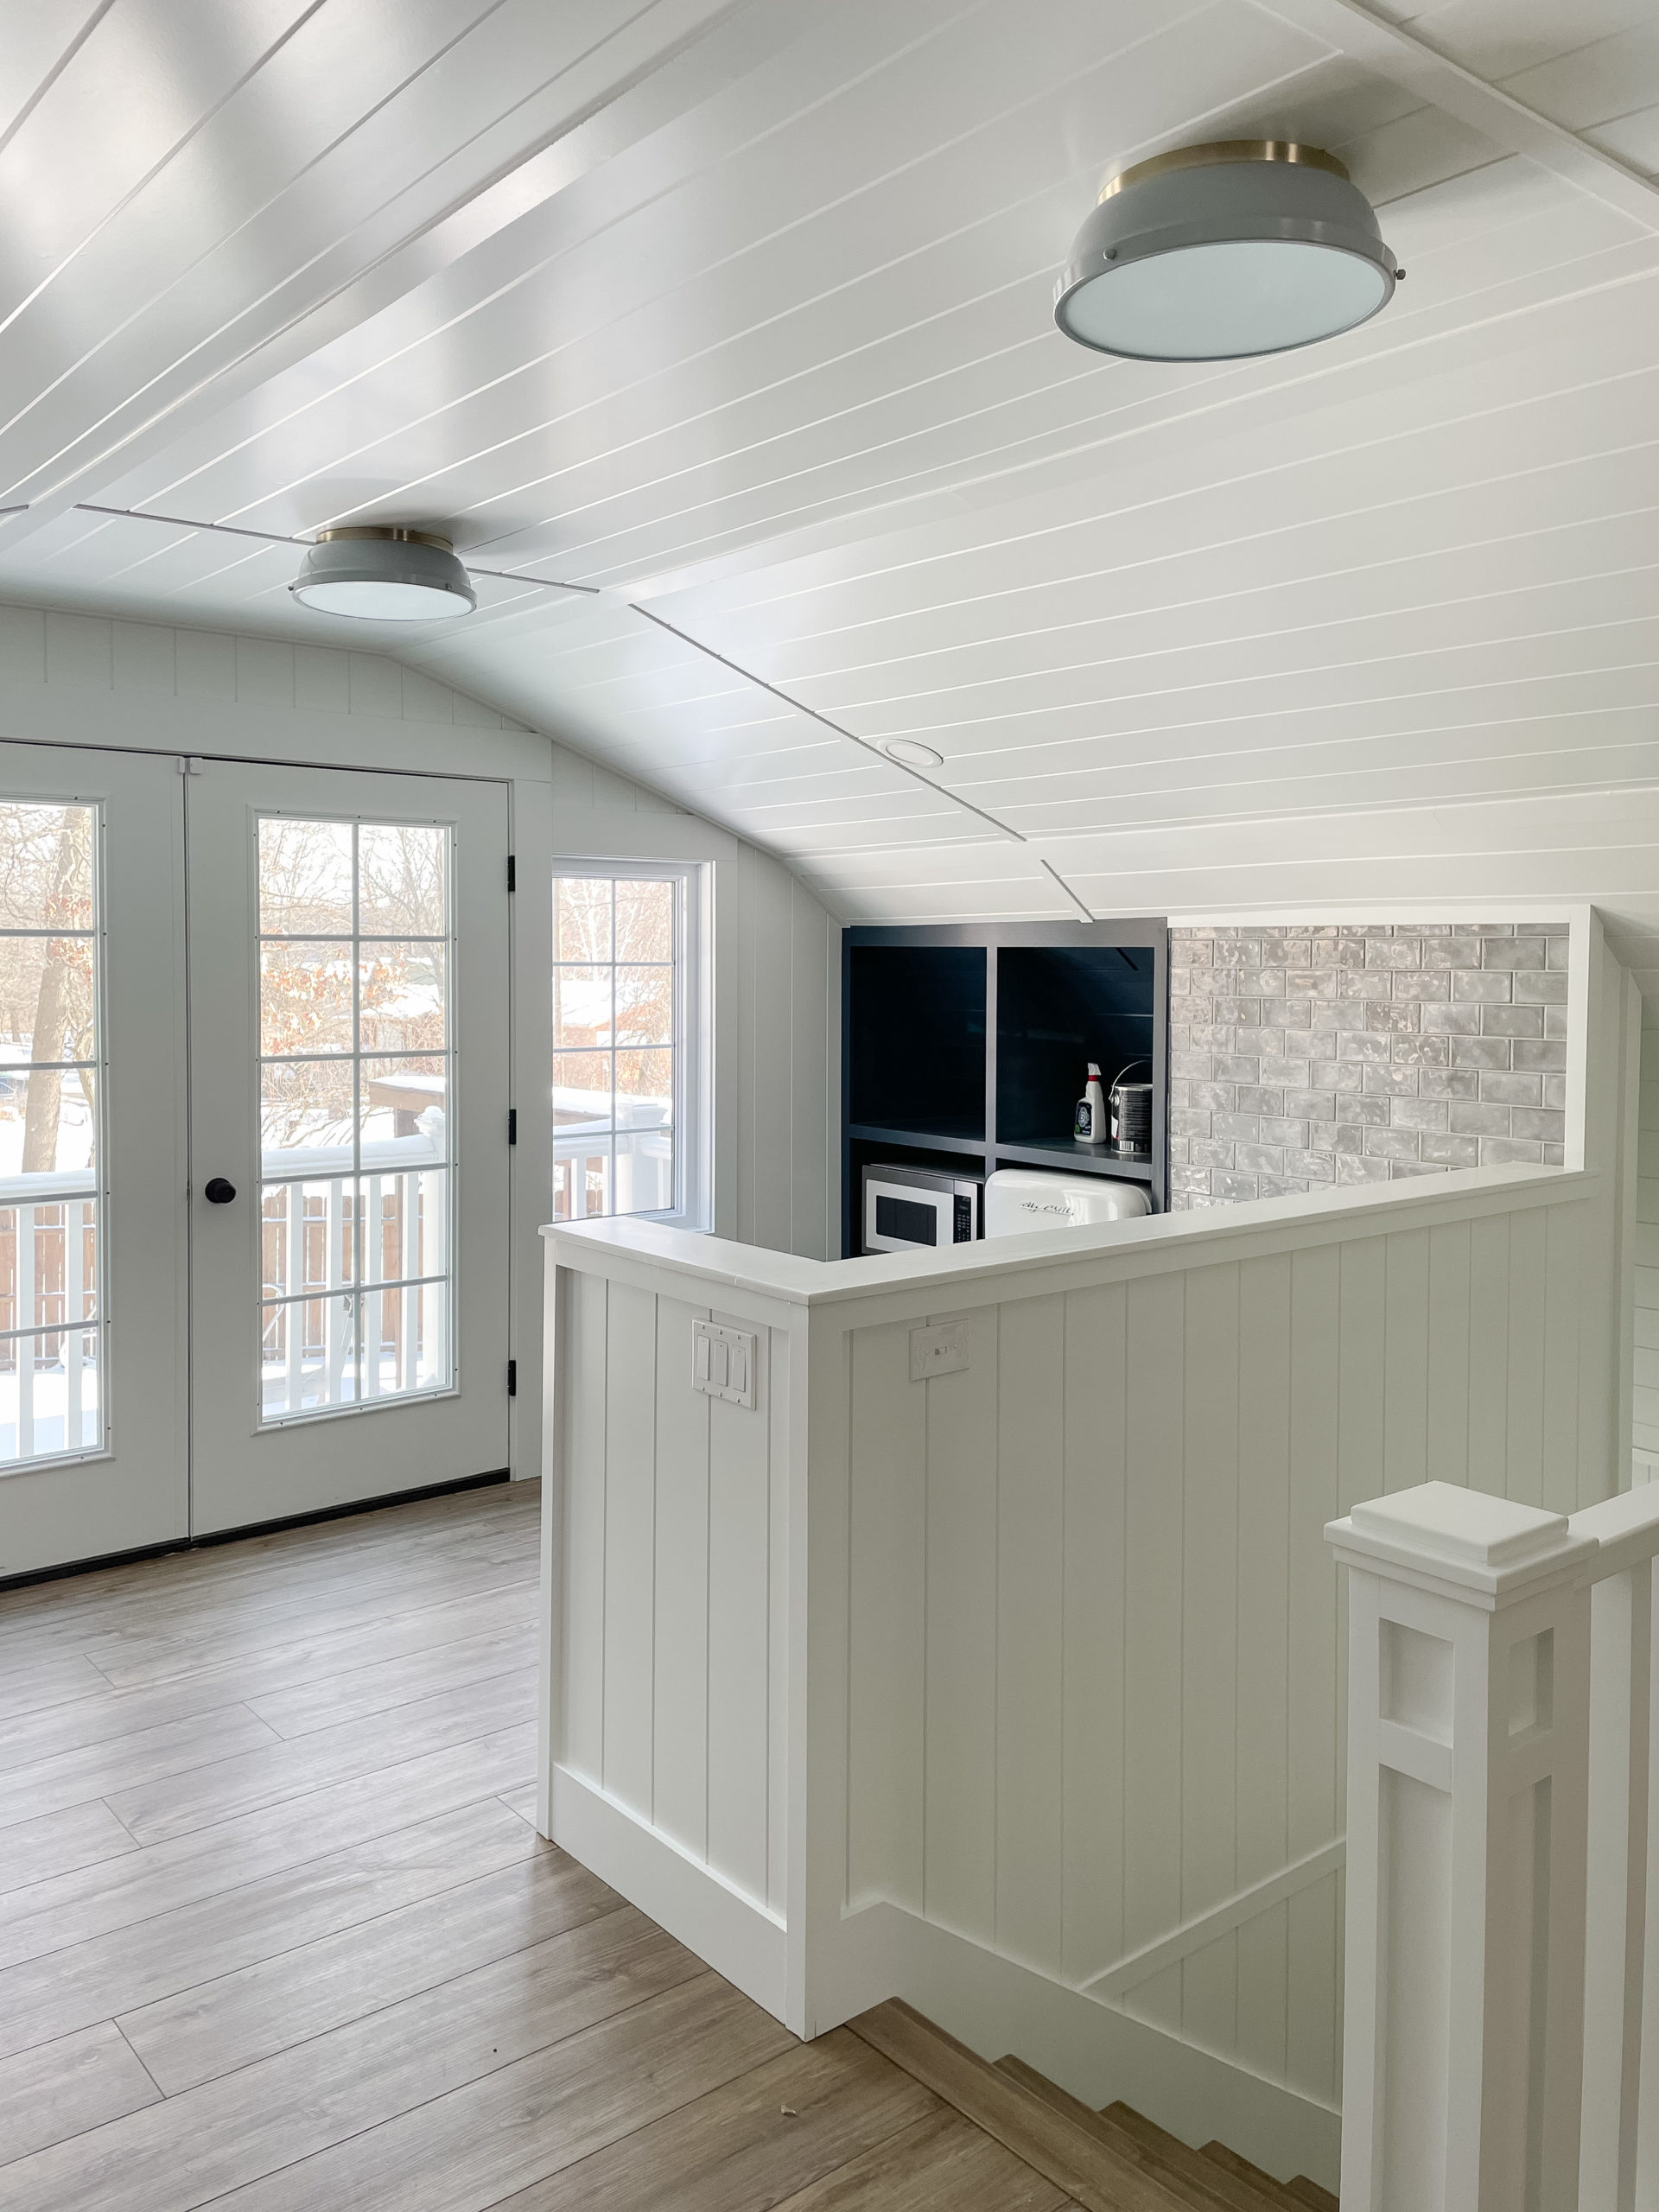
The trickiest part about tiling is figuring out the math to pick a starting point. Luckily the Mr. was in charge there as we wanted everything to line up right with the countertop (we still need to caulk between the tile and countertop yet). Oh, and our countertops are in! Man, I really have been holding out on you. It feels like all of a sudden a thousand things happened in the course of 10 days. This little pseudo kitchen area is really coming together. The cabinet doors are being installed later this week as well!
Pool House Tile
Again these floors are filthy, I cannot wait to give everything a good scrubbing.

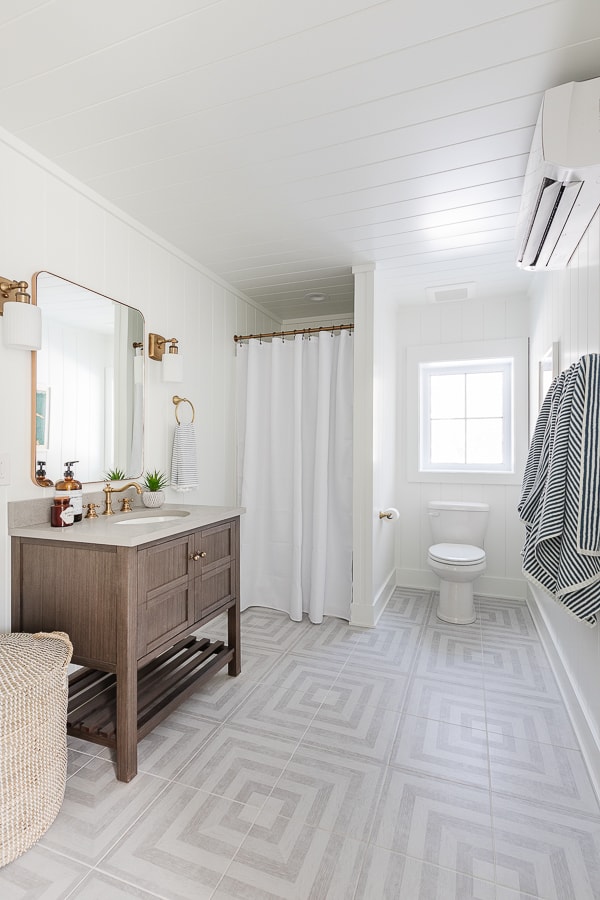
Once we had familiarized ourselves with tiling the backsplash, we tackled the mudroom and bathroom floors. I’ve never done a patterned tile like this and I’m glad we are both still alive to tell the tale. I can’t tell you how many times we would measure and mark the tiles to cut, only to realize we had flipped the tile around in the process and cut the wrong side off. Thankfully we always realized it before we got too far in the process and were able to take the tile up before our ineptitude was permanently memorialized for all to see. This floor was our Everest! We were so happy when we were done and the pattern was intact – phew! The shoe molding still needs to be installed if you notice the little gaps by the baseboards.
I have to say I’m in love with how it turned out! It’s just the right amount of fun and whimsy for a pool house space but with a classic feel that will age well. Don’t mind the photo frames below I was testing out which size will hide the pesky electrical box there.
Wow and I almost signed off there, but we haven’t even talked about the lights! The electrician installed all of the lighting fixtures this week and they are so fun. We used all smart switches so you can control the lights from anywhere and now the Mr. sits in bed flipping lights on and off from his phone like a maniac. What can I say? We are easily amused these days.

Charlie approves of any room that has a good napping spot, so this room is a dream for him. I was trying to determine if I wanted Euro shams or standard shams on the bed and he was my helper. We agreed Euro was the way to go.
Ok, NOW I think that’s everything! Wow, we are so close to being done over here. The plumber is coming next week, the trim guys need to add the shoe molding a few little touch-up things here and there and I can move stuff in after a good scrubbing! Well more stuff, you may notice I stuck the tv console in here, (so we could see what height to hang the tv) and the little storage cabinet in the mudroom too. Ok and the kitchen stools…I know it makes zero sense to be decorating a construction zone, but I can’t help myself. I’m pretty proud that I have refrained from hanging on art on the walls!
You can check out more of this project below –
SOURCES: Disclaimer – This post contains affiliate links. I may receive a small commission for purchases made through these links at no extra cost to you. Just click on the BOLD links.
Wall color – Extra White by Sherwin Williams
Cabinet color – Blue Note by Benjamin Moore
Countertop – Quartz by Vicostone the color is Olympus White
Is the hardware on your doors black?
It is yes!
Love the first floor tile floor, it is just what I have been looking for a similar area we have. Did you do the install yourself? How difficult was it (other than old bones)? What color did you use for grout? White? Thanks in advance!
We did install ourselves and it wasn’t too difficult. We just needed to make sure we kept the pattern straight. We used Mapei grout in Frost – thanks!
AMAZING! Well done on the tiling, I’m thinking I could give it a go now I’ve seen yours! Just wondering if a sink is still to be installed up in the kitchenette? Or are you just going to use disposable cups etc?
We didn’t really have a good spot for a sink upstairs unfortunately, we decided having more counter space at the snack bar was more important. The fridge will be stocked with cans of sparkling water, pop, juice boxes, etc and we will have a recycling bin out there. Thanks!
Kelly,
You have done an awesome job as usual! It looks absolutely beautiful!
Thanks so much!
Wow, you have made so much progress and all looks great!
Thanks Sue!
ILOVE what you did!! It’s looking so good! Well done! What is the white thing on the wall above the tv? Is it a heater? I really love everything what you’ve done. Outstanding!
It’s called a mini-split and it’s a heating and cooling unit yes. It was the best option out there since there wasn’t room for duct work – thanks!
Looks amazing. I can’t wait to see it in person. Love, Love, Love it!!!!
Can’t wait till you all can come over again!
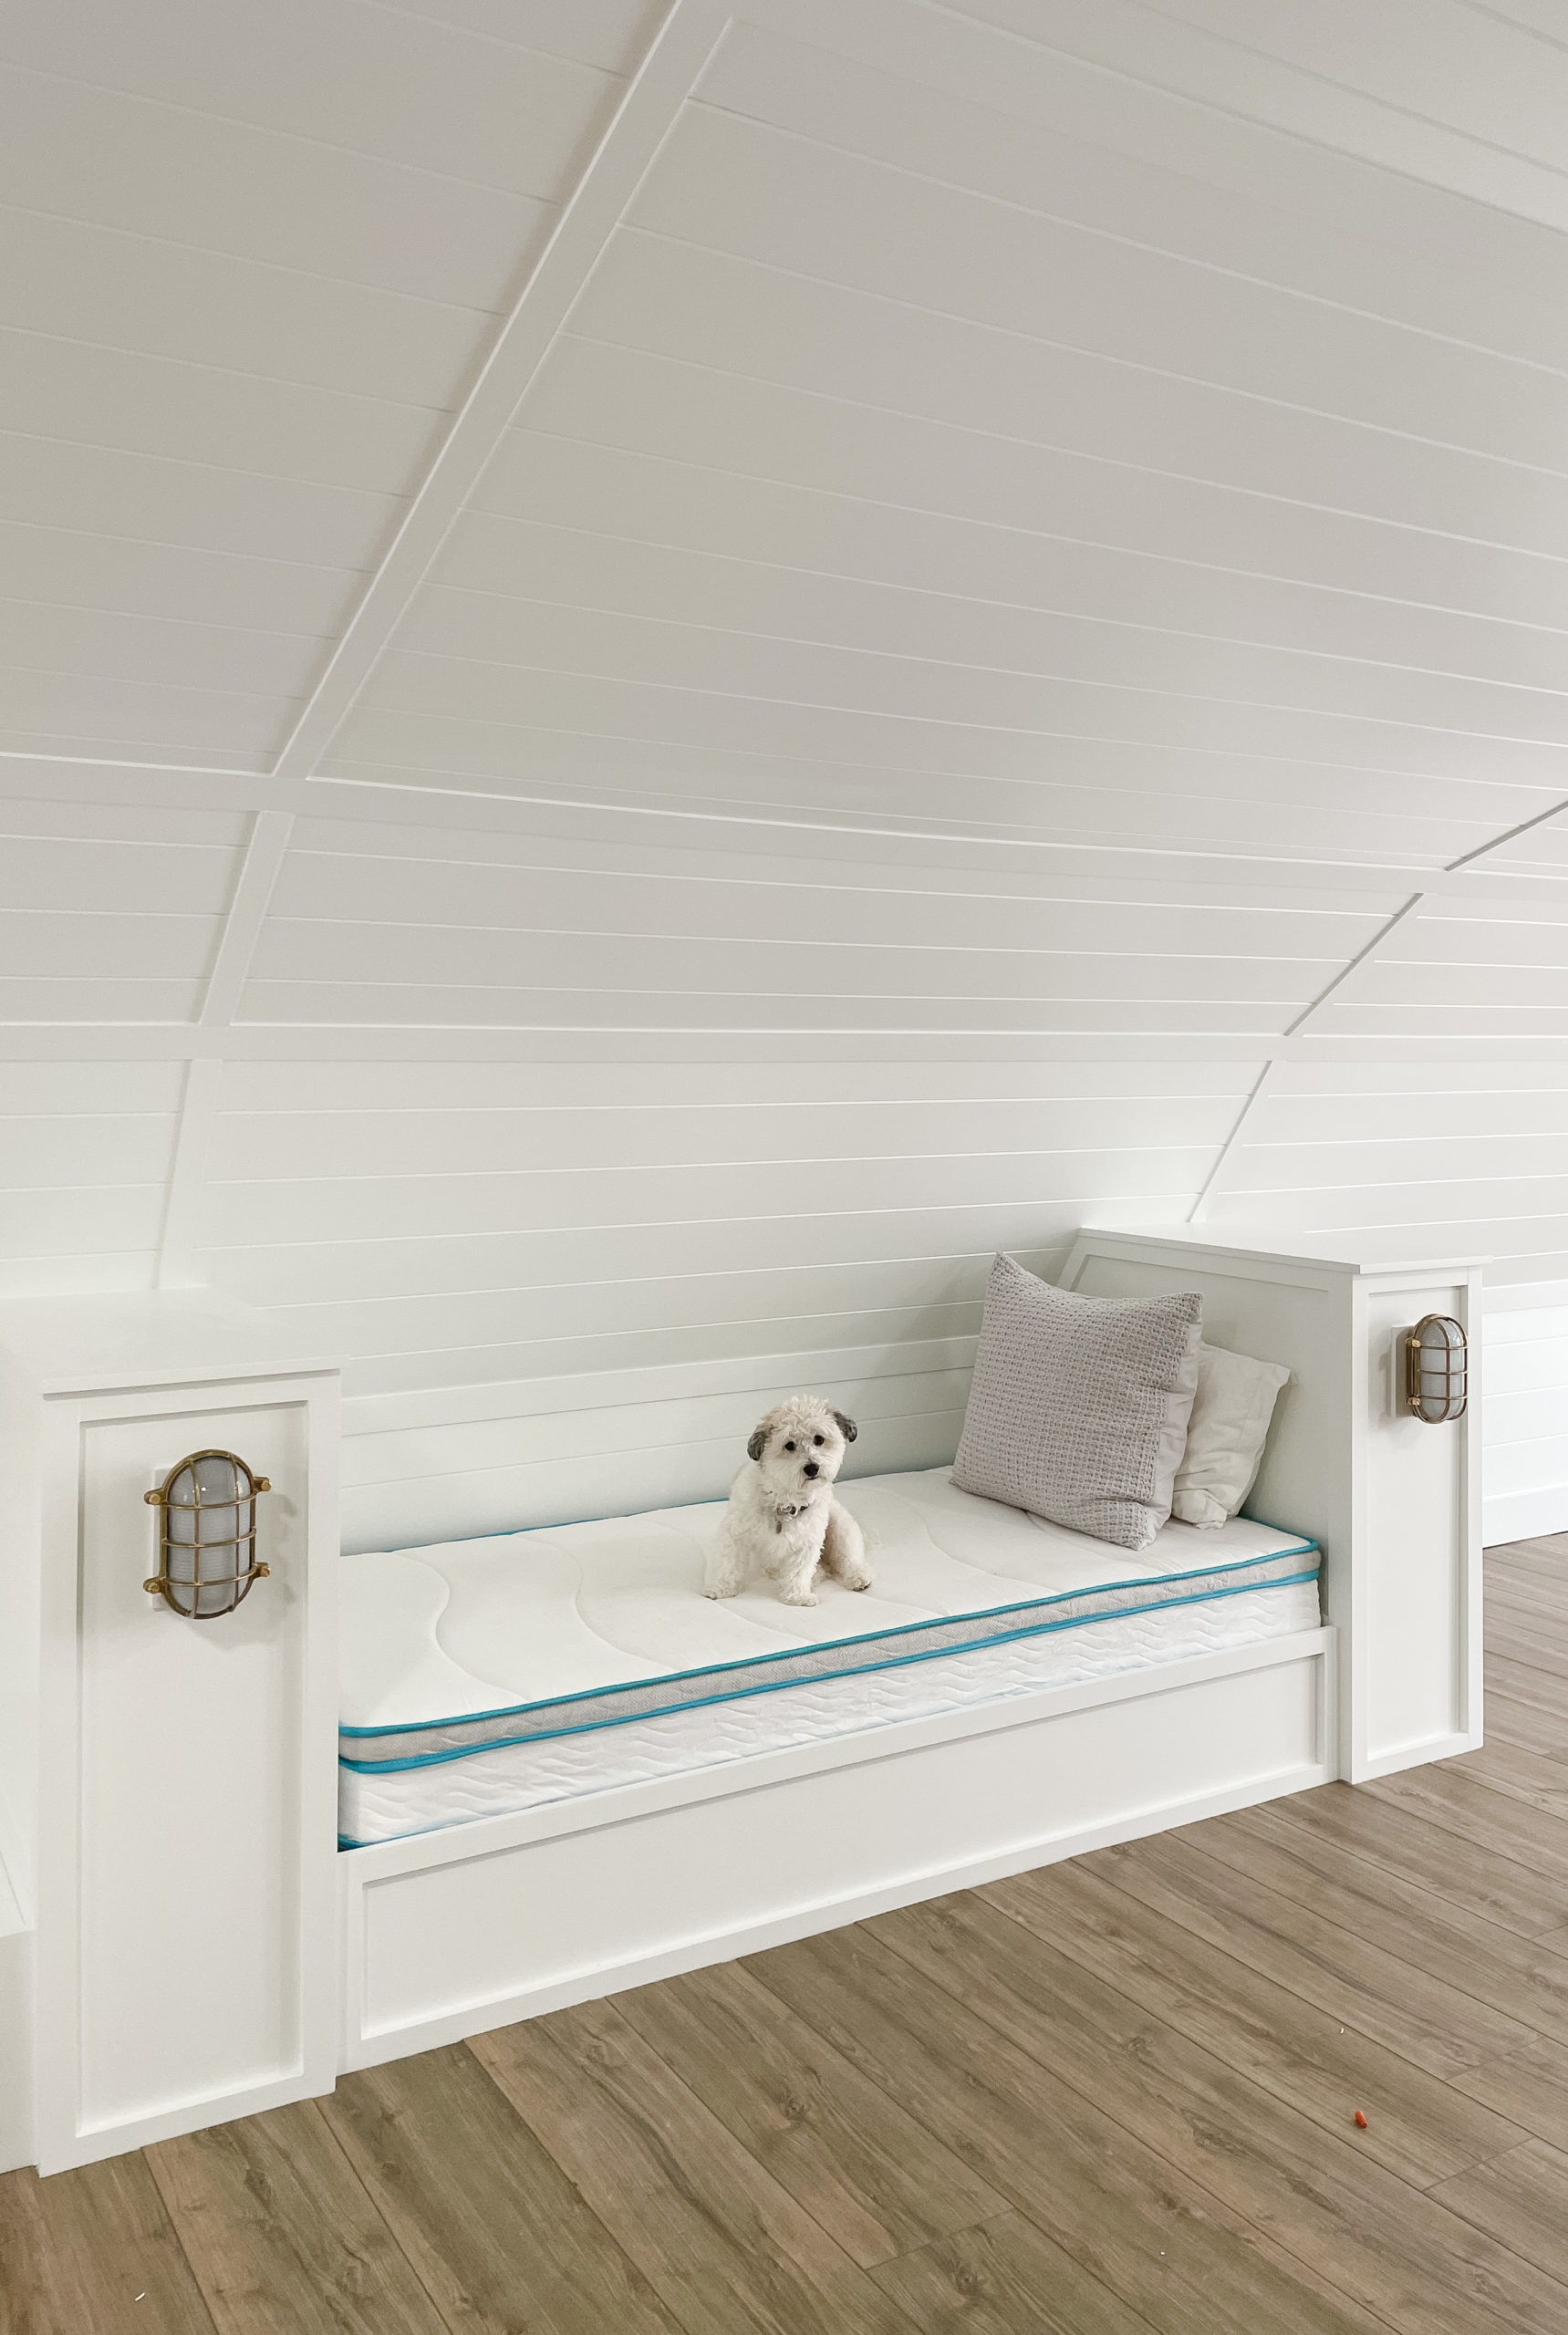
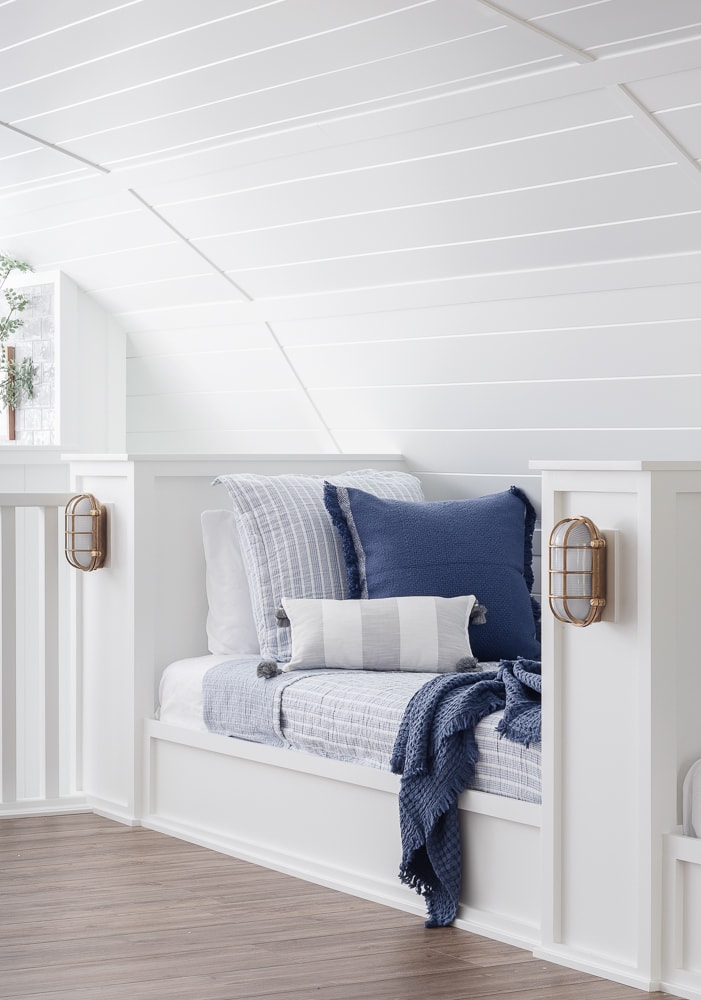
Just wondering what length the beds are? My teenage sons are so much taller and twin beds are becoming uncomfortable? Did you go longer on the length for adults or taller guests? The whole space is just so comfy and relaxing!!!
Never mind..I’m so dumb..saw the link for the mattresses!! Smart to go with XL
Not dumb at all ha! Yes, we went with the XL and one of the guys who built the beds is 6’3 and was able to fit comfortably.
Can you remind me what you used on the walls? It’s not shiplap…i’m just drawing a blank!:) Could you link to the product by chance? Thank you! In love with everything!!!
It’s MDF paneling that was milled with a v groove at 6 inch increments – thanks!
The pool house is looking so great. I can totally understand those knees and joints becoming more noticeable. Despite the body feeling our age- you still have your whits about you and are doing such a great job accomplishing your goals. It will be so worth it for this upcoming summer time fun. Thank you always for sharing your projects and talents.
Thanks Amy, it’s been fun to share with you all!
OMG. It looks amazing!!! So bright fun but classic. Wish I could visit and hang out LOL.
Thanks so much, it’s been such a fun project!
Hi Kelly, I’m interested in LVP because I have friends who have vinyl plank in an apartment and hate it. I’m guessing though the operative word here is “luxury”. Obviously, a higher grade that doesn’t make noise when you walk on it. Can you say more about what you installed?
It’s a dreamy space and you’ve done a great job.
June
Hey June, we paid the extra $ for the underlayment and I think that made a HUGE difference in the noise factor. I would definitely recommend that step.
Your work has really paid off, it looks amazing. I can just imagine the fun that will be had there. Between the lake and the pool and poolhouse, your kids’ friends won’t ever want to leave! Now prepare for the grocery bill😉
Haha yes it’s crazy how much more $ I spend in the summer on snacks and drink etc…but we are happy to have them. It goes by too fast!
I love all of your choices of materials and the design(as usual)! This is a space that is timeless. It’s fun for all of us to be along for the ride!
Thanks, Joanne timeless was a definite goal with this design!
This is such a cool space. I have loved watching it come together!
Thanks Abby!
Looks Amazing! 😍
Thanks!
The way you laid the flooring really did expand the space! Everything looks so good. While Dan played a key role in this project it is clear that the critical decisions were best made by Charlie…
Hahaha yes Charlie is always the best project manager :)
Thank you for sharing all the details of this project…it was like watching a mini-series during the pandemic! Beautiful nearly-finished project!
Thanks for following along, it’s been so fun to share with you all!
Kelly,
It looks amazing! Kudos to you and the Mr. for installing the flooring yourselves!!!
Quick question…my husband and I want to install LVP in our basement and I noticed you don’t have shoe molding on the second floor…I love the clean look! Are you adding it? Or did you just butt the LVP right up to the baseboard and not leave a gap? I’d like to do the same thing!
Hey yes, the shoe molding just isn’t installed yet in these photos. You don’t want to butt it right up to the baseboards because you are supposed to leave a little expansion gap. You can remove your baseboards, lay the flooring, and then replace them for that cleaner look.
Thanks! That’s what I thought. It looks great!!!
It all turned out perfect!! Love everything about this space! You really outdid yourself on this one!
Thank you!
WOW! (. . . which is what your guests are going to exclaim when they get to the top of the stairs!) It’s amazing, Kelly! Every. Single. Detail.
I was SO excited reading this post and savoring each photo and I’m beyond excited to think about your future posts showing the bedding and how you style the room. Oh, be still my heart!
But, after reading how you two did all the tile and flooring. . . my knees hurt, lol.
Thanks Dori! Cannot wait to style and finish up this space, it’s going to be so fun!
It looks absolutely gorgeous !!!
I think it is going to be a well used and loved space.
Well done to you all !!
Thanks Tracy, we are really excited to use this space as a family for sure!
As always Kelly everything looks amazing!!! I would want a sleepover – actually I could live in
the pool house! LOL Great job – beautiful.
Haha I’m ready to move in over there too!
I’m ready to move in!!
Haha thanks!
It is so amazing to see your vision come to life! Your choices have been spot on, as usual. Love everything you’ve done…makes me wish I had a building like that for all my grandkids to come to visit…(if this COVID ever goes away)….good thing that your kids are old enough to look after themselves while you and your hubby were across the street doing this amazing work! 👏👏👏 to the both of you! …and of course, Charlie for the seal of approval!
Marie
Yes so thankful they kept themselves busy while we did the flooring, although my little guy liked helping too!
OMG Aunt Lois would love the pool house! BTW we have LVP all through our main floor. The entry & bath look like tile, the rest like wood. It’s amazing, especially in this crooked old house.
LVP is SO great for crooked spots, the floors were very wonky in here! It definitely looks different than it used to :)
This looks amazing!!! Love everything about it!
Thanks Marta!
Your house/ pool house is going to be the place to be this summer! It turned out beautiful!
Thanks Rebecka! So excited for summer :)
This is the coolest space for a fun sleepover/family visit . You really had a vision and worked so hard to make it become a reality. I bet the kids can’t wait to use it. Really turned out high quality style. Very special space!
Thanks Kristen, it’s been so fun to see it finally come together!
Amazing! Looks so beautiful. Are you taking reservations? 😀
Haha I wish :)
Love the space.
Thank you!
Looks amazing as does everything you do. Any plans to paint the door to the outside downstairs? I think it would be a fun pop of color.
Probably not because the mullions in the doors are white so I want it to match that, fun idea though!