
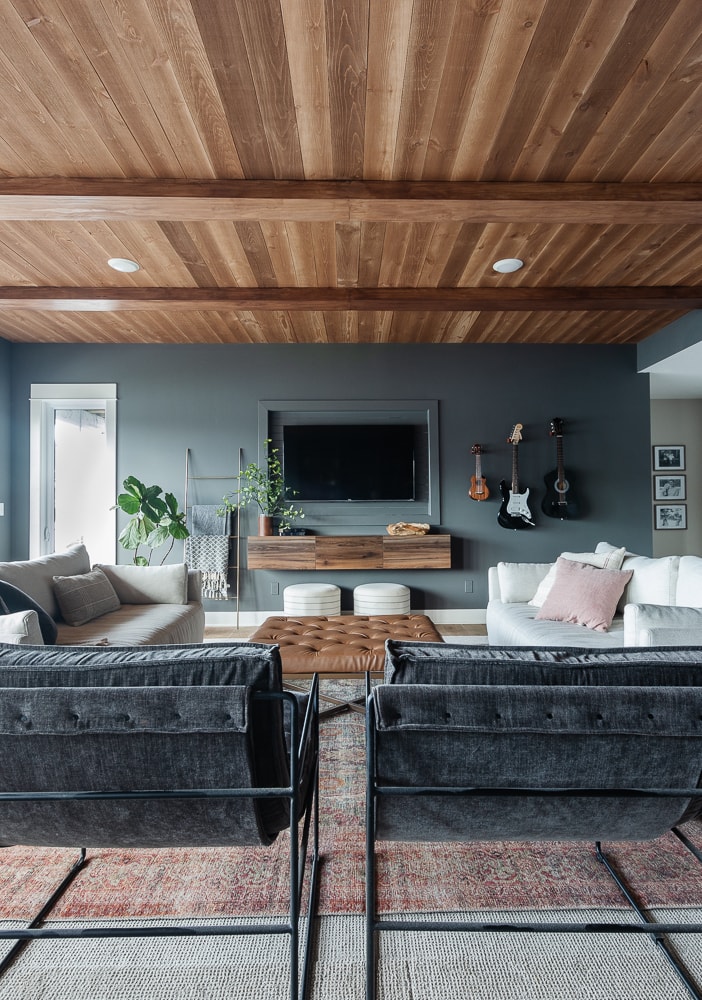
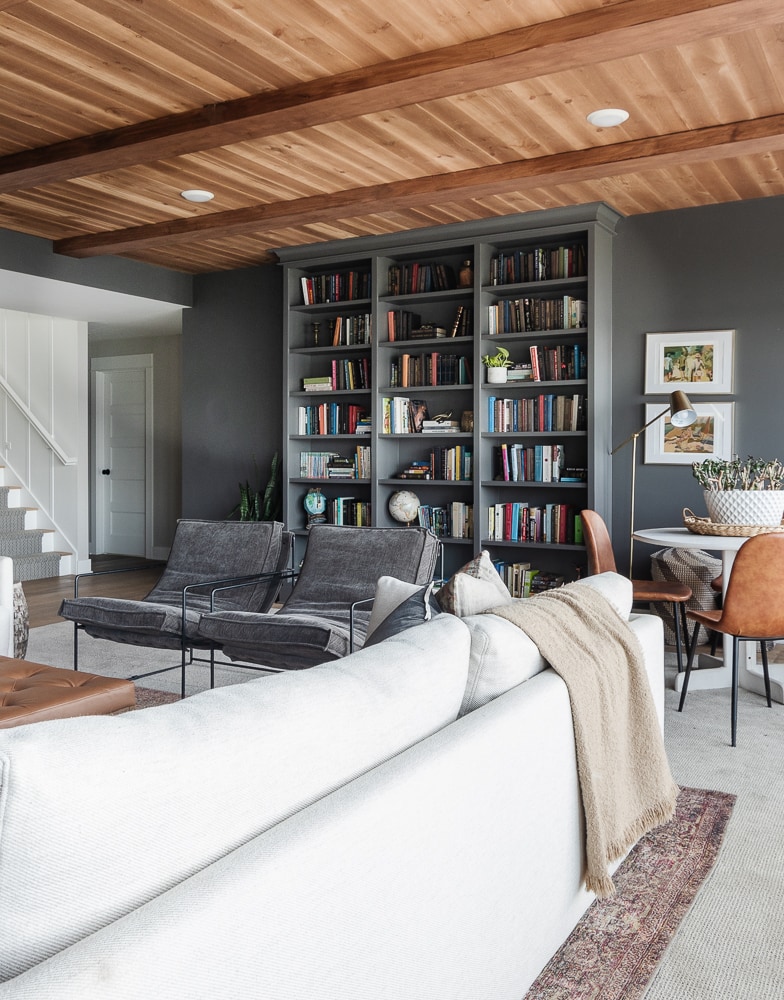
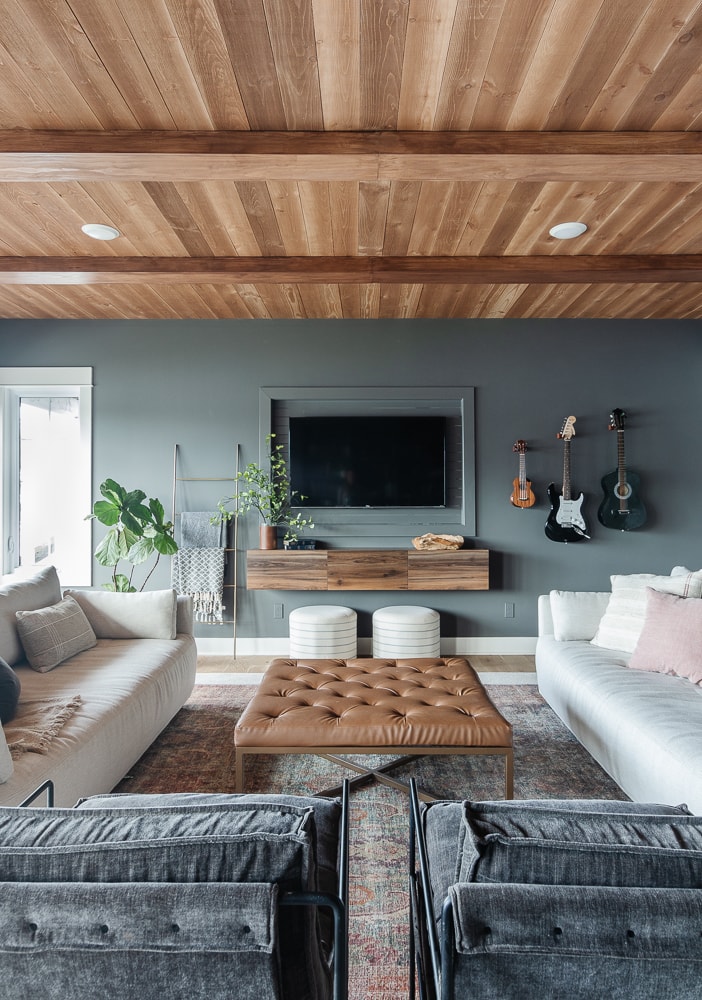
DIY Planked Wood Ceiling
A year after I started our basement family room makeover, I’ve finally finished! The plan was always to add a DIY planked wood ceiling. It just took me a little longer than I planned to execute it.. I knew I wanted a darker warm color wood ceiling to go with the charcoal walls.
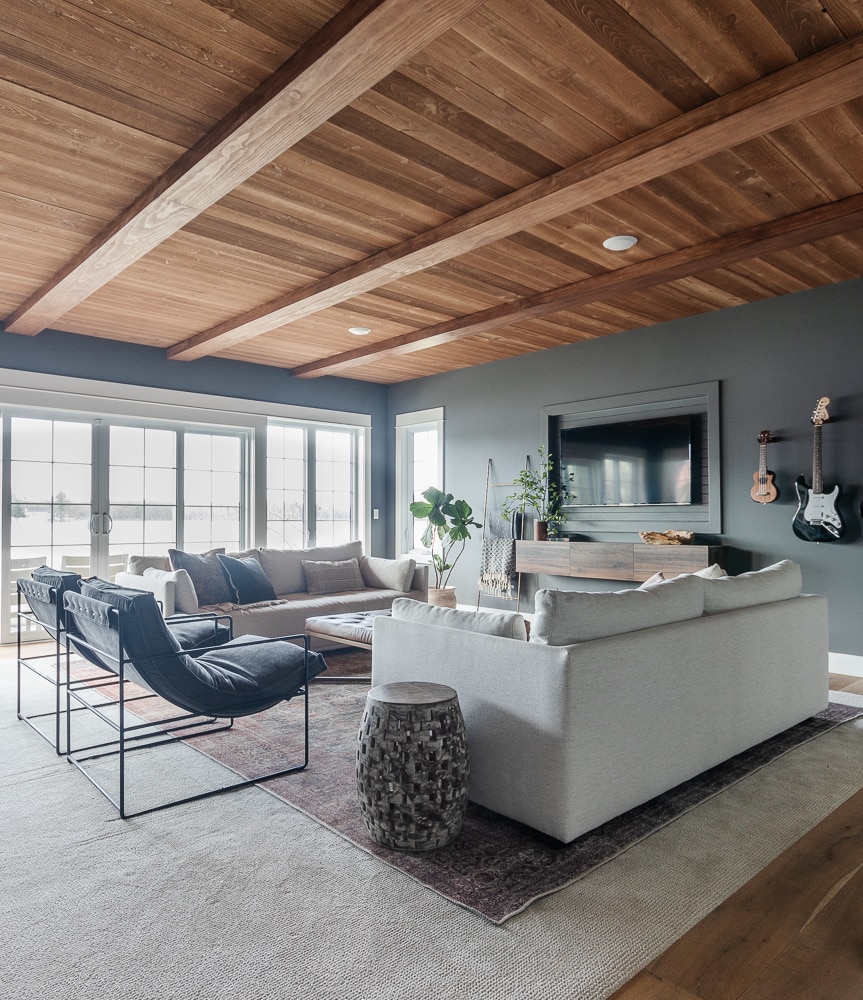
I love the darker cozier vibe, it counterbalances the light and airiness of the rest of our home.
This is where we watch movies, teenagers hang out, and The Mr. man-caves when he has a chance. I thought the wood ceiling would add a nice masculine touch.

I spent a lot of time looking for the exact right products. I did a ton of searching online and came across these pre-stained 4 foot planks from Menard’s.

They had the perfect matte finish and color I was looking for. I knew I wanted to have 4 large cross beams to span the room, so the 4 foot length was perfect.
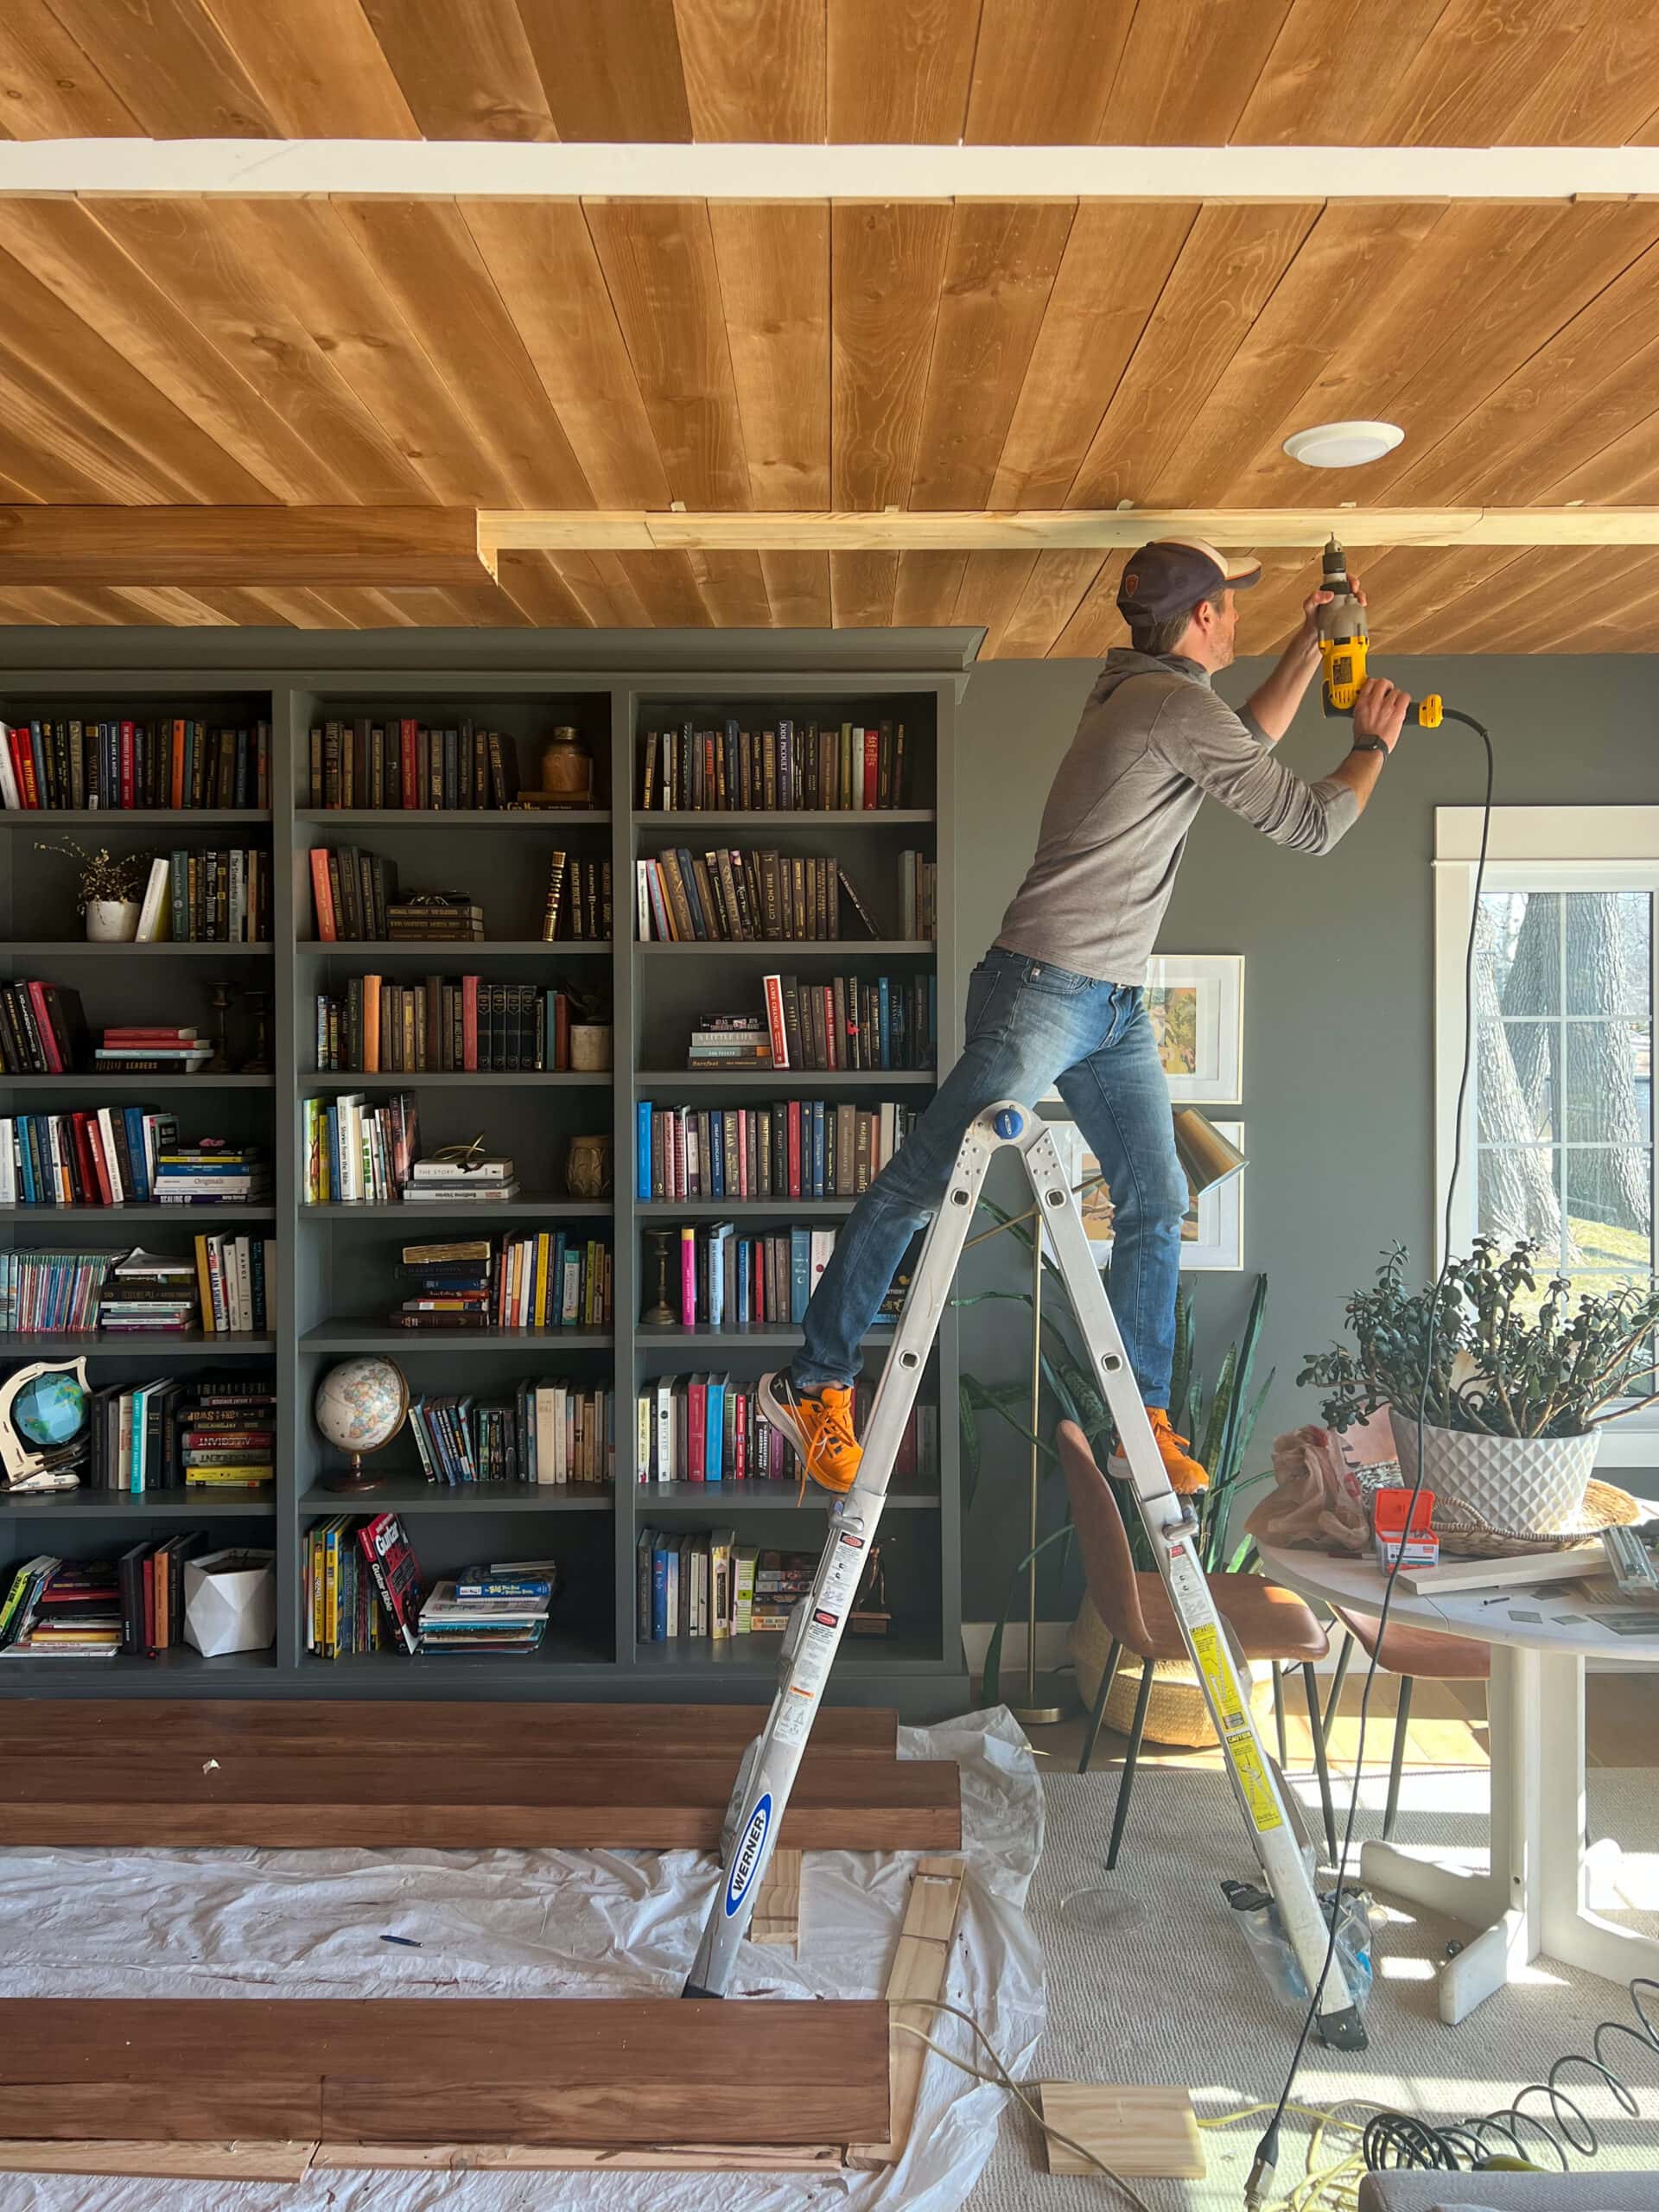
This part was a breeze, minus a little neck pain! The boards are so lightweight. I was able to attach them with liquid nails as well as some light finishing nails. It only took me 2 days to cover this entire 20×20 ft room.

Next came the beams, I’m not going to lie this was trickier than I anticipated. I actually tried to hire this portion out, but I couldn’t get anyone to call me back. We decided to just go for it, and ordered all the wood we needed. We don’t have a vehicle large enough for the 12 ft boards, so we had it all delivered. This would have been fine except typically when doing a wood working project, I like to pick out all of the boards to make sure they are straight. We had two wonky boards that made building one of the beams a huge pain.
We wanted chunkier beams so we used 1×8 pine boards for the middle of the beams, and 1×4 pine for the sides.
We built simple box beams by gluing the boards together with wood glue, and securing them with finishing nails.
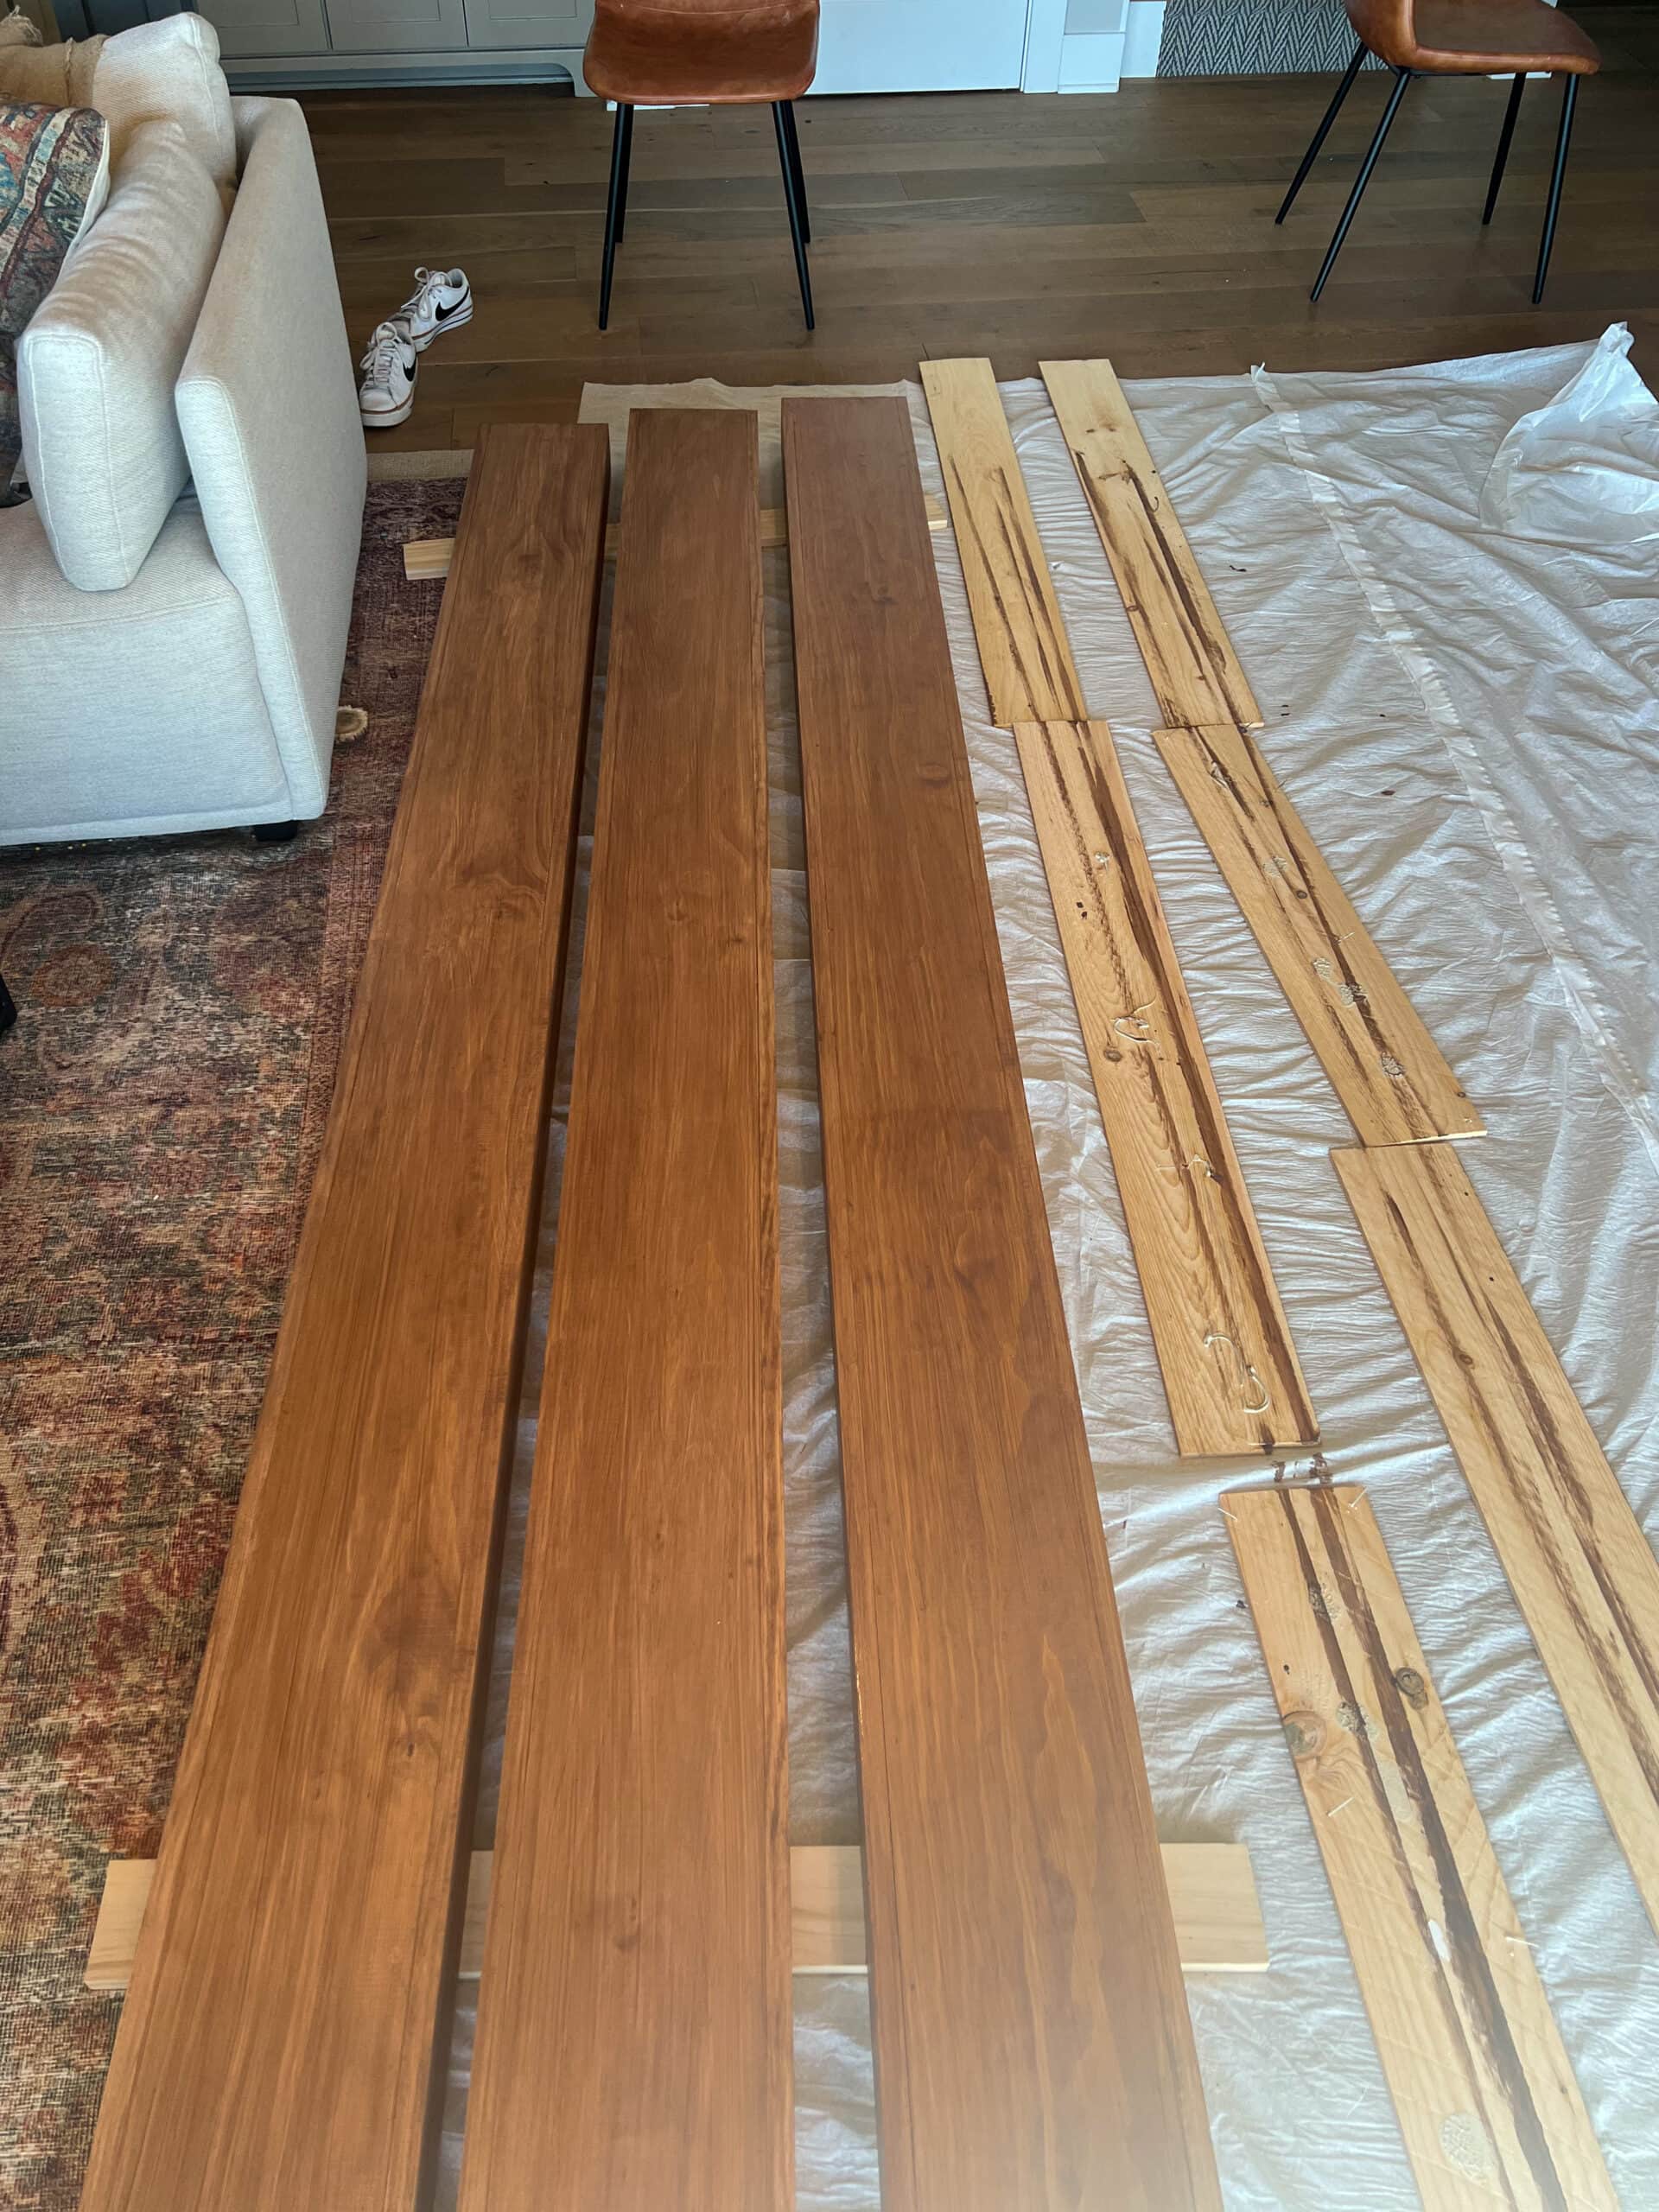
I used wood conditioner on the beams and then coated them with stain (more on this later).
We screwed 1×8 boards into the ceiling joists where we wanted the beams to run. This is where things got a little dicey…since a few of the boards weren’t straight they wouldn’t fit over the 1×8 we attached to the ceiling.
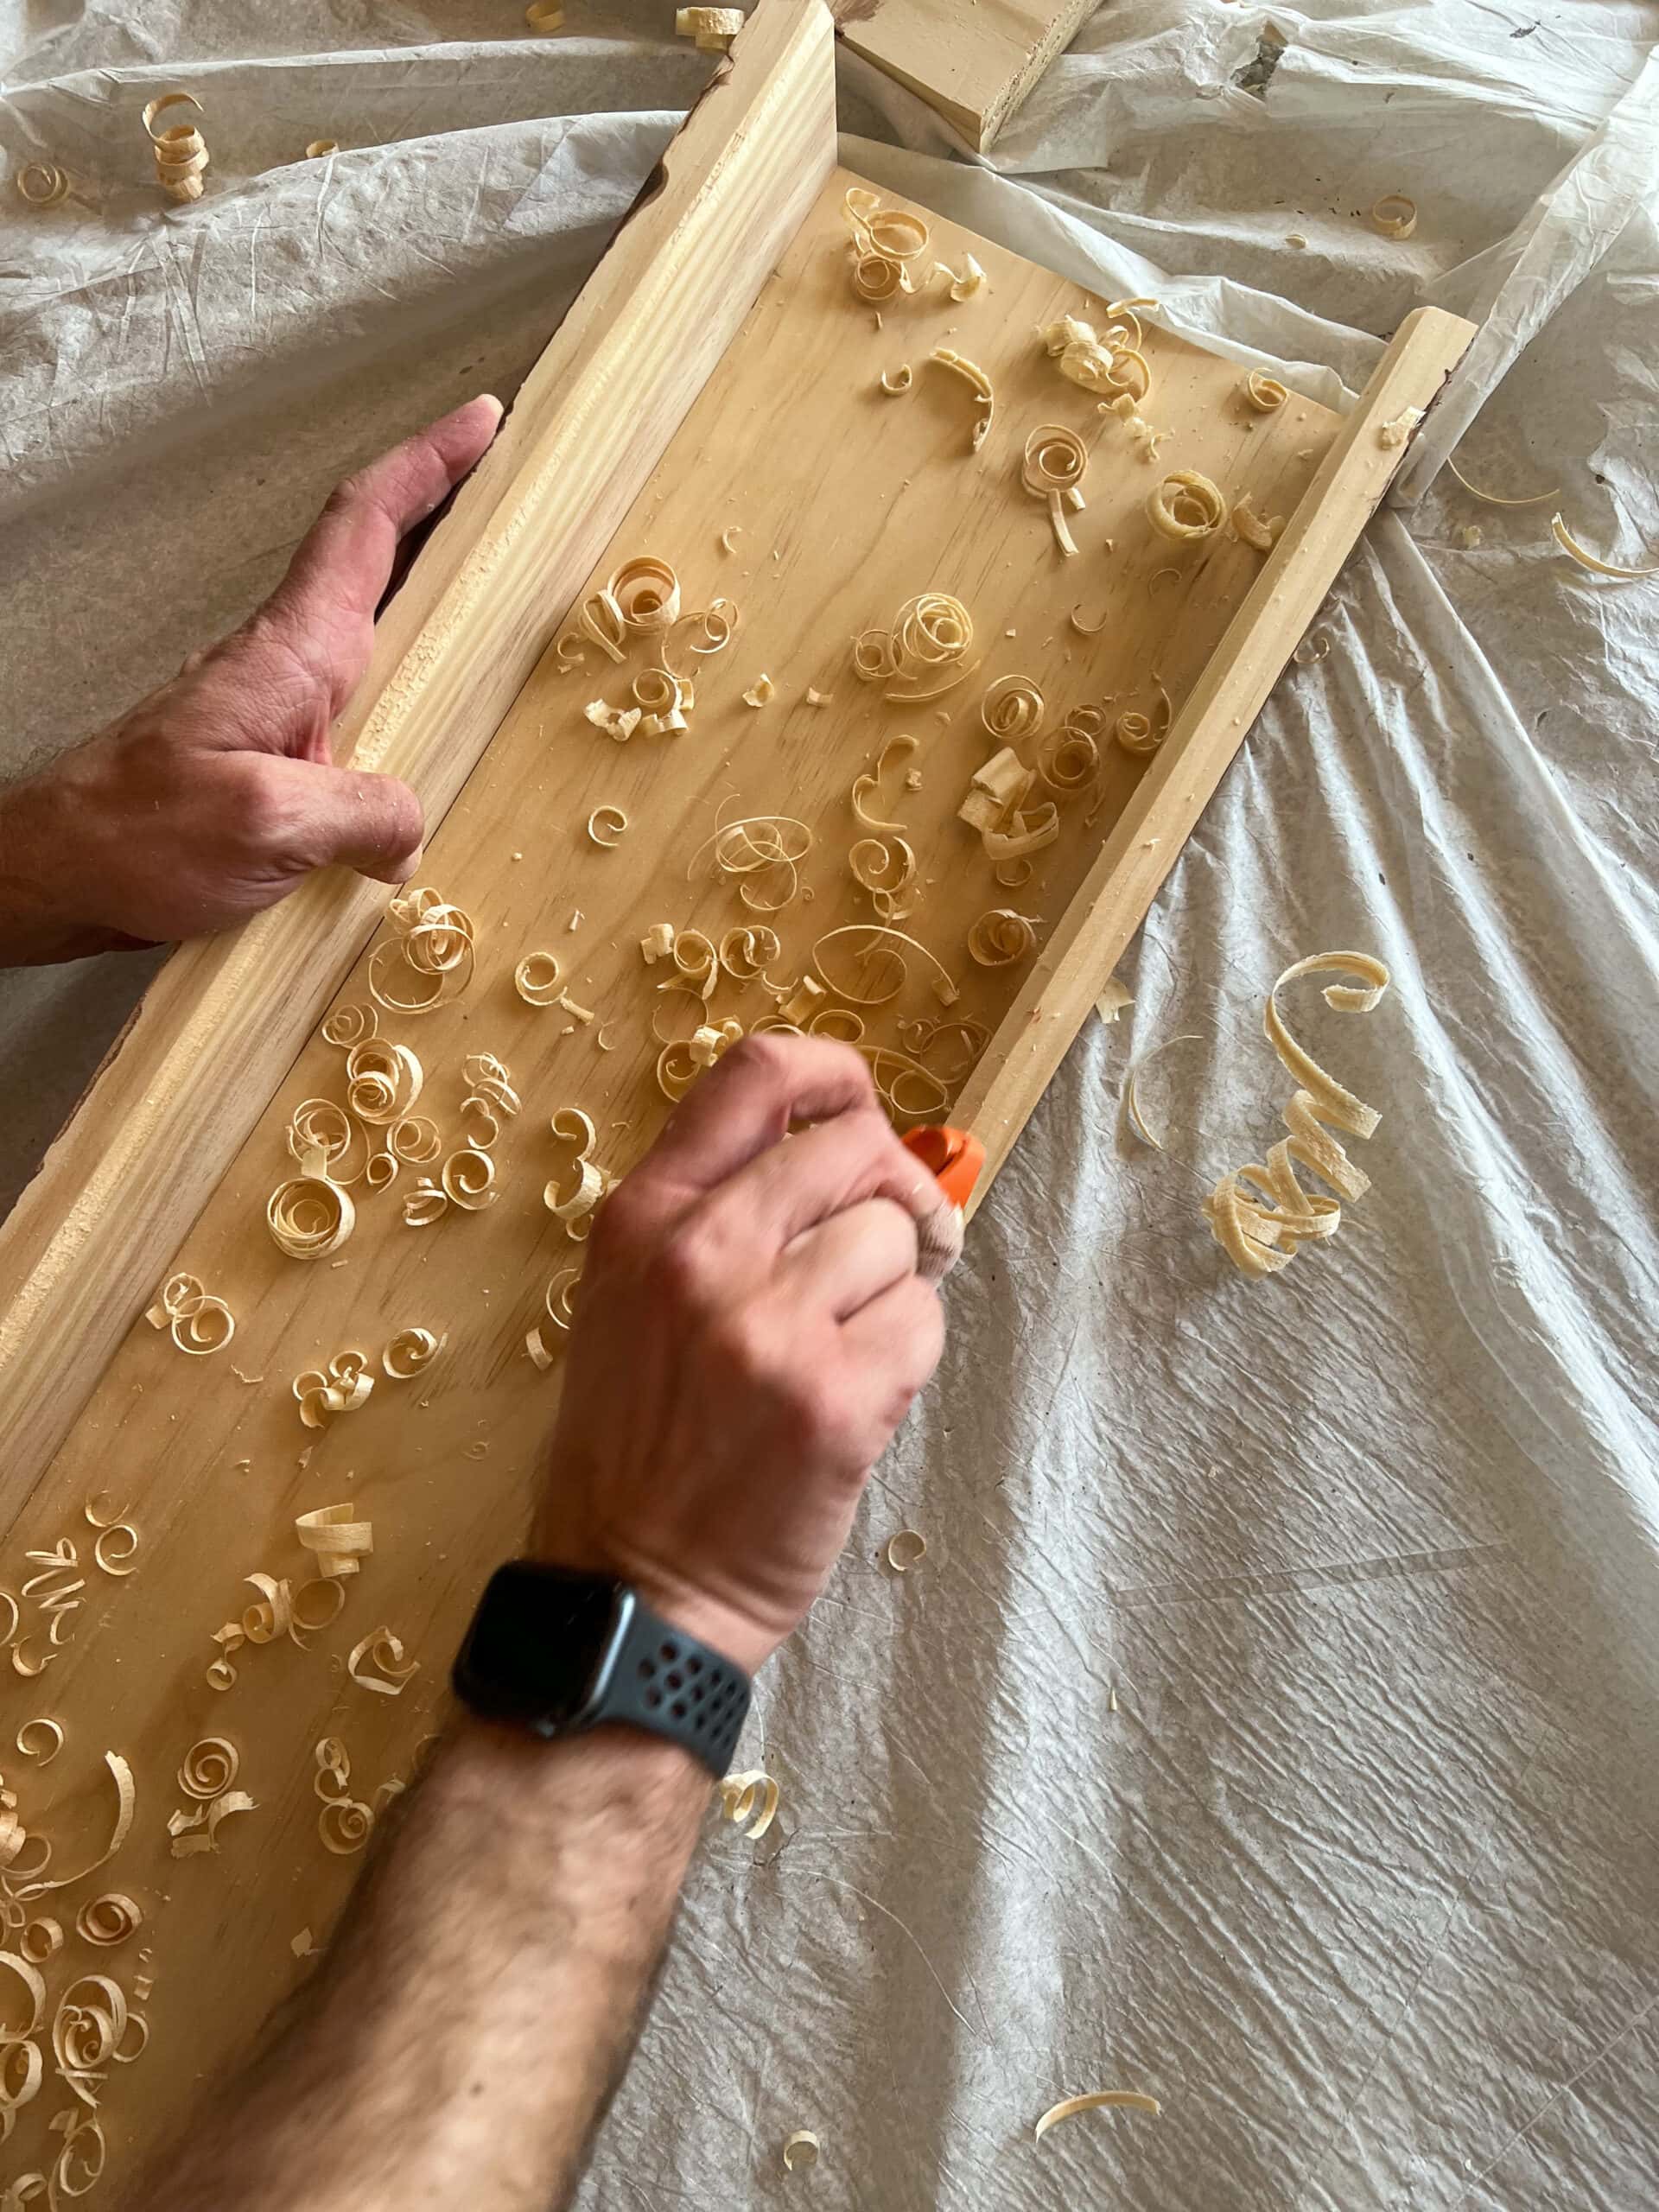
Luckily we had a wood plane so we were able to scrape down the sides a bit to make it fit. It was a pain, but we made it work!
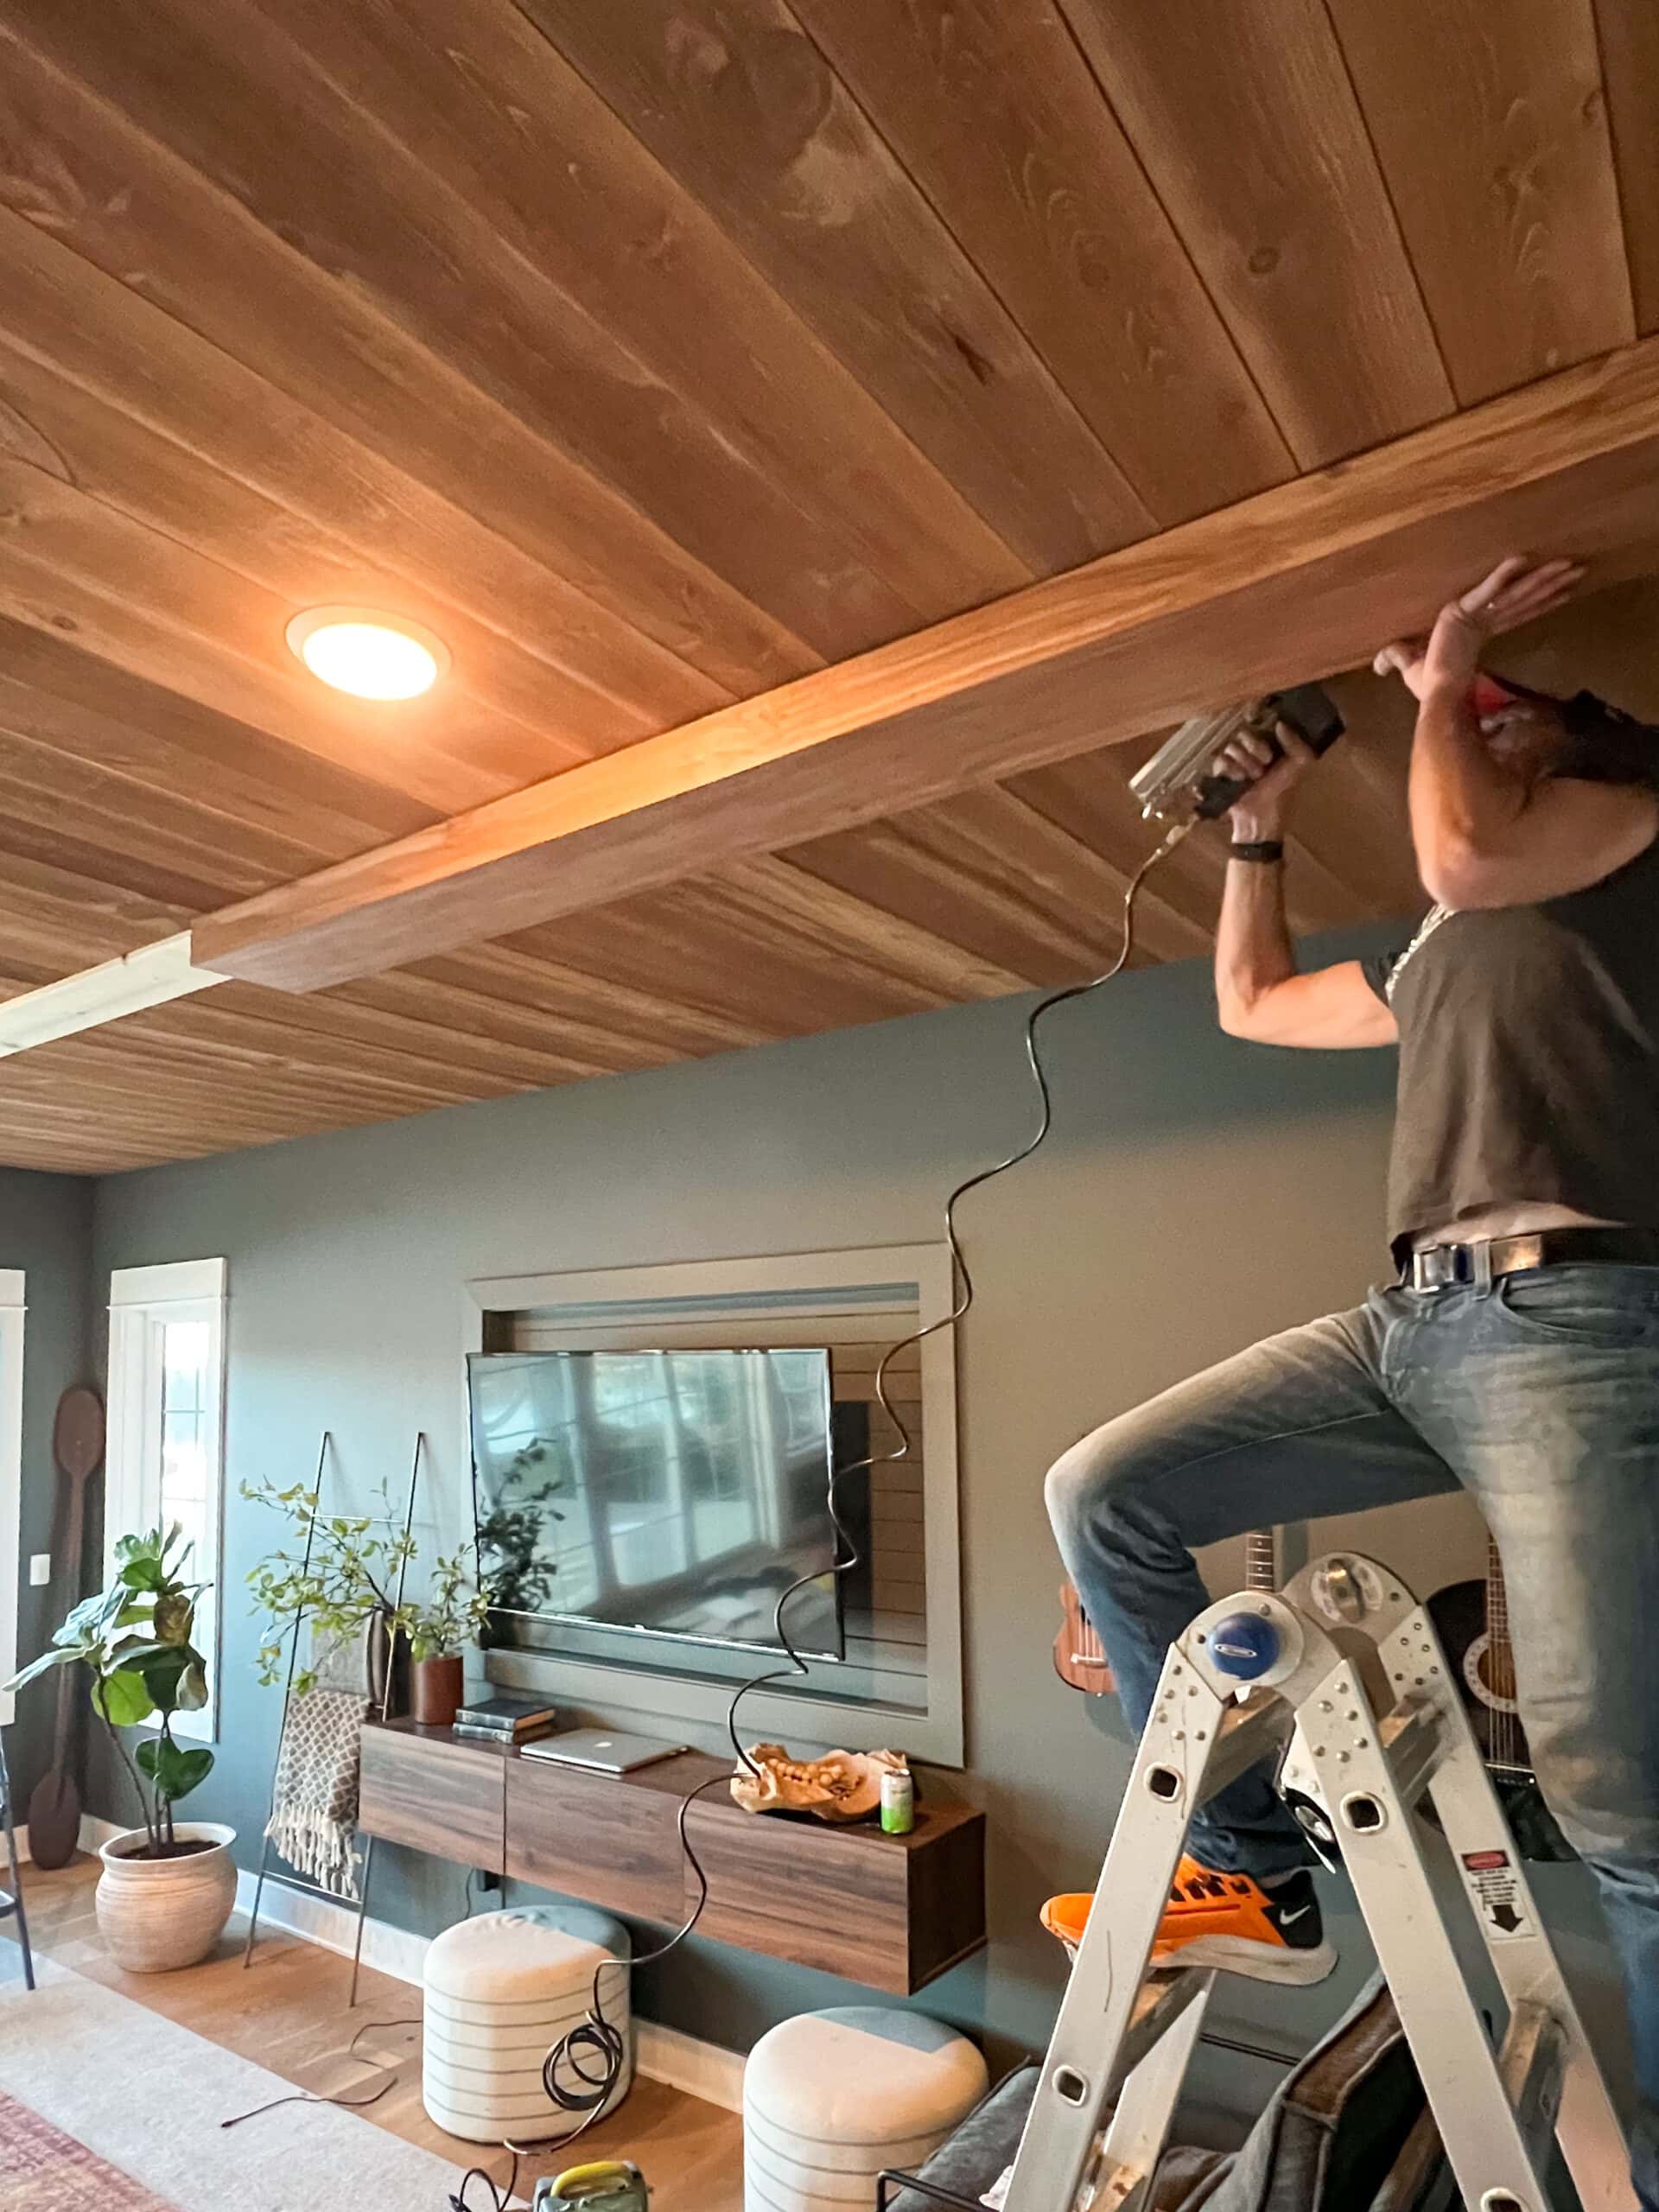
We attached all of the beams to the ceiling by nailing them into the 1×8’s on the joists. Then my perfectionism got the best of me…since this room is 20 ft wide we had to build 8 10 ft beams that would come together with a seam. Well, once the beams installed the seams were very noticeable.
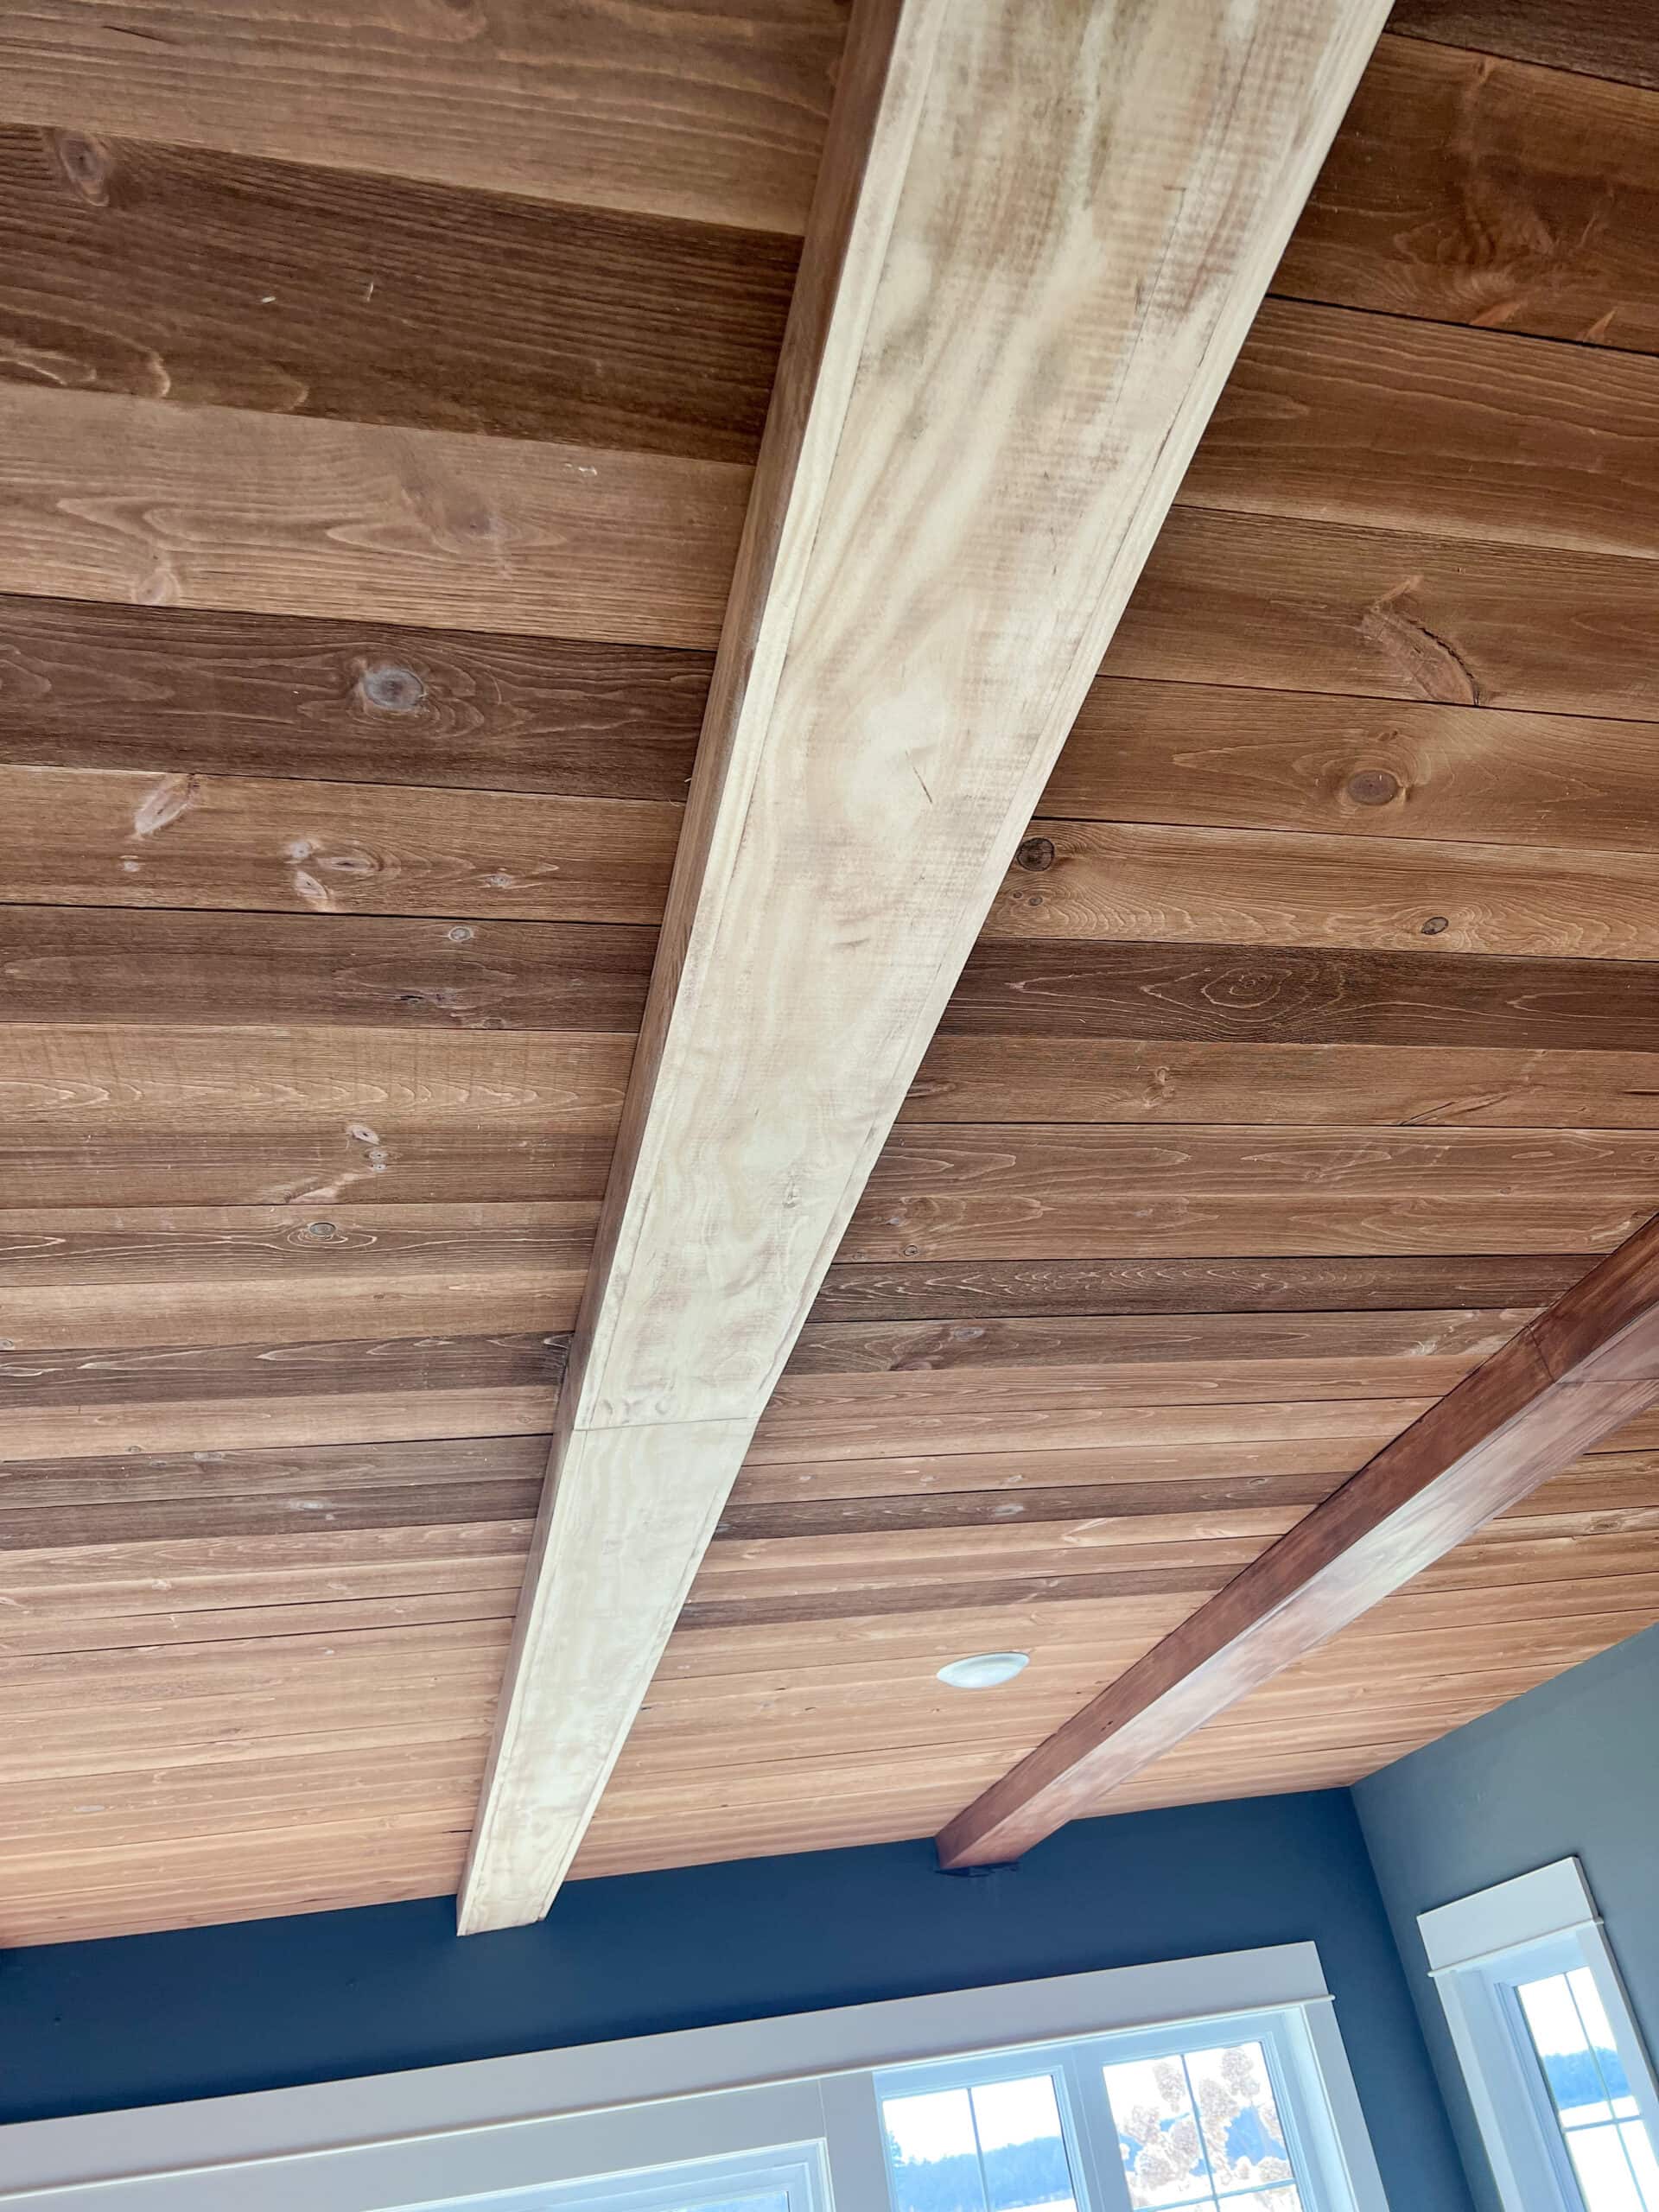
I toyed with the idea of covering them with metal brackets or leather straps. However my vision for this ceiling was more clean and simple. I ended up sanding the beams down (not fun once they were up) and filling in the seam with wood glue and sawdust. Then I restained them all. It was a pain, but the extra steps were worth it. I’m so happy with how it turned out!

This DIY planked wood ceiling really adds so much to this space! It was one of our harder DIY projects to date, but so worth it in the end.
Disclaimer: This post contains affiliate links. I may receive a small commission for purchases made through these links at no extra cost to you. Just click on the BOLD links.
SOURCES:
- WOOD PLANKS
- STAIN COLOR – Fresh Brew by Benjamin Moore
- CHAIRS – Article
- SOFAS – Article
- RUG
- WALL COLOR – Kendall Charcoal by Benjamin Moore
- TV CABINET
- BLANKET LADDER
- LEATHER OTTOMAN
- WHITE OTTOMANS
- LEATHER CHAIRS


Looks great! Quite the transformation! Love the wood tones with the wall paint color.