
Putty Colored Cabinets and Cabinet Painting Tips
Guys, I did a thing!
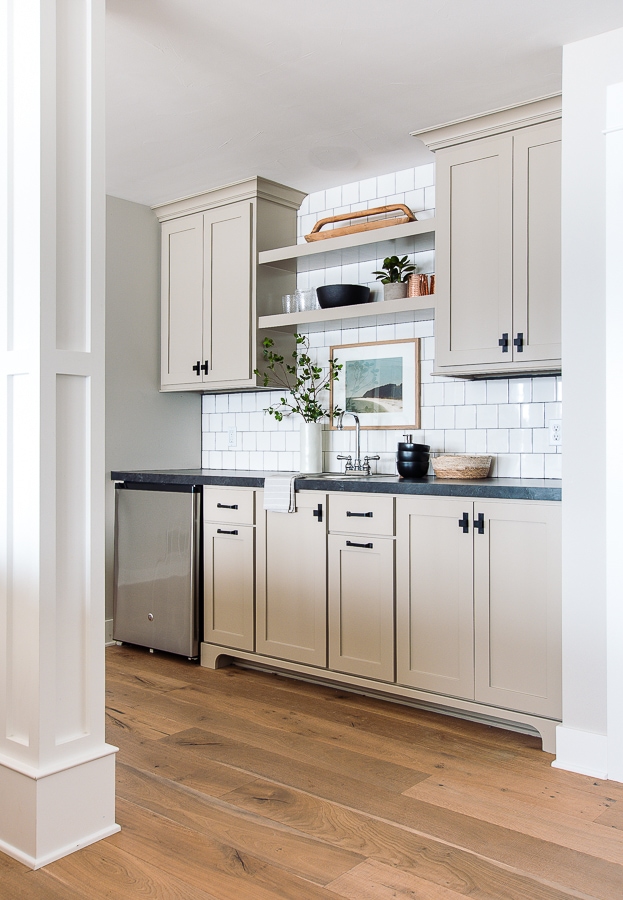
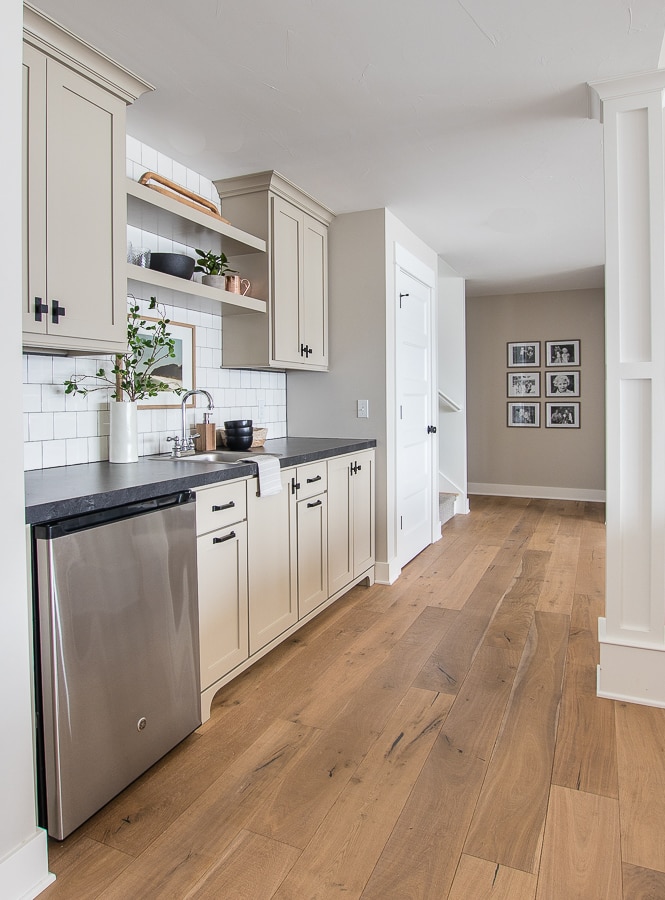
I finally painted the wet bar cabinets in the basement!
And they aren’t blue!

Remember, I talked about this project waaaay back in the fall in this post here. Ok, and really I have been talking about painting them since we moved in three years ago. They were just never the right tone of blue. My big plan was to hunt down the exact right shade of blue. I had approximately one million blueish/blackish/grayish paint chips floating around my house, but I never fell in love with one.
Here’s the before again –

and after!

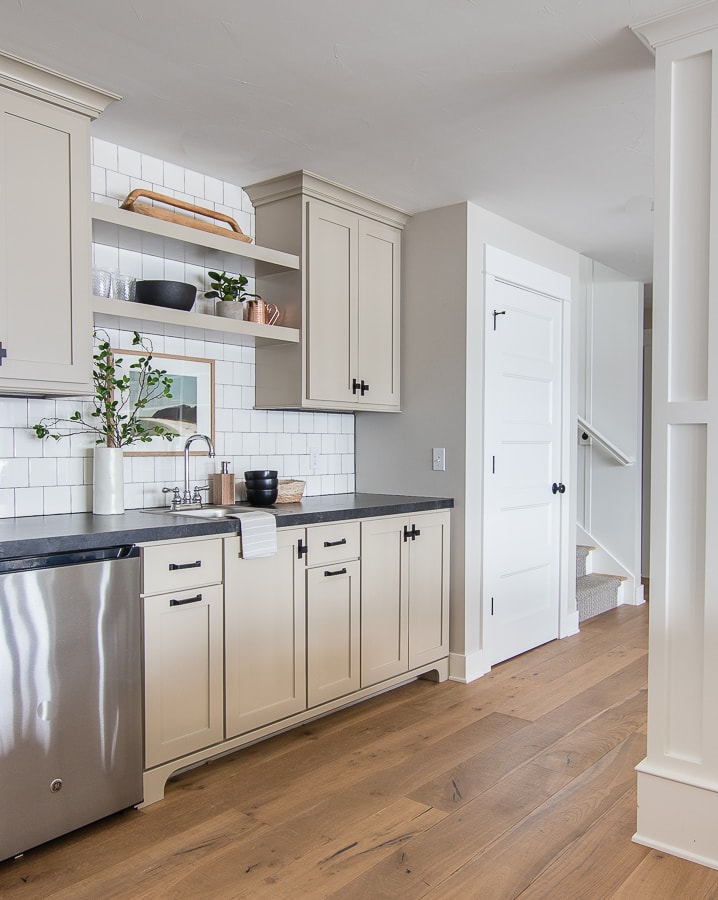
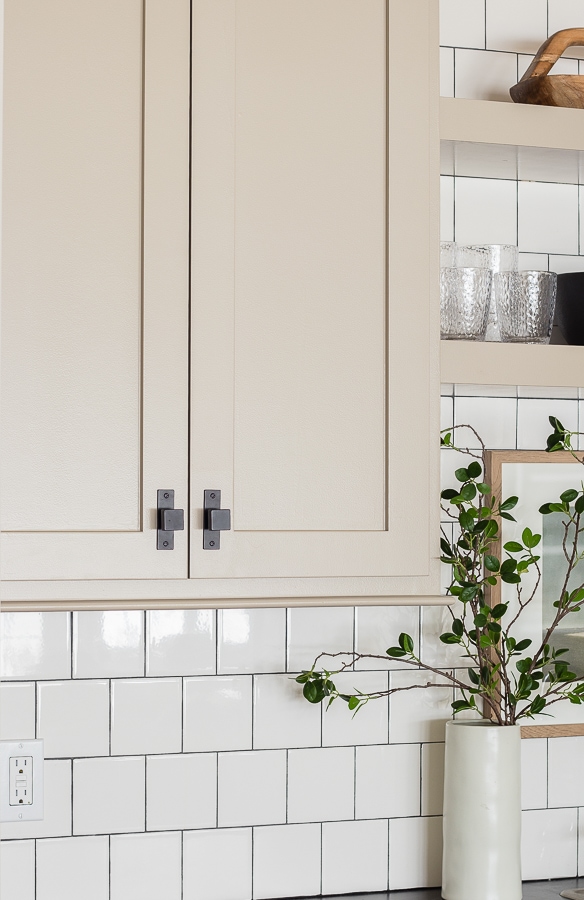
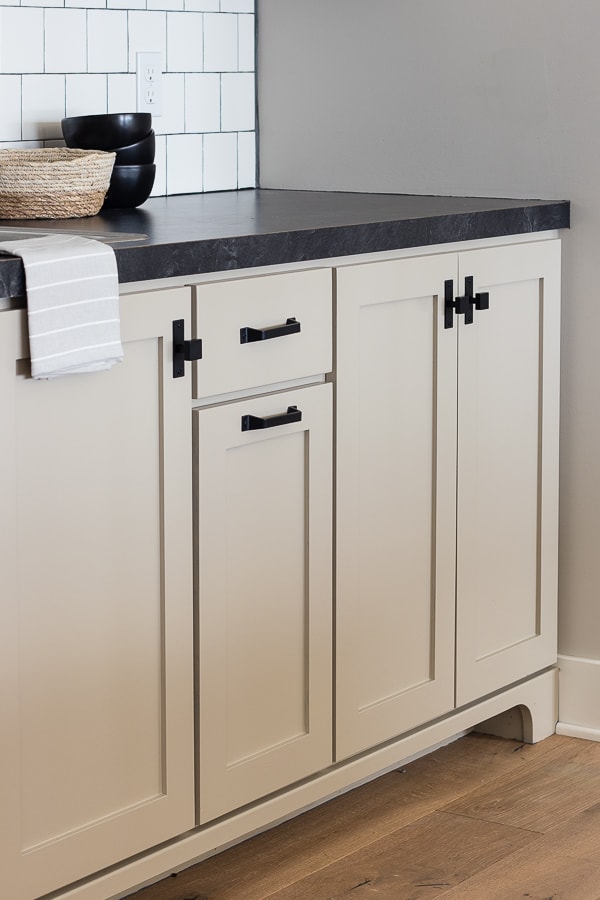
Last week, I got a bee in my bonnet and decided it was time to change this space. I went to the paint store with my army of blue paint chips and chose…this putty color – Langdon Dove by California Paints. I know! I surprised myself too! Putty/mushroom colored cabinets have started to pop up here and there on instagram and pinterest. They feel both fresh and modern, yet classic at the same time. I love the warmth they add, plus the contrast with the black counters is so nice. California Paints is a brand my local paint store carries, but they color matched it for me in Benjamin Moore Advance. I’ll include a shot of the top of the paint can at the bottom of the post.

That’s part of the reason the blue cabinets weren’t working down here, our couch is a warmer cream, the new rug is full of warm tones, and the leather chairs – all warm! Time to make the cabinets part of the warm and cozy vibe.

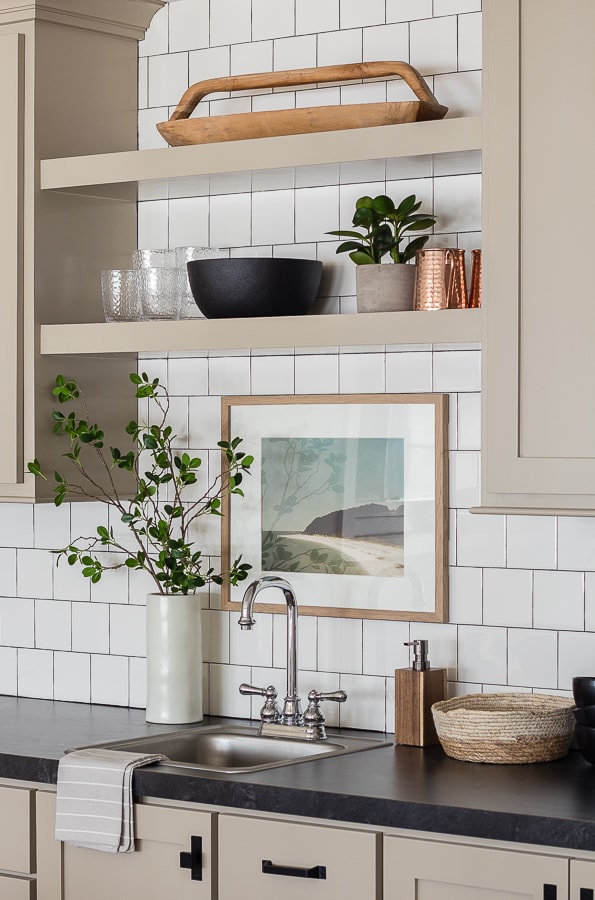
I love it! I’m so happy with the change, this space finally feels like home and we have been spending so much time down here. The warmer paint works so well with the tile and counters, and the black hardware really stands out now.
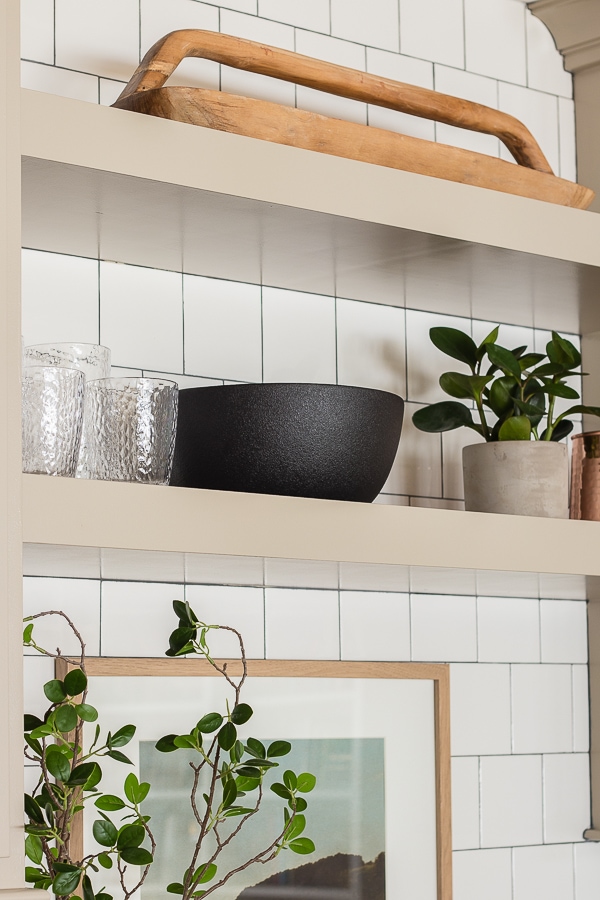
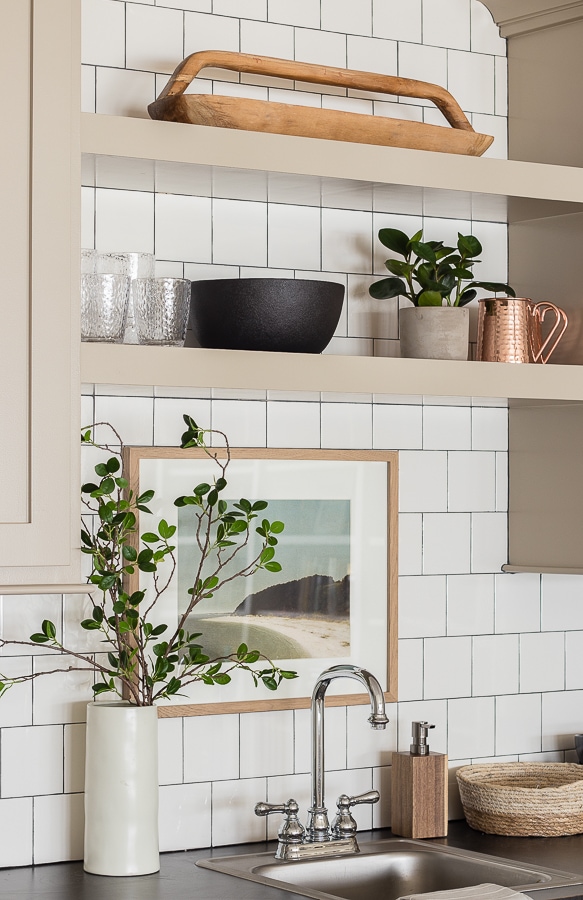
I added some warm wood, copper, and black accents to finish the space. I have always wanted to hang a piece of art in this blank space above the sink, and I finally found the perfect print from BFF Print Shop.

I’m still on the hunt for a few throw pillows to finish off this space, and then I’ll share the whole room together. I’ve had several requests to share my cabinet painting tips (and I have saved some info on my instagram highlights under painting tips), so I’ll share a few.
Cabinet Painting Tips –
- Go to your local paint store and talk to the experts! I’ve even brought a drawer front in to show them what I would be painting to make sure I have the right supplies.
- Clean your surface really, really well. I use Challenger it’s a heavy duty cleaner. I dilute it and wear rubber gloves to give everything a really good cleaning. Having a clean surface is really important for the the paint to bond.
- These cabinets were already painted and smooth, so they didn’t need to be sanded. Depending on your cabinets you may want to use a de-glosser or for wood cabinets fill in some of the grain and sand for a smoother finish. For wood cabinets you will want to prime first as well. Again ask the experts!
- I either spray cabinets with a paint sprayer or use a small roller and brush. Spraying is always going to give you the smoothest finish, but I didn’t feel like messing with setting that all up with this small of a space. Also, it’s way too cold to spray out in the garage right now, so I did the roll and brush method. I take a brush to the details or edges and then roll the rest to smooth it out.
- Use quality paint! Do not skimp and get cheap paint when you are doing your cabinets. I used Bejamain Moore Advance for these cabinets. It’s what my painter originally used on them, so I know its good. It is kind of a hybrid paint that is water based, but acts more like an oil based paint so it dries really smooth. You need to be sure to wait at least 16 hours between coats (I waited overnight) because it has a slower drying time which helps it level out and get really smooth.
- Let everything cure. We didn’t use these cabinets for several days to really let them harden up.
- If you make a mistake, don’t freak out – sand it down and put a fresh coat on. I had several drips I didn’t see until I hung the cabinets back up. I just took a sanding block to them and touched it up with a fresh coat of paint.
There you have it all my cabinet painting tips and tricks! Stay tuned for the full reveal of this room, and you can check out more of our basement here, here and here.
SOURCES – This post contains affiliate links. I may receive a small commission for purchases made through these links at no extra cost to you. Just click on the BOLD words.
Wall color – Agreeable Gray by Sherwin Williams
Cabinet Color – Langdon Dove by California Paints
Tile – Lowes
Counters – this is a laminate that is supposed to look like soapstone, I don’t love it in person and I’m hoping to swap it out soon. I don’t have the exact brand info on it.
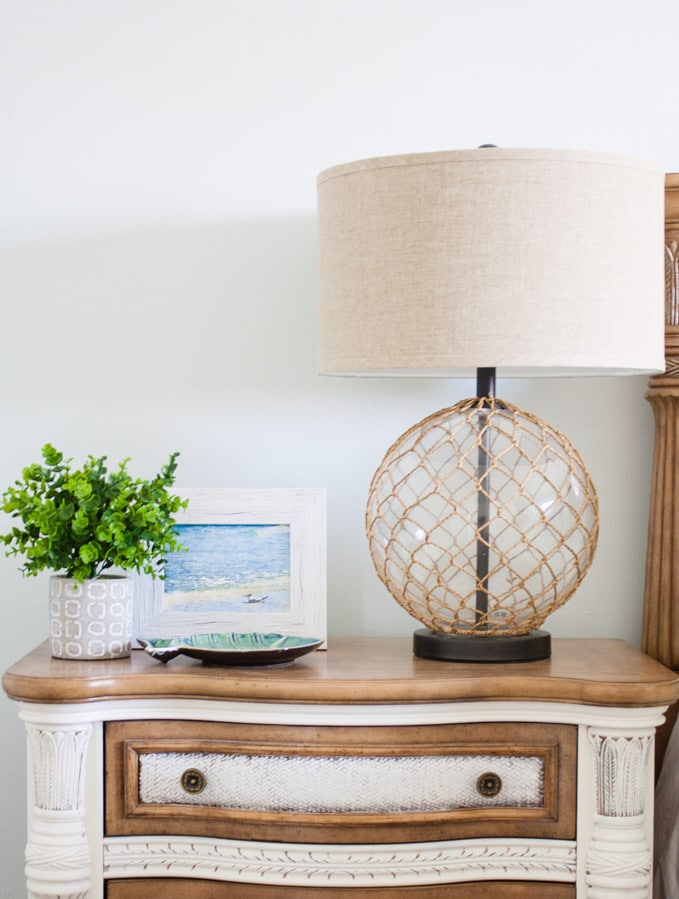
Vase – find it here
Wood tray – find it here
Soap dispenser – find it here
Basket – HomeGoods
Copper mugs – find it here
Black bowl – find it here
Glasses – find it here
Hardware – I bought this at a local store and I don’t have any brand info on it – sorry!
Frame – find it here
Art – BFF Print Shop
Tea towel – find it here
Here is a photo of the paint formula.


Kelly, love your paint choice for these cabinets. Please give me your opinion on what I’m thinking for my bathroom/laundry room remodel. I have purchased online a navy blue vanity. Not sure of the exact color name. I want to use BM white dove on my shiplap. Do you think this color for my other cabinets would look ok? I have one small transom window in that whole area so not much natural light. I have been stressing about my color choices and need help! Thanks in advance!
P.S. I forgot to mention that the vanity top has several different shades of gray in it. Second guessing myself and probably should do gray cabinets.
If it has gray in the counter it may not go great with the putty color – good luck!
Hi Kelly,
You did an excellent job on your basement cabinets! They look beautiful in the space.
We are going to start our kitchen make over and this color is exactly what we were looking for. It will pair beautifully with our black granite countertops. Thank you so much for sharing the paint can lid label with the color mix!!
Best wishes and Happy Easter.
May I please inquire what grout color was used for the wet bar field tile backsplash? Thank you!
I’m not sure on the color name but it was a charcoal gray – thanks!
I love this color so much! This is what color I want to use on my cabinets but yours looked so clean I was sure that’s what color you bought them. I was pleasantly surprised to learn that you did them yourself, giving me confidence to take this color on all on my own! What sheen did you use for this paint? Or was it just whatever sheen came with that Benjamin Moore paint? Just wondering if it was more of an eggshell, matte, or semi-gloss. Thank you!
I used satin which is what I like for cabinets – thanks!
Hi, I love the cabinet color. We are thinking of doing something similar on the cabinets in our kitchen with a naval colored island, white glass chevron backsplash and marble-looking quartz counters. I’ve been going back and forth between dark hardware and soft brushed gold hardware (not bright gold). Any thoughts on the choice between those two taking everything else into consideration? Thank you!
Oh that sounds so pretty! I think gold would look great on this color too we just had the dark hardware already but I love that color combo :)
Hello; Beautiful! Can you tell me if the color is more Beige or Taupe? Thank you
Hmm I’d say it is more Taupe I guess?
Hello, Could you please tell me the store where you got your cabinet hardware from?
Thanks!
Beautiful job! What kind of roller did you use? Foam, velour, microfibre? Thanks!
A regular paint roller but a mini one made for smooth finishes.
Where can you buy the Advance paint? Can you get it at Lowes?
I don’t think so you will probably have to go to a Benjamin Moore retailer or store.
Hi Kelly,
For the roller you used, can you let me know if it was sponge roller or what exactly it was made of? I tried it was sponge and was pretty smooth but doesnt look as smooth as yours do so wondering which you used.
Thank you. Great job. Looks amazing!
Love the color Kelly. Went to the website for California Paints, but could not find Langdon Dove. Do you have it’s id number. I use Benjamin Moore paint and would have them color match as well. Thanks so much! Love your decorating eye!!
You have the golden touch-this looks beautiful!
I absolute love your cabinets. What brand and where did you find them?
Hi Laura we actually had all our cabinets custom built by a really talented cabinet maker here, thanks!
Can you share his info. We are in the area.
Thanks!!
Very professional job! The cabinets look great and the color has given me an idea for the basement cabinets in our future home.
Will you please share the information about your floors – they are beautiful!
Hi Gail these are engineered white oak from Vanier from Build Direct in the color Robin. You can find a link to the exact floors on the FAQ page too!
I’m impressed!!!
Thanks!
Beautiful, Kelly! Love the colors and hardware!!
Great job as usual!!
Thanks so much!
Hi Kelly,
The Cabinets and hardware look so pretty… Great Job!
Thanks for sharing your painting tips : )
Thanks so much for reading!
I’m a true blue girl & at first I was like nooo don’t ditch the blue. But after looking at the black hardware that pops & the beautiful symmetry of the room I can’t argue the results! Thanks for sharing Kelly.
Thanks Barbie! You may like the new blue walls in my son’s bathroom to get your blue fix :)
FLAWLESS!!!!! Love it. Makes me feel more confident about painting our kitchen cabinets. I know it takes a lot of work and patience. Great job Kelly.
Thanks Kelly!! You can do it, just prep and take your time!
Hi Kelly: Would there be any way that you could let me know what brand and color those incredible floors are? Laminate? At Lowes? Home Depot? Pergo or something else? They are PERFECT for what I want in the kitchen re-do I’m doing right now, but my guys were hoping to lay them down this weekend so if you could let me know soon that would be so great!
Thanks so much!
ps: I LOVE your posts! Your home is absolutely amazing!
Susan
Esqblue@ Alliant-law.com
I love the new look… gives a clean feel …
Thank you!
I thought the blue looked great. But honestly I do like this better!! It just, I don’t know, BLENDS better!! Great job!!! I’m so impressed with the smooth finish!! I LOVE YOUR HOME!!!
Yes it just fits the space so much better rather than standing out!
Really nice improvement. I think the blue shade was a little jarring. Beautiful change.
Yes it always stuck out like a sore thumb down here.
The first thing I noticed was how well your hardware looks with the paint color. I’m a big blue lover but the new color really looks fabulous!
Thank you! The hardware does pop so much more!
WOW Kelly! Couldn’t believe my eyes when I saw these pic’s just now! I’m right in the middle of a kitchen re-do right this second at an adorable little tudor home that I am fixing up for my nephew to move into and this color is PERFECT! I love it and I’m going to tell my painters to “hold tight on the white”! Ha!
2 Questions:
1) Semi-gloss or satin for the cabinents?
2) What is that flooring? Pergo? Can I please get the brand, color, and where you bought it?
It’s perfect too and I love it.
Thanks Kelly,
Susan
All of our cabinets and trim are done in satin paint and the flooring is engineered hardwood – thanks!
Turned out beautifully, as always! I love how the cabinets blend with the walls. I love how it all turned out! thanks for sharing!
Thanks Deanna!
The cabinets look perfect! Can you tell me what kind of flooring you used in the basement?
It’s engineered white oak by Vanier from BuildDirect the color is Robin. The exact link is on my FAQ page – thanks!
The cabinets are beautiful! Would you mind sharing where the stems are from in the vase? Realistic ones are so hard to find! I’d also be interested in your new carpet. Looking for a textured similar to yours. Thanks!
They are from amazon but I can’t seem to find the exact same ones anymore, I bought them last spring.
I like the color! Did you remove the doors, drawers, and hardware to paint, then reassemble when dry? What tape do you use to tape off surfaces next to cabinet boxes?
I was wondering whether the doors and drawers were removed. My parents painted their cabinet doors about 25 years ago – they were going to replace the kitchen a couple of years later. Twenty five years later the doors still look fresh 9nope, never replaced the kitchen :-D) and i am sure it is because they spent the time on prep and removed them all to paint flat.
Yes I removed them all to paint and waited a few days to hang them back up too so they could really cure!
Yes I did remove everything and I didn’t really tape I have a pretty steady hand but I do like frog tape when I tape.
Oh, Kelly, I love the cabinets! Everything harmonize so beautifully. And, as always, the way you styled the shelves is perfect. :-)
Thanks so much Dori!
Absolutely beautiful. What a difference. Looks so perfect.
Thanks!!
I love everything blue but these cabinets in putty look fabulous! I think it’s a more timeless look than blue cabinets as well. Great job!
Thank you Allison!
Kelly!
Love the color you went with!
The Hardware really pops and it all comes together so nice. How cozy!!
I’m in the process of trying to paint my childhood piano. Do you think the paint you recommended from SW would work?
Oh it could? I would google painting a piano and see what comes up!
Love how these cabinets look. What I am really impressed by, is how smooth your paint job looks without spraying. Don’t you get that orange peal look with a little roller? I’m going to have to try using one when I paint my vanities in our master bath.
This paint has a longer drying time so it really levels out that orange peel look and dries completely smooth!
Thanks Kelly….They look great!
Very nice color! It can be easy with these tones to get a bandaid color look, so this is really a job well done! Thanks for the color tip!
Ha I’m glad I avoided the bandaid look!! :)
Wow – love the new color. I actually had to look back at the hardware because I thought it was new – it really jumps out now. I just finished a project last week that I have been going to do for 2 years. Our 40+ year old Ethan Allen hutch was really dated so I removed the top portion which looked too colonial now for our tastes. I painted the base a mid to dark blue and was able to match new knobs to the door hinges. It looks like a completely new piece. Is it perfect?? No – but I am pleased. I very carefully hand sanded it – it is in the kitchen so didn’t want to make a mess. I primed it and then gave it two coats – actually three on the top. It has given the kitchen new life, and I have ordered a custom Roman blind in blues/greys. We plan on making a move in the next year and that hutch base is going to become a vanity with a vessel sink in a lower level bathroom. So, that makes it have 3 lives. Considering that I bought the hutch used for $200 from a lady that was downsizing due to a divorce it really has paid for itself, and it is one of our most loved pieces. It makes me smile to look at it. The lady that I bought it from lived in a very exclusive area and had a beautiful home full of higher end furnishings. She was so sad I really felt sorry for her. I’m sure she would be happy to see her hutch found a good home!!
Sounds like you gave a great piece new life!
Hi! I love the color you chose!!! It looks so pretty. Could you tell me if you used a satin finish or a semi-gloss finish? Thank you!
I used satin – thanks!
It’s a really nice color choice which matches perfectly with the colot tone on the walls!
Honestly I think that the repainted cabinets now blend soo nicely and flawlessly with the rest of the basement (color) theme. You made a good decision in my mind.
Thanks so much!
Kelly, your cabinet color is beautiful! What color did you use? Did Benjamin Moore mix that color for you? Please explain. Thank you!
Hi Donna California Paints is a brand that my local paint store carries. I’m sure if you googled it you could find a provider near you? Or have a local paint store color match it for you – thanks!